Codeless: Manual assigning of Leads to Agents
This article will guide you through the Manual assigning of Leads to Agents
Navigating to the Placester CRM on Mobile
Placester CRM is now mobile-friendly and can be accessed on Mobile devices. Now, it's easier to edit Lead/Contact details anywhere as long as you have your mobile phone with you.
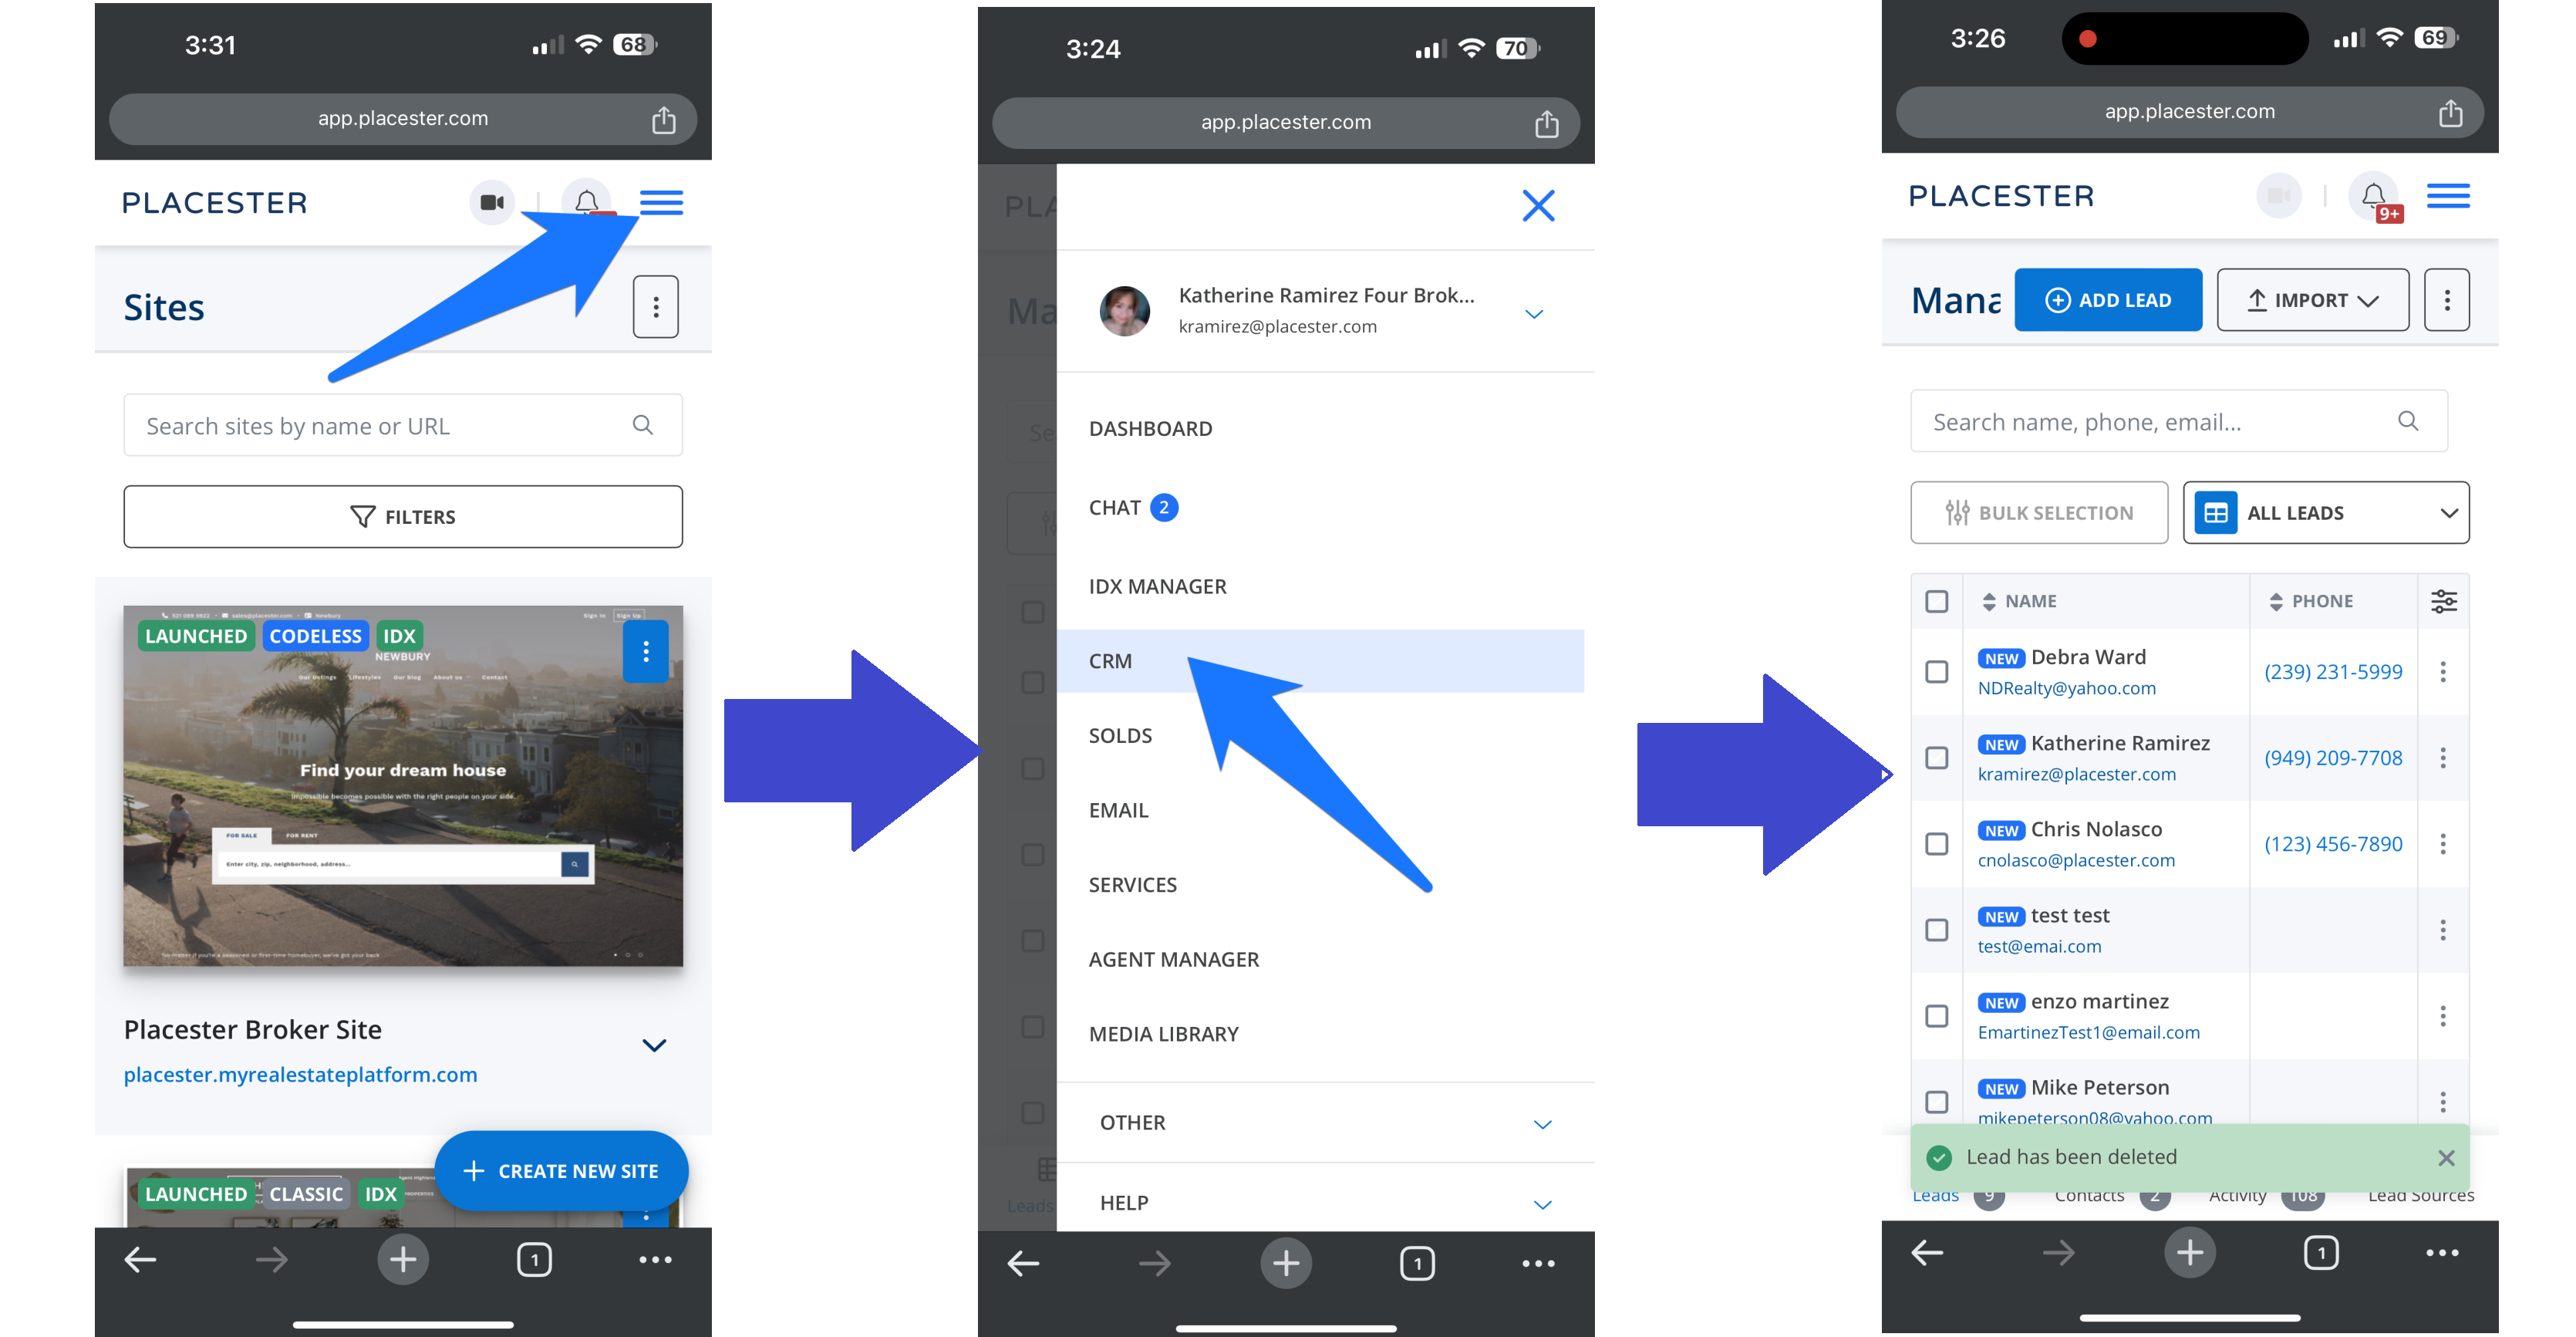
Once you log in on your mobile browser, click the trigram symbol ☰ on your dashboard, click CRM on the drop-down menu and it will bring you to a page where you can view your leads.
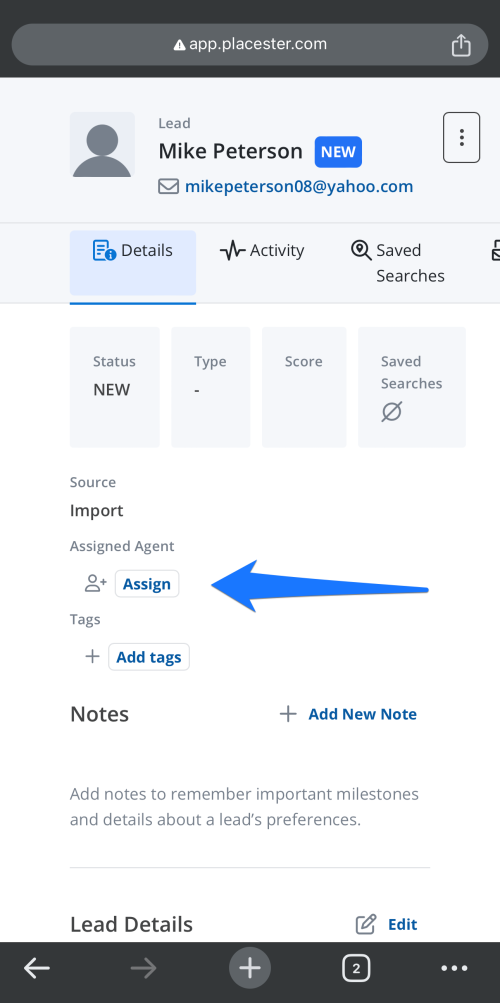
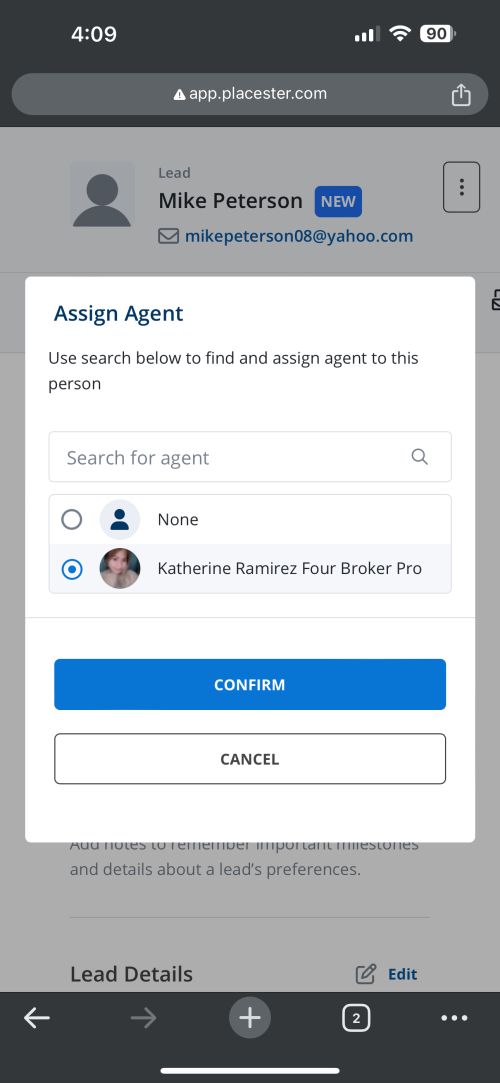
On your CRM page, click the lead/s that you want to manually assign to a specific agent. This will take you to the lead's information page. Click + assign unde Assigned Agent and a popup menu with the names of your agents will appear. Click the name of the agent to whom you want the lead to be assigned then click confirm.
Navigating to the Placester CRM
Once you're logged in to your dashboard, click CRM.

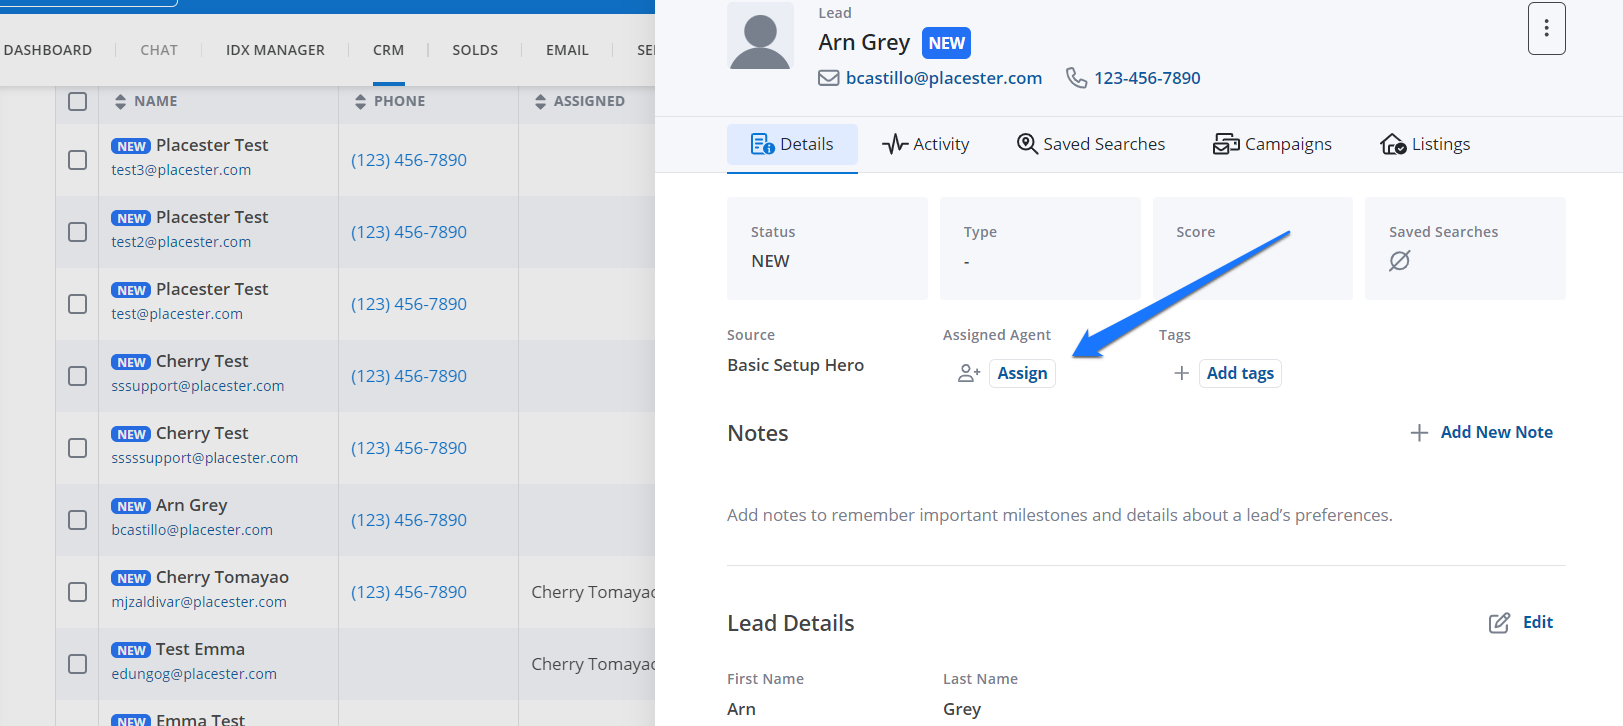
On your CRM page, click the lead/s that you want to manually assign to a specific agent.
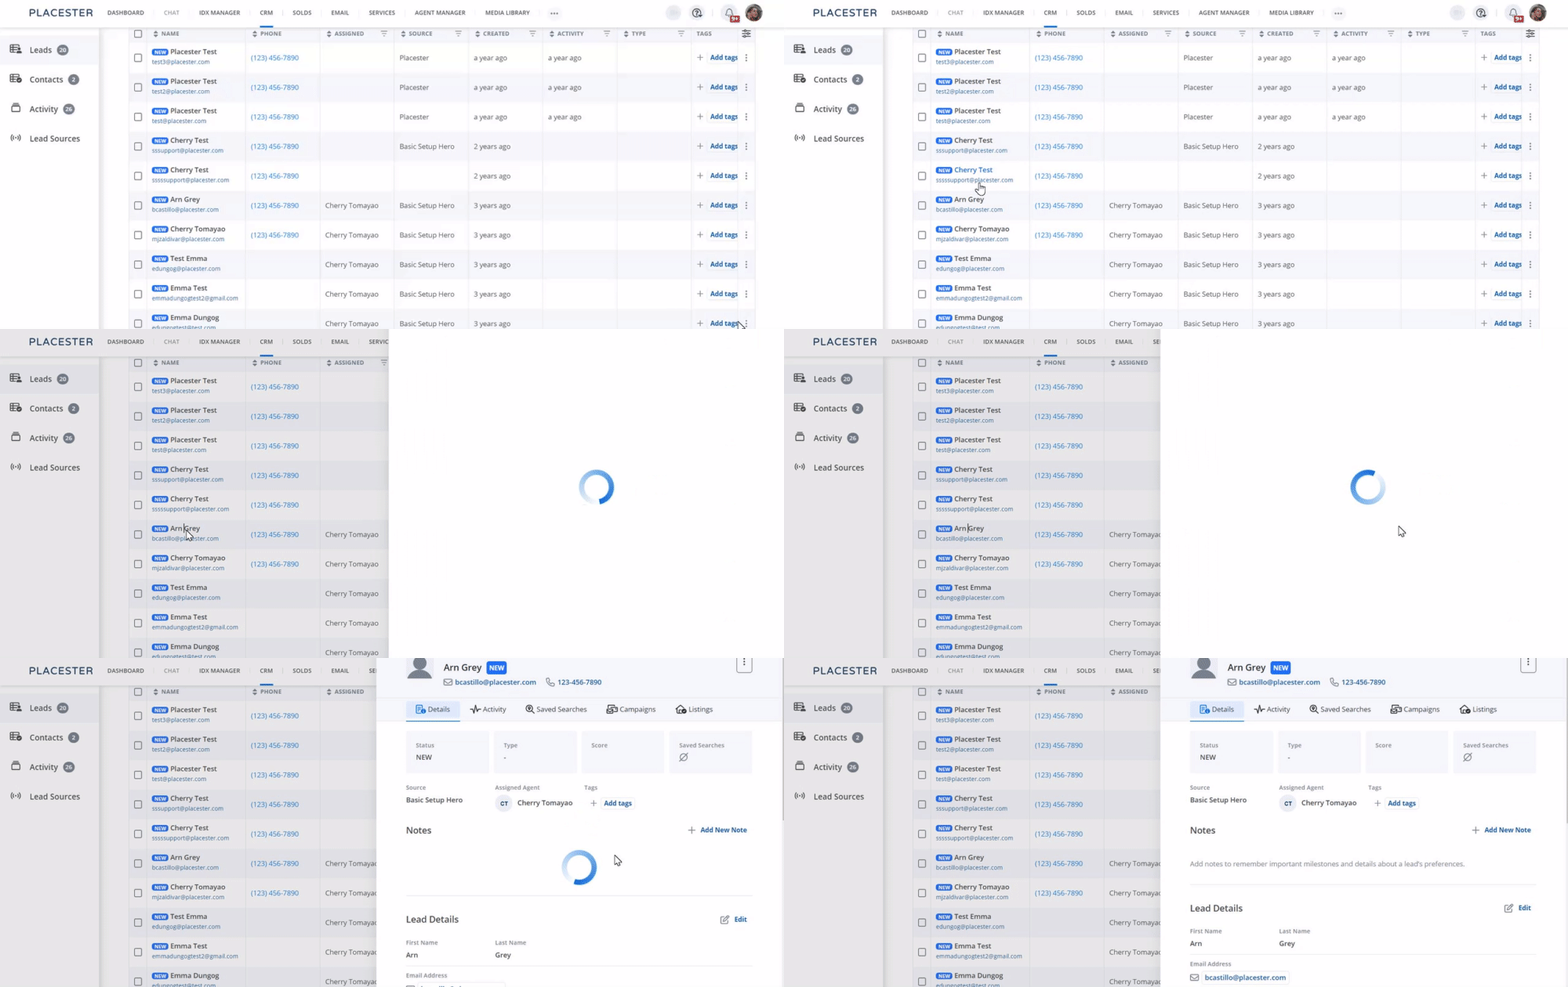
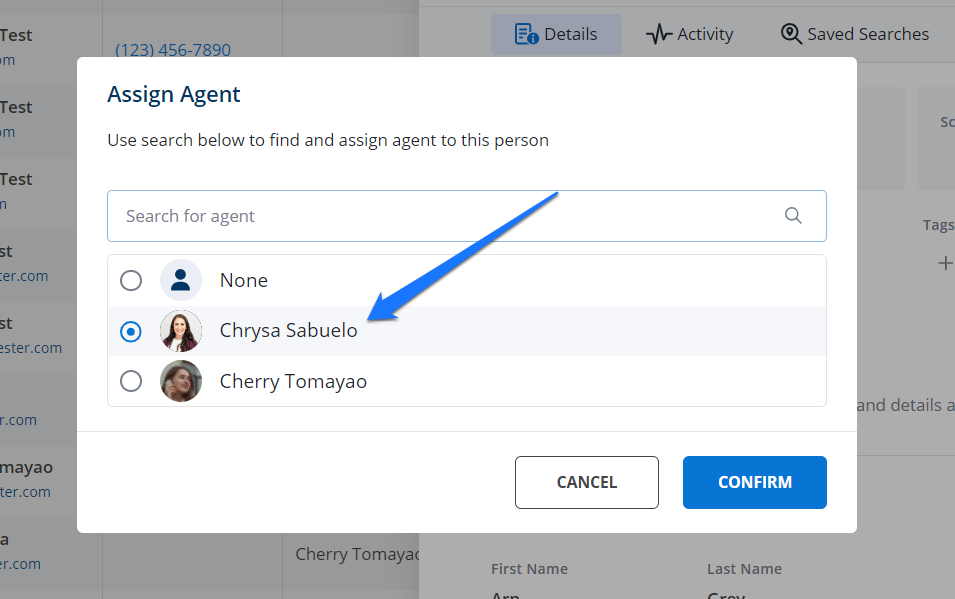
This will take you to the lead's information page. Click + assign unde Assigned Agent and a popup menu with the names of your agents will appear. Click the name of the agent to whom you want the lead to be assigned then click confirm.