How To Get Started with Content Automation
This article walks through buying Content Automation and completing its first-time setup.
Before you begin: You need an active Placester subscription. You can buy Content Automation before creating a site, but you need at least one publishable Placester website to finish setup. Review your Business Profile first so automated posts can reflect your business and market.
Start the purchase
- Sign in to Placester.
- Select Content in the top navigation.
- Select Blog in the left nav.
- Select Get Content Automation.
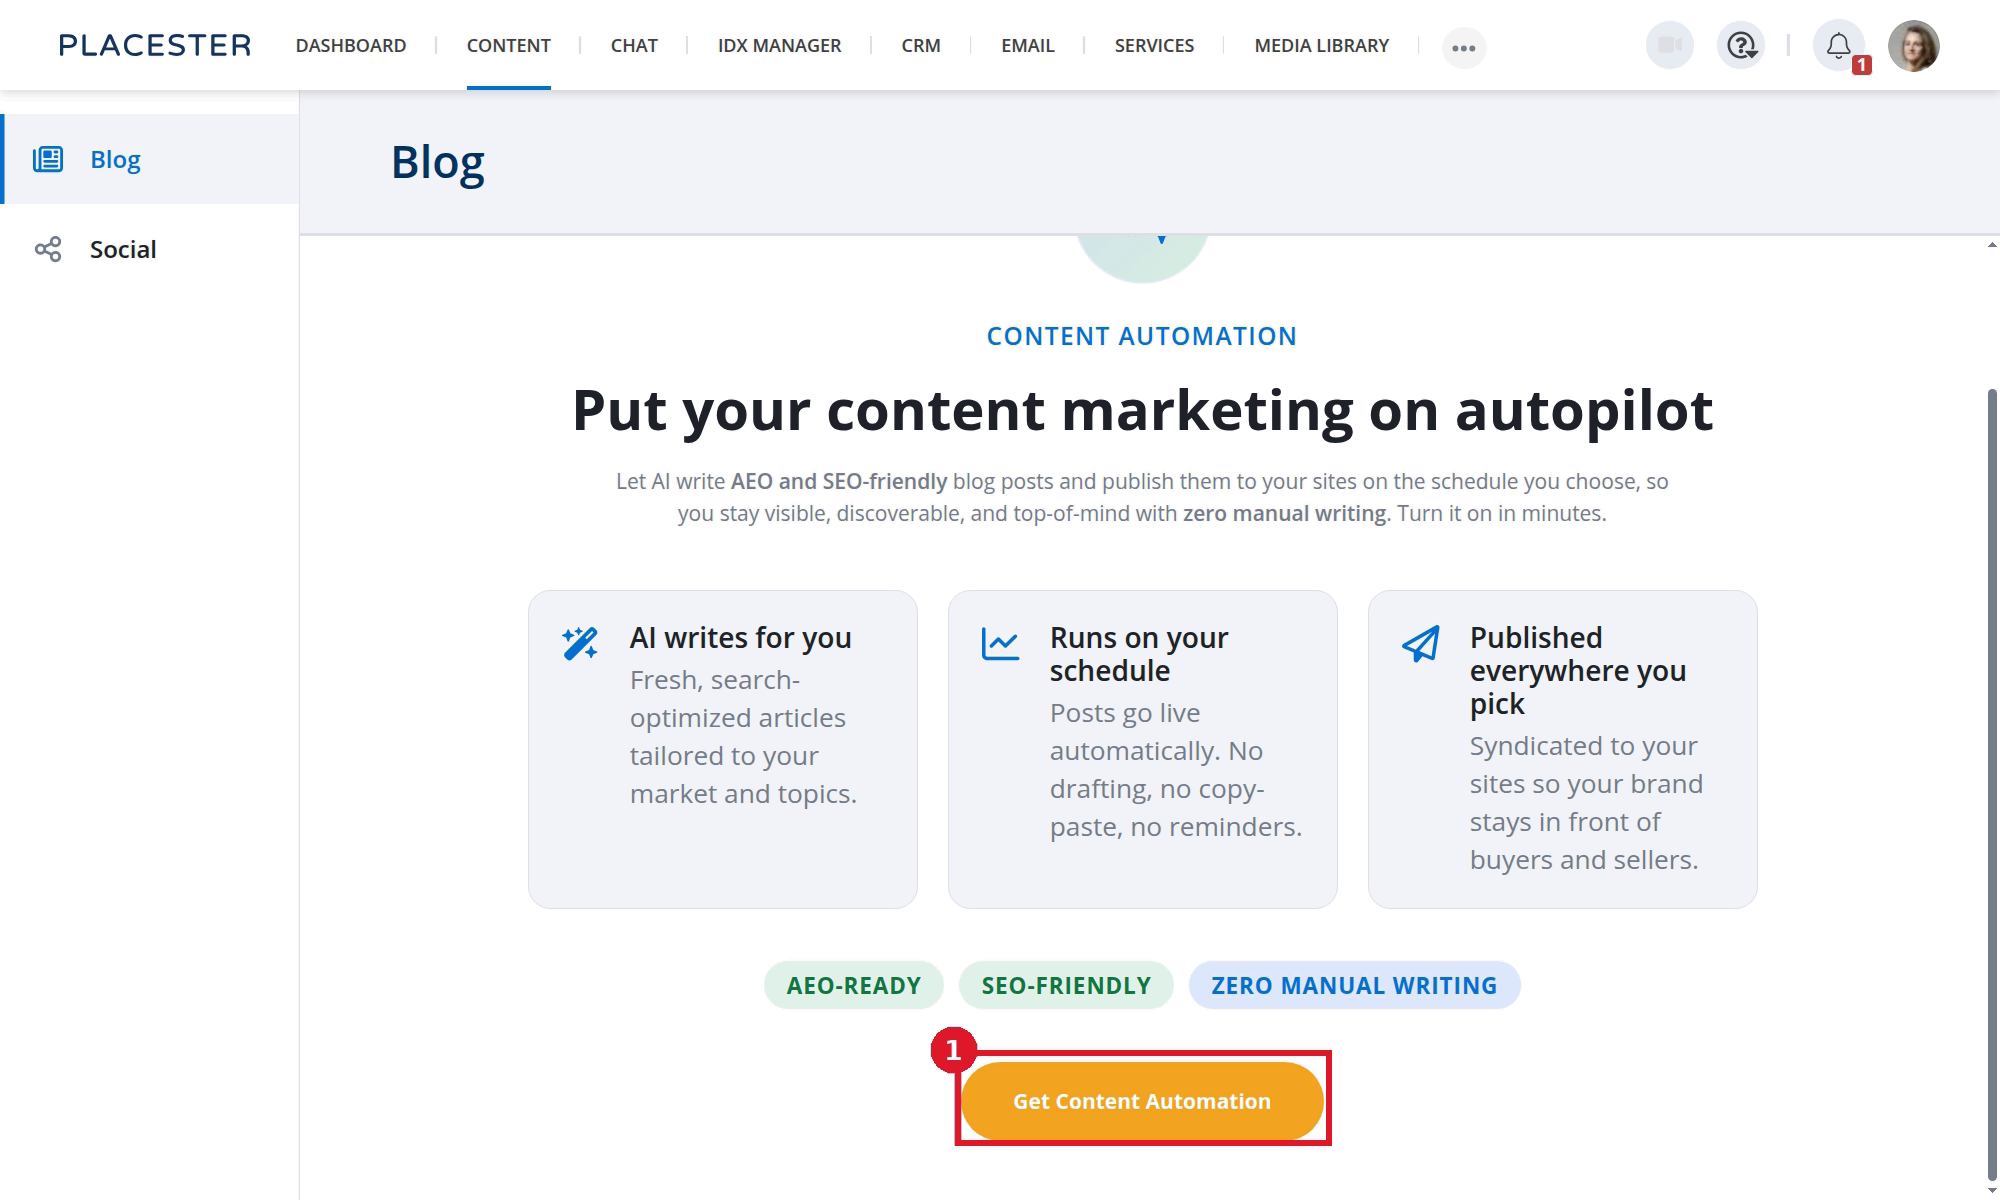
- Get Content Automation opens the purchase flow.
The introduction currently uses plural language about publishing to "sites." Setup currently supports one publishing destination.
You can also open Plan & Billing → Product Add-ons, find Content Automation Add-On, and select ACTIVATE.
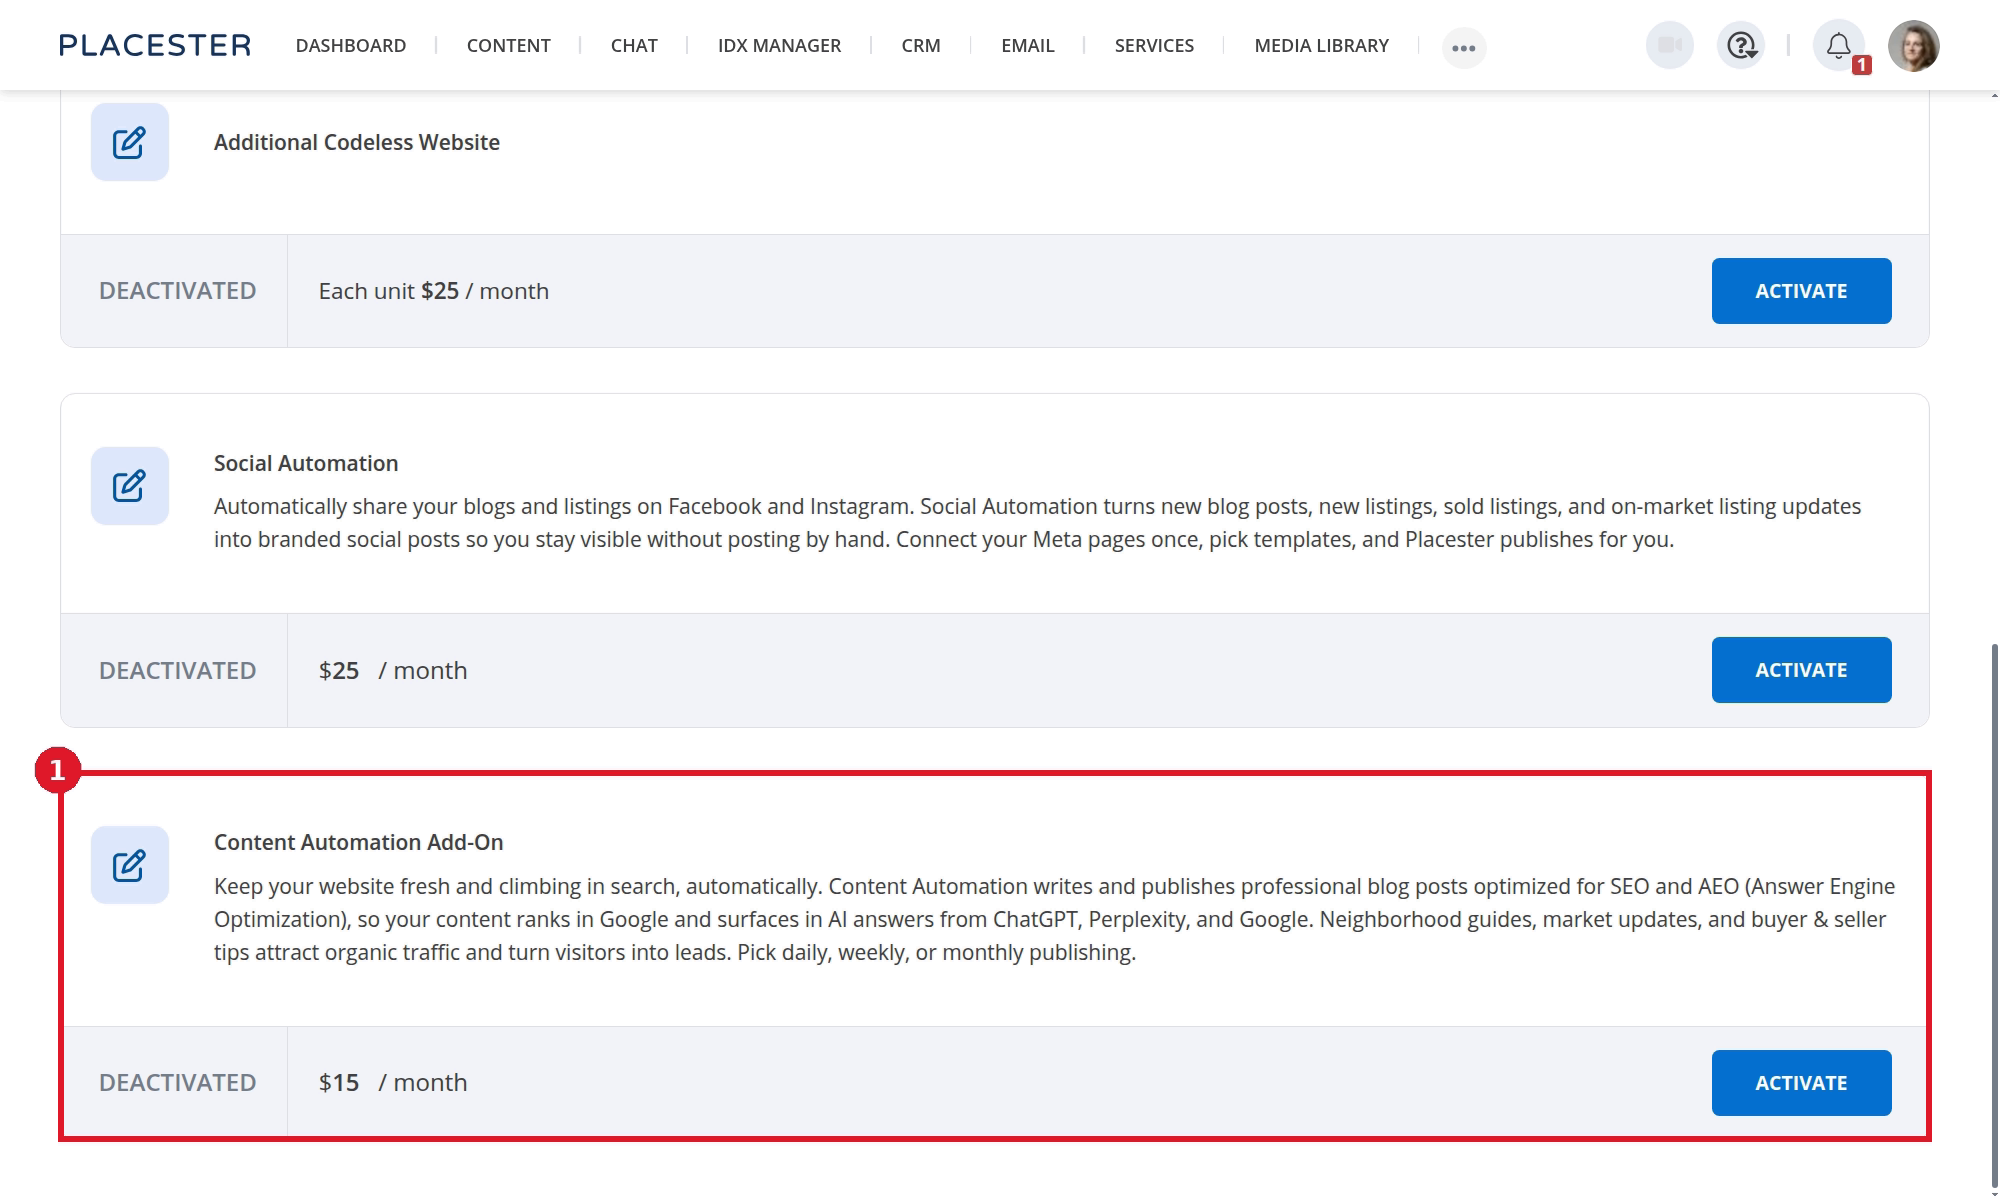
- Content Automation Add-On shows its current status, starting price, and ACTIVATE action.
Choose a plan
Content Automation offers monthly, weekly, and daily plans. The selected plan determines the publishing cadence shown during setup.
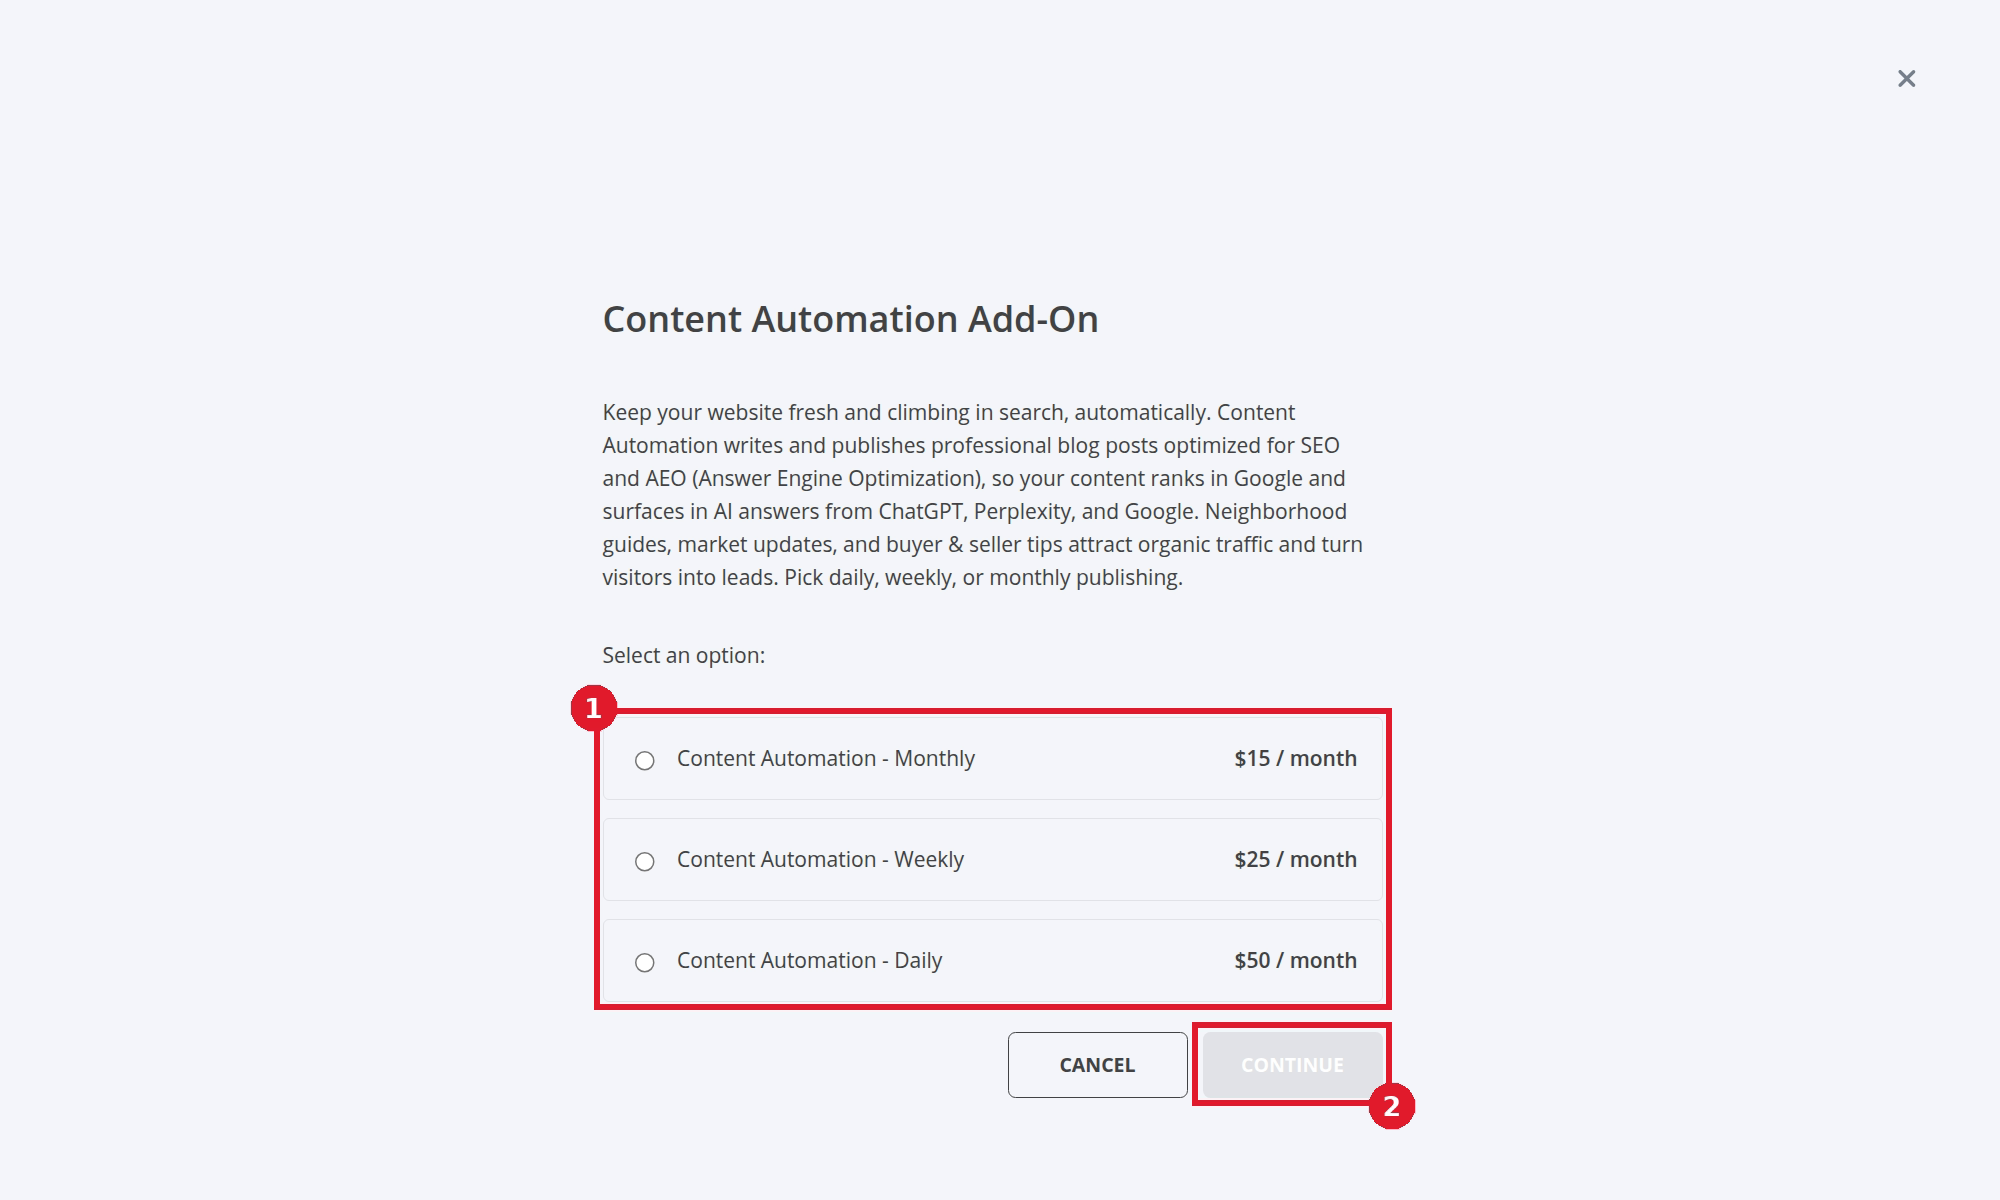
- Select a monthly, weekly, or daily plan.
- CONTINUE becomes available after you select a plan.
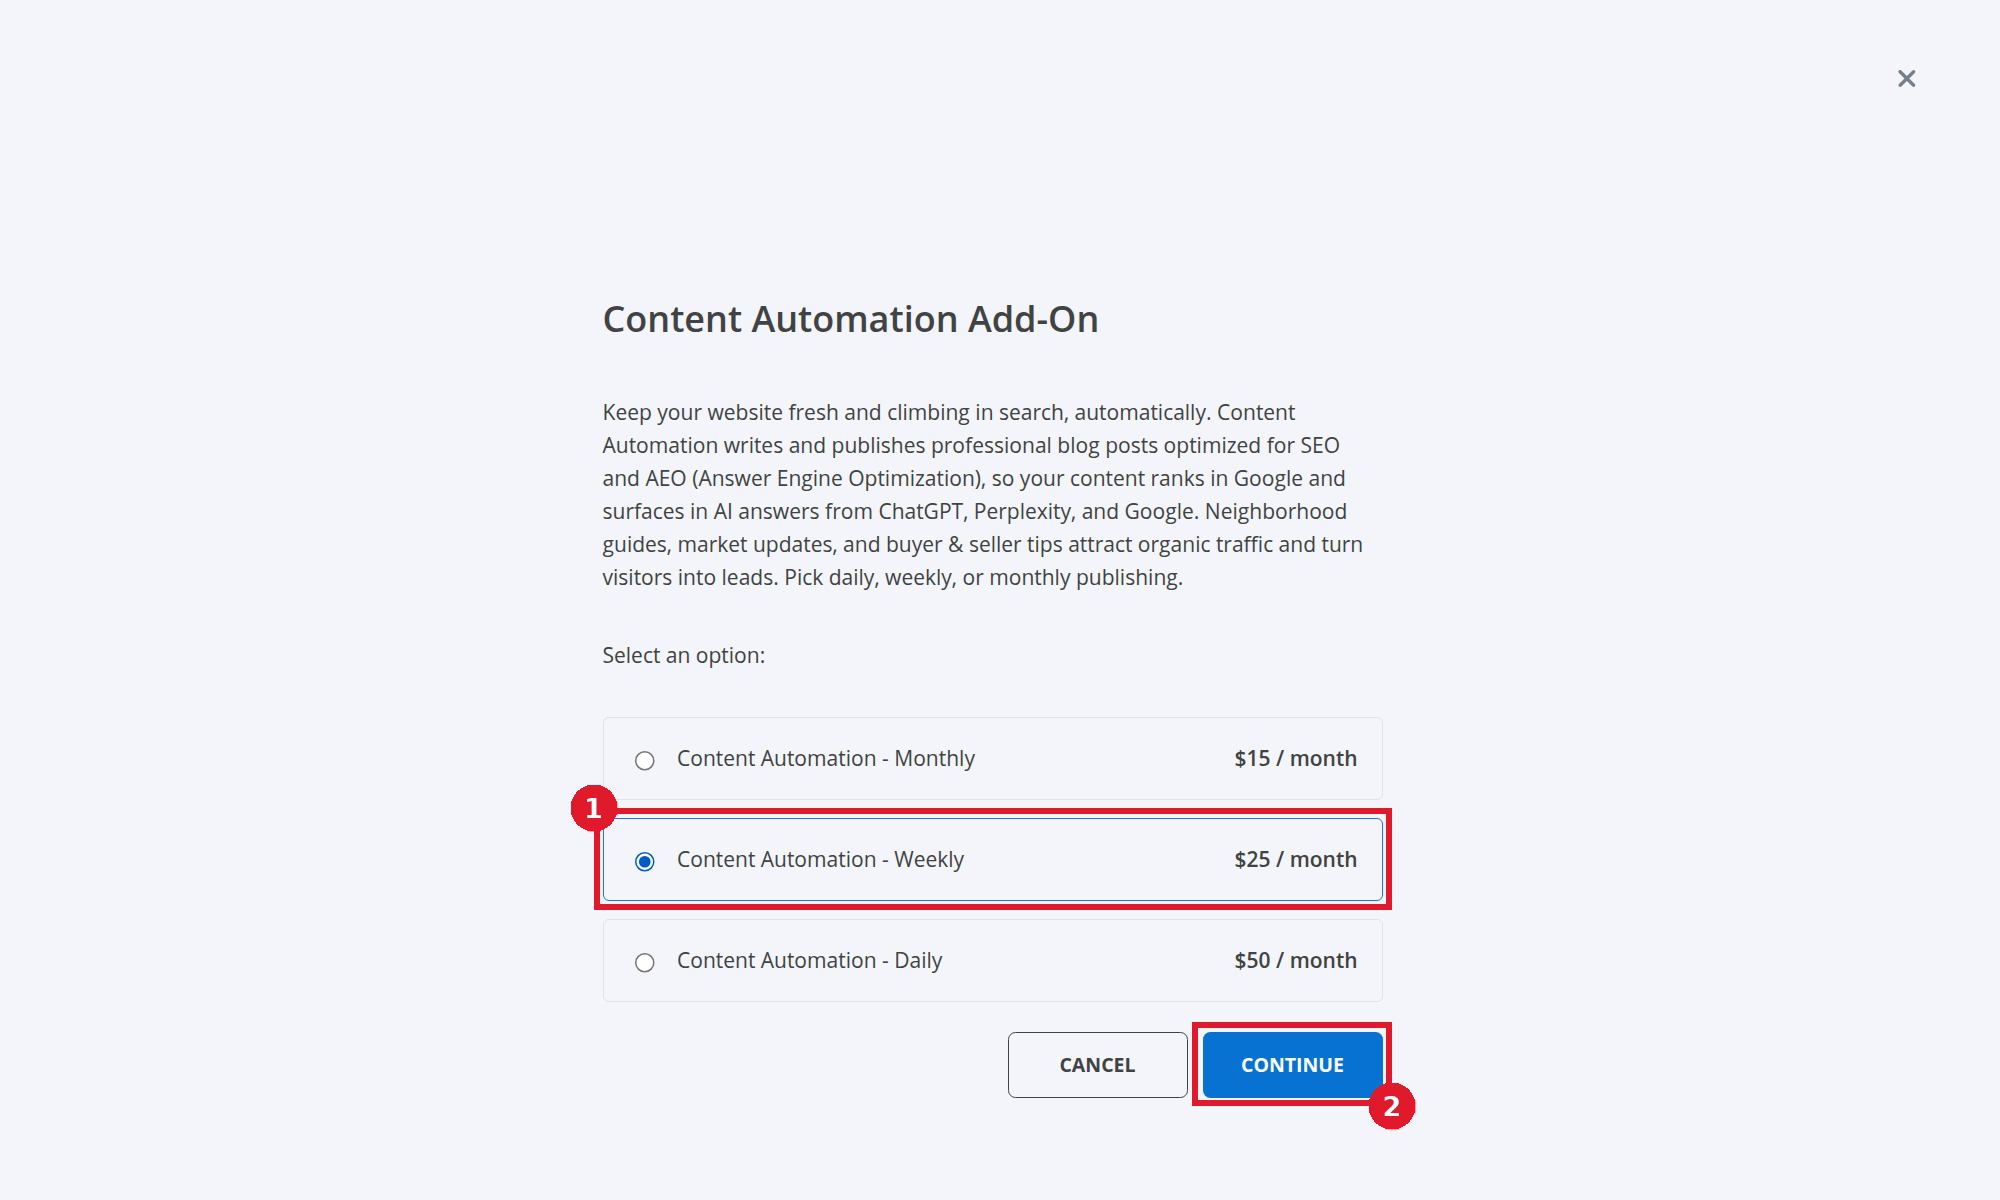
- The selected plan is outlined in blue.
- Select CONTINUE.
Prices shown in Placester are the current prices for your account. They may differ from the examples in these screenshots.
Confirm the purchase
Review the plan and price, then complete the purchase.
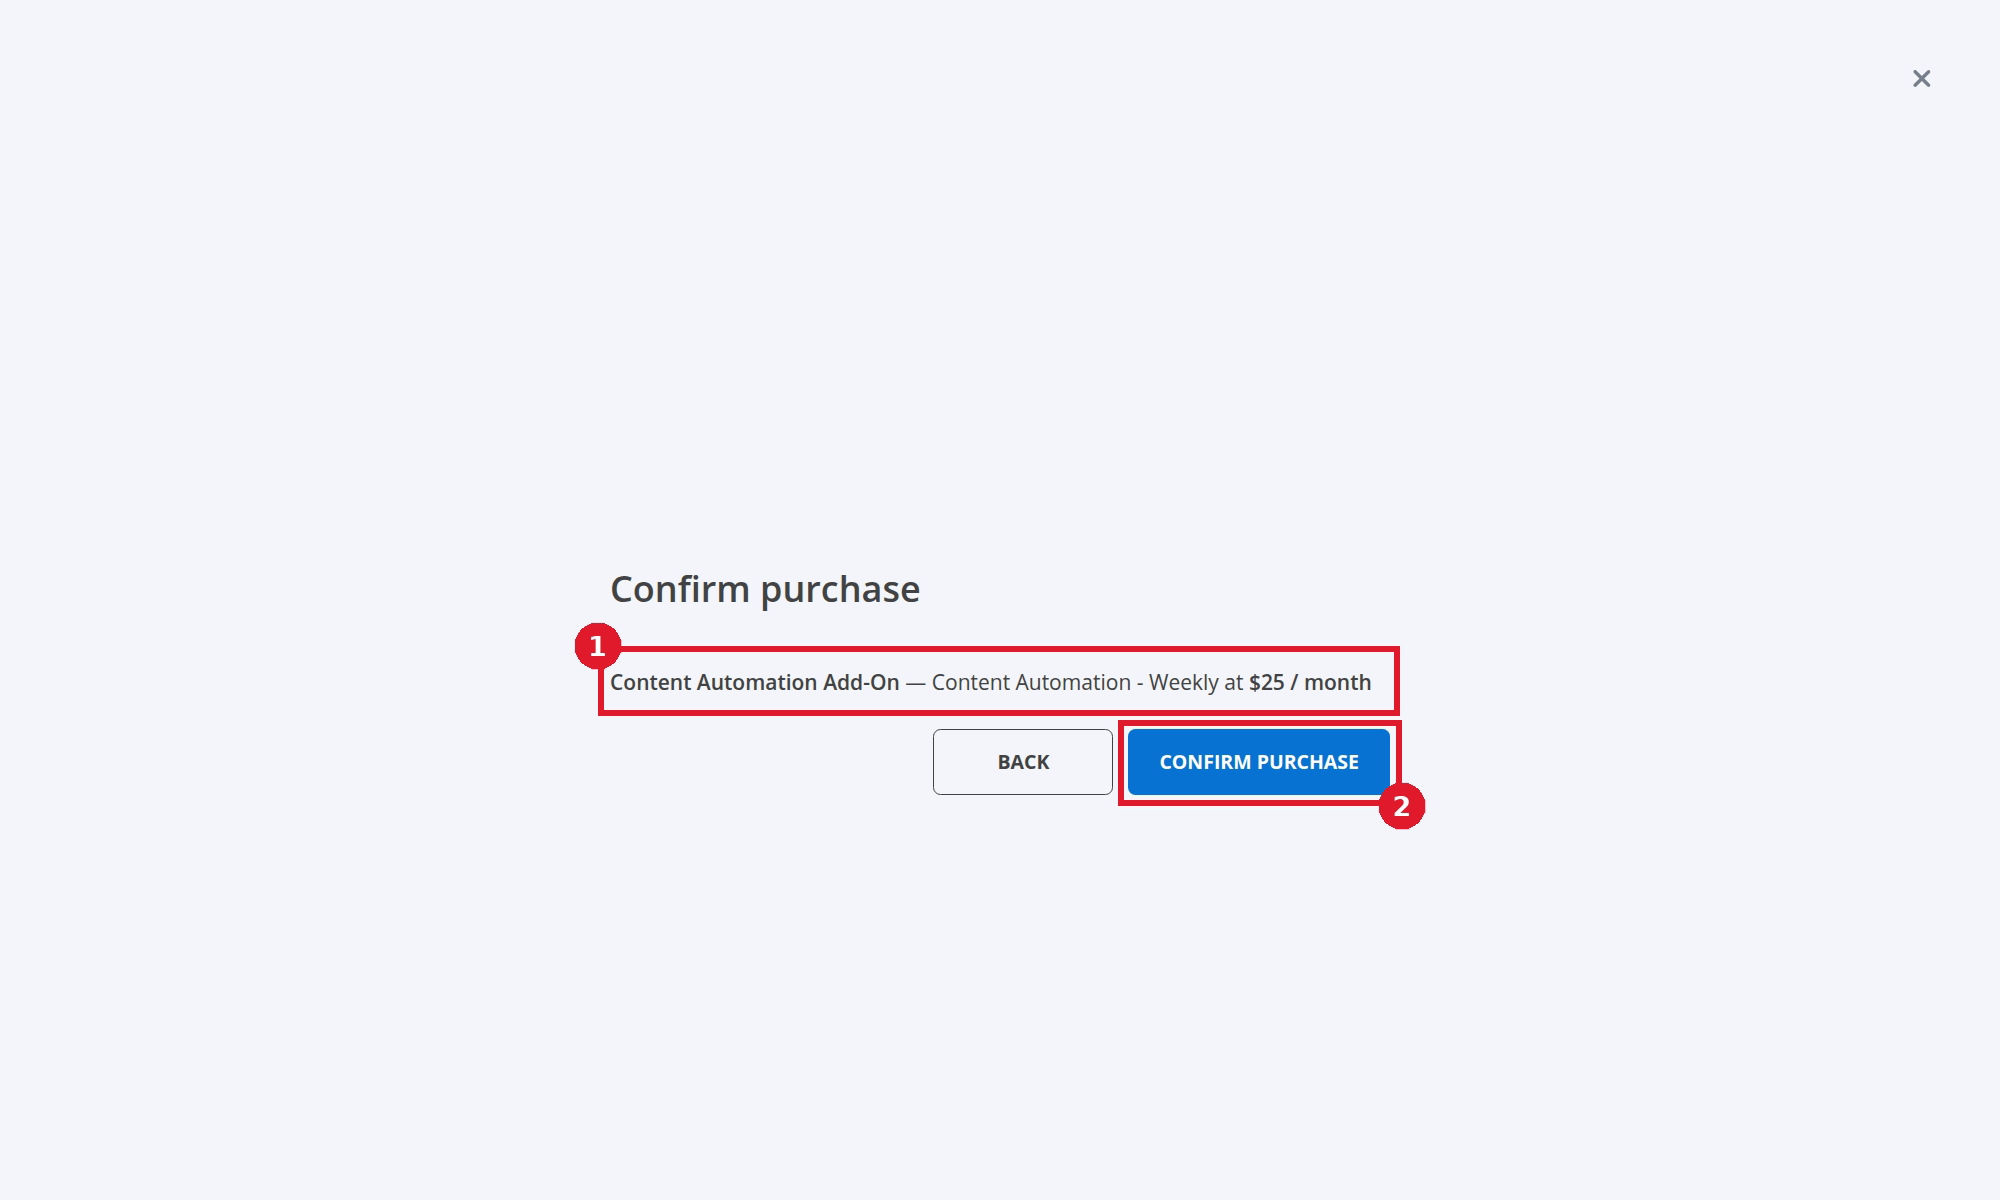
- Confirm the selected plan and price.
- Select CONFIRM PURCHASE.
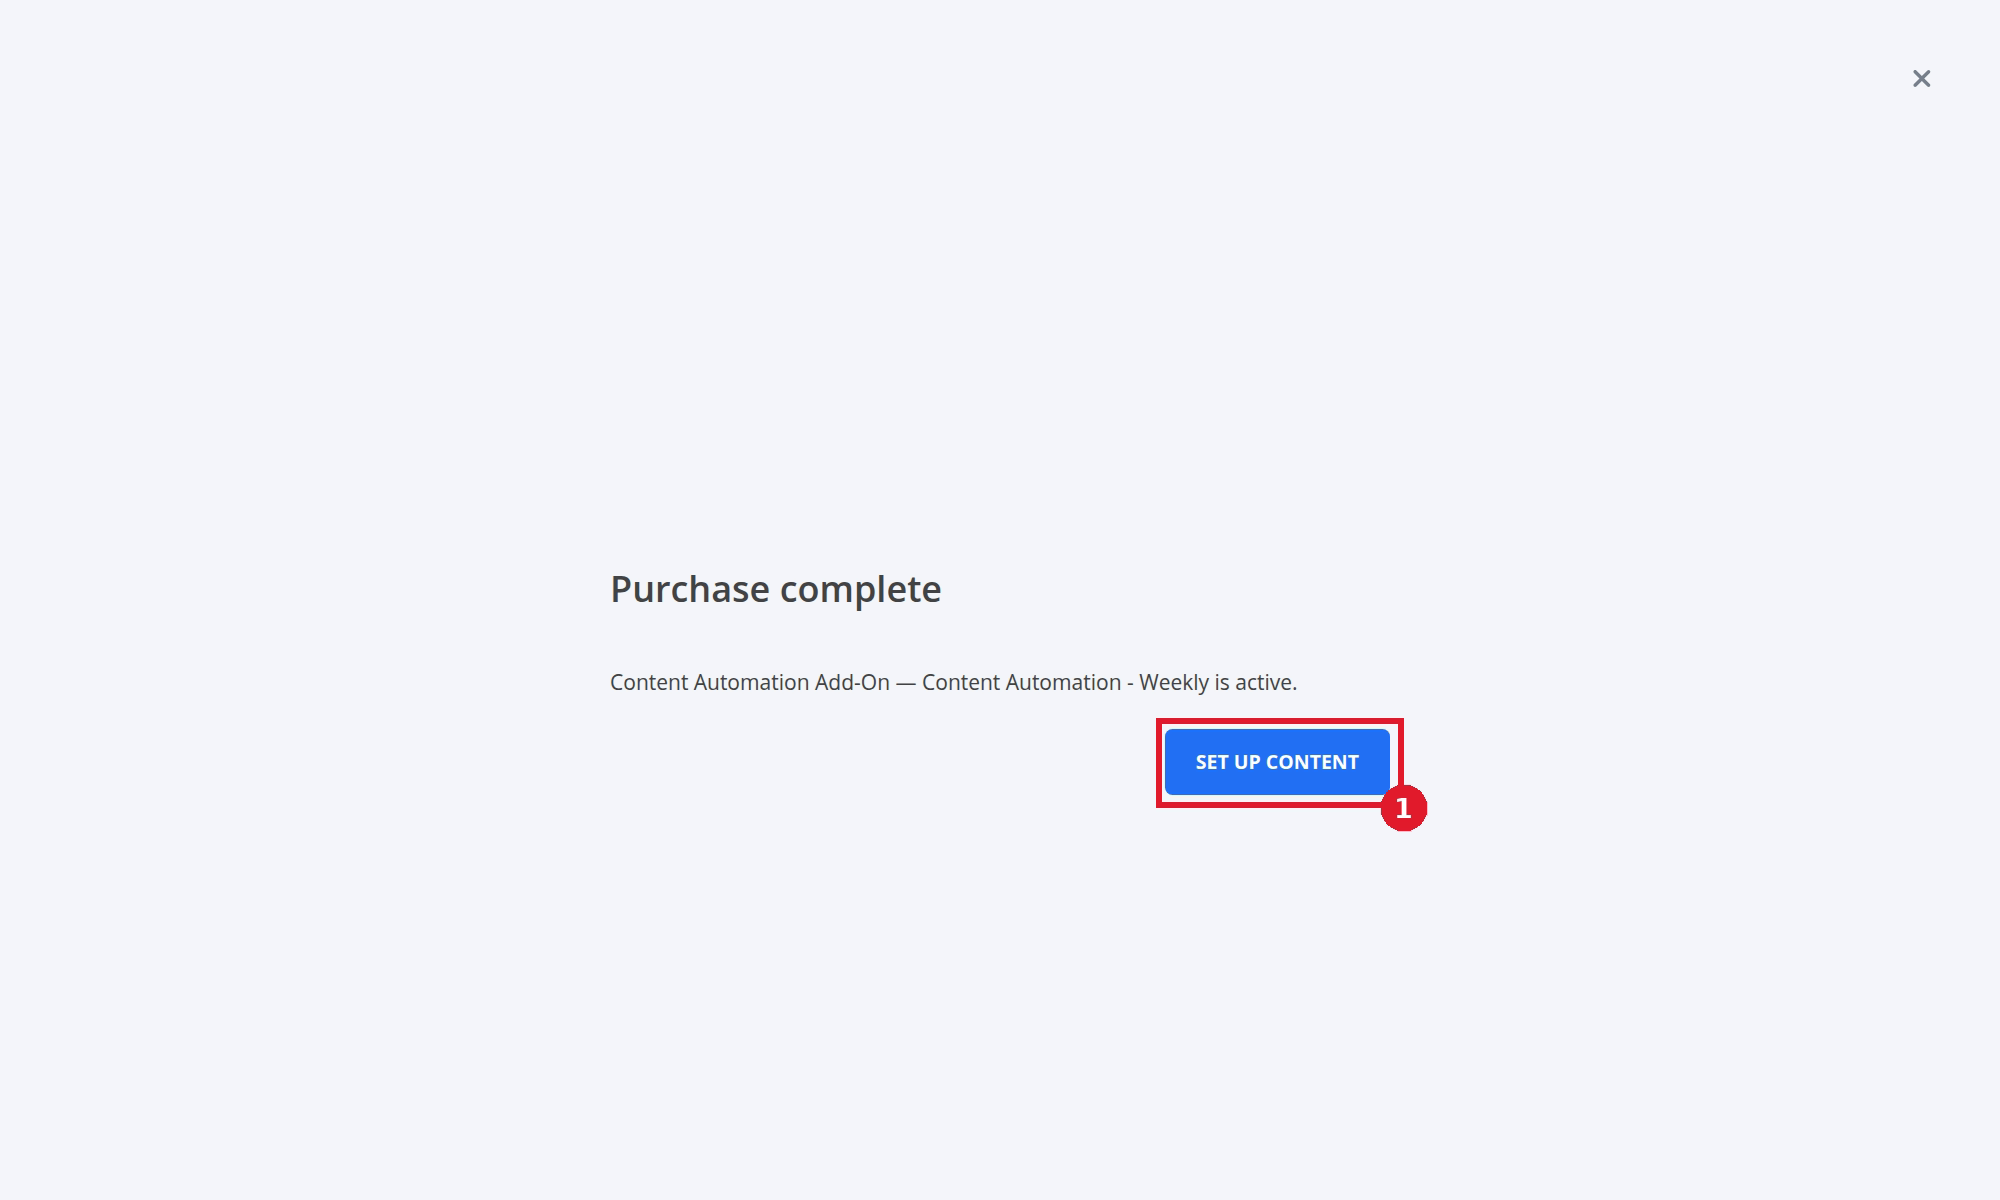
- Select SET UP CONTENT.
If you do not yet have a publishable website, Blog opens Configuration and shows No publishable sites yet.
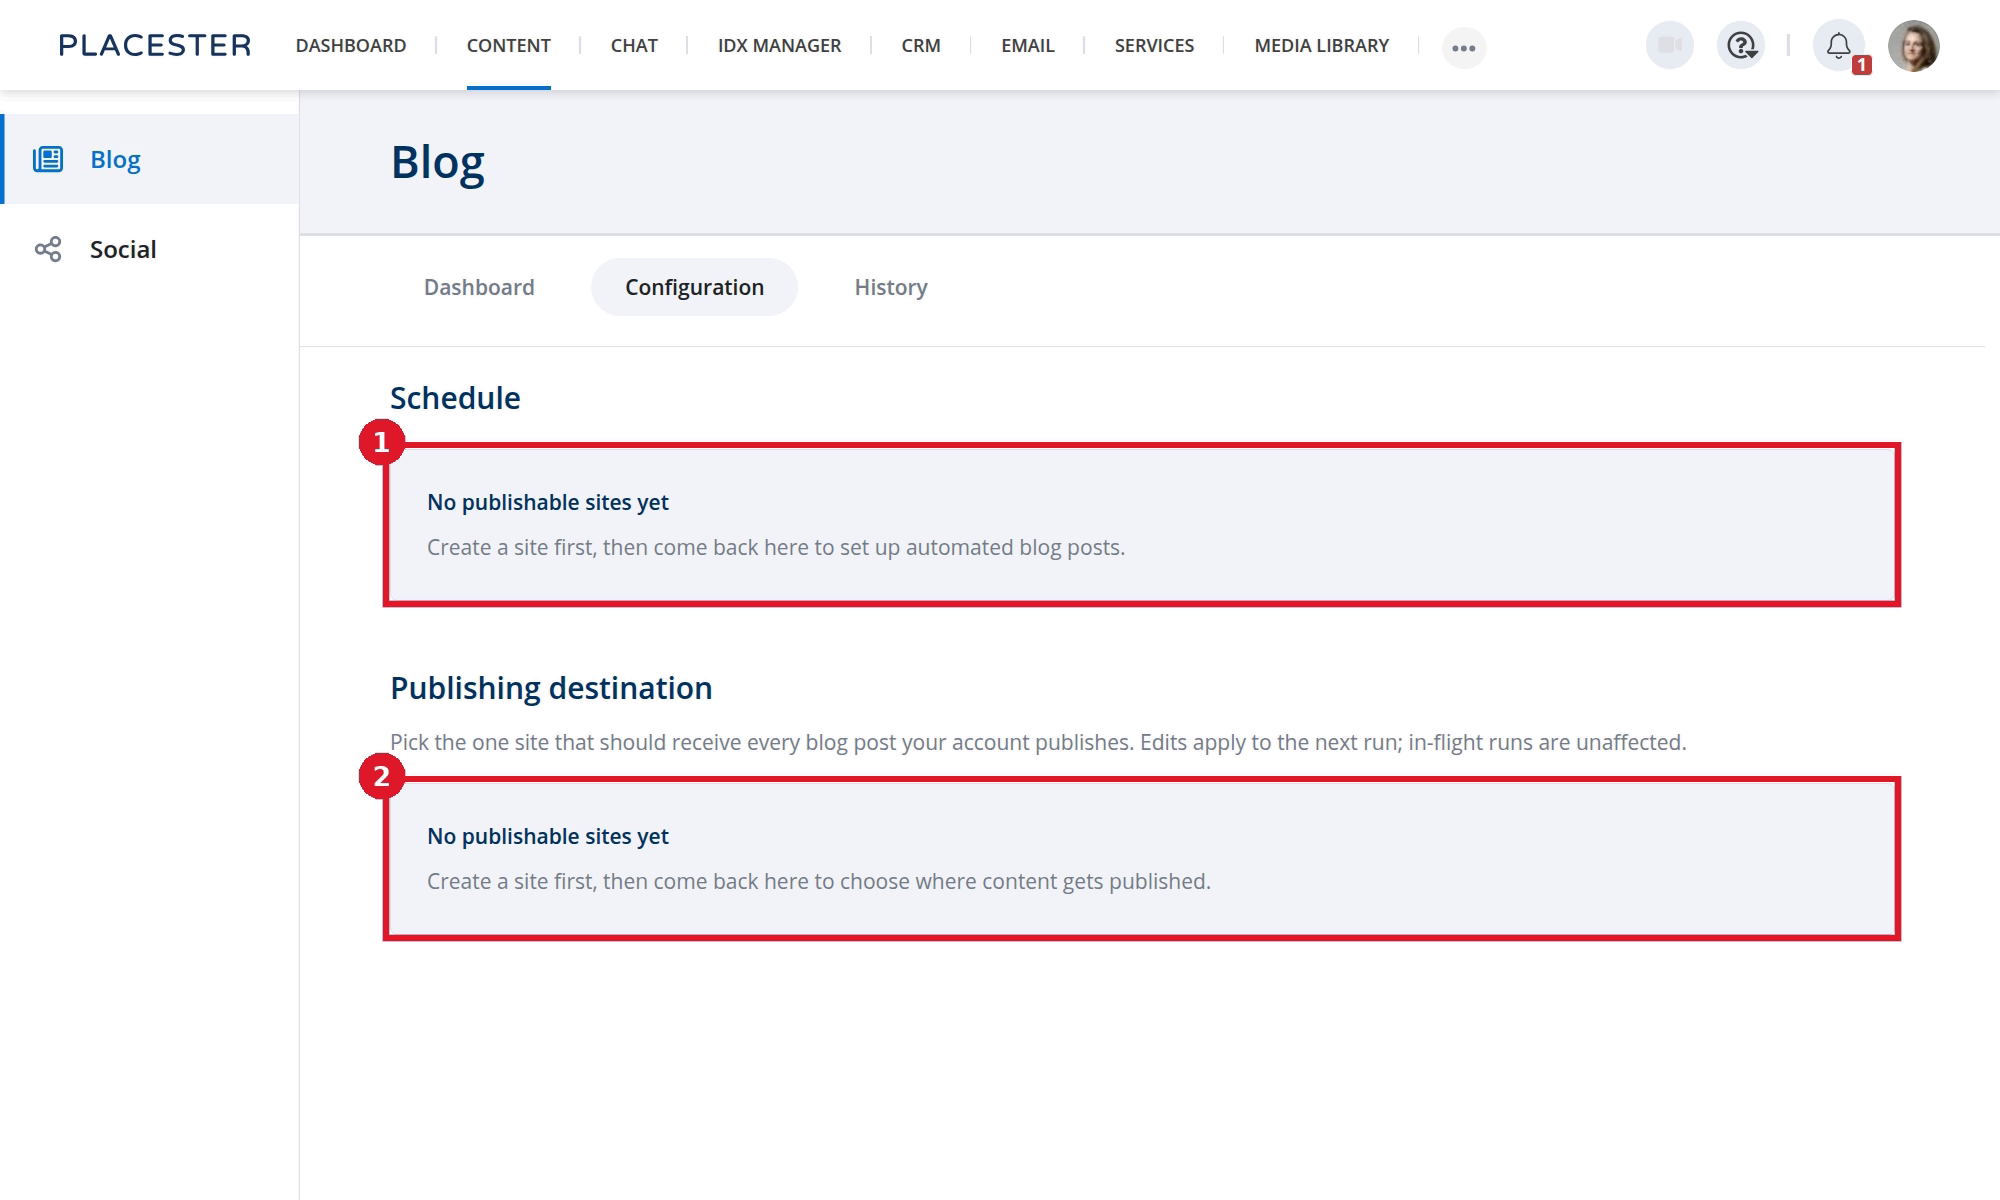
- Schedule setup waits until a publishable site is available.
- Publishing destination also remains unavailable.
Create and publish a site, then return to Content → Blog to continue the setup wizard.
Complete the setup wizard
The setup wizard has four steps: Profile, Topics, Schedule, and Destinations. The setup screenshots below use a Monthly plan, while the purchase example above shows Weekly. Your schedule and summary will match the plan you purchase.
1. Review your profile
Review the Business Profile details Content Automation will use.
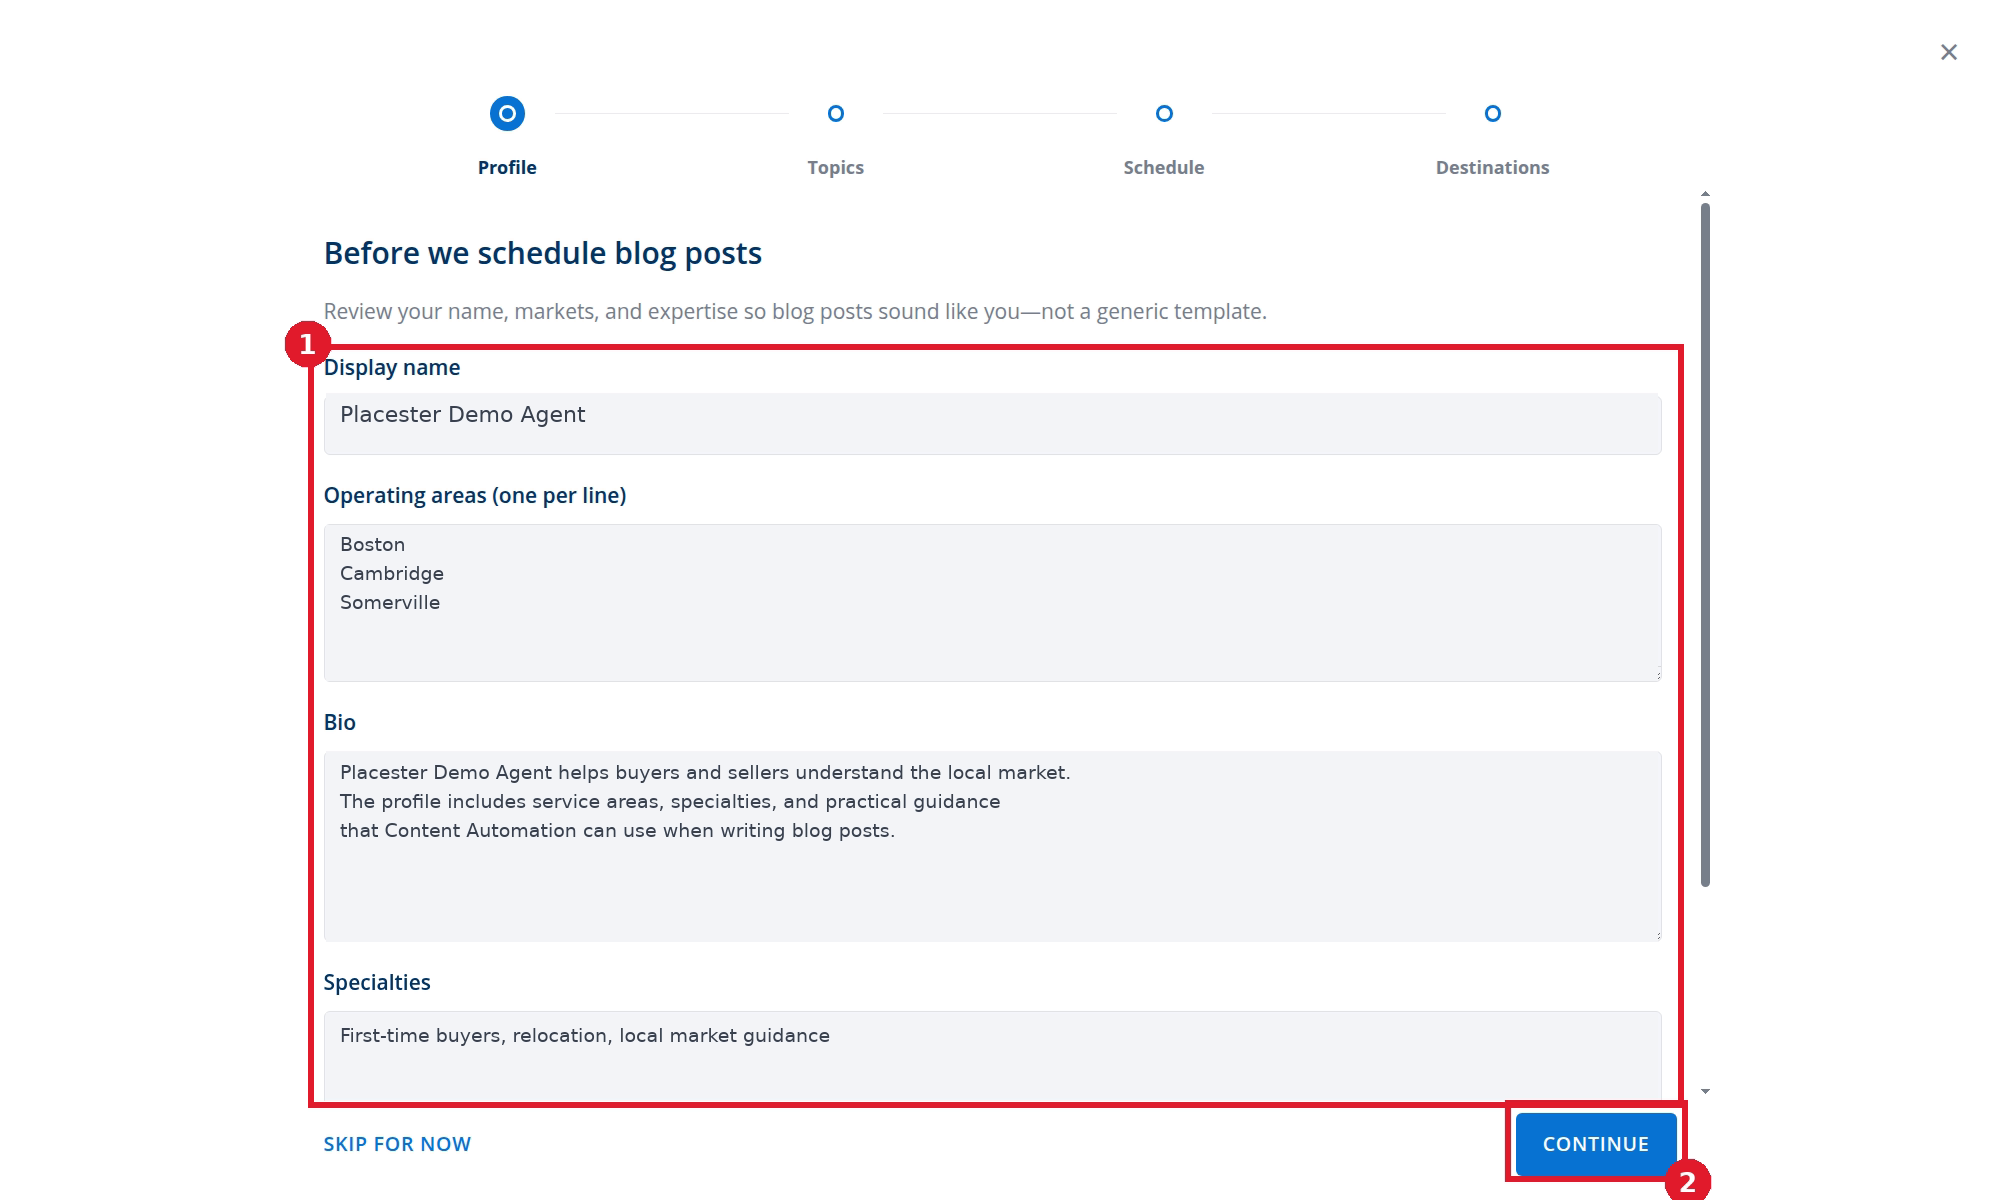
- Review your display name, operating areas, bio, and specialties.
- Scroll to review Target audience, then select CONTINUE to save the profile details.
SKIP FOR NOW closes the wizard without finishing setup. Return to Content → Blog when you are ready to continue.
2. Choose topics
Select at least three topics for your article rotation.
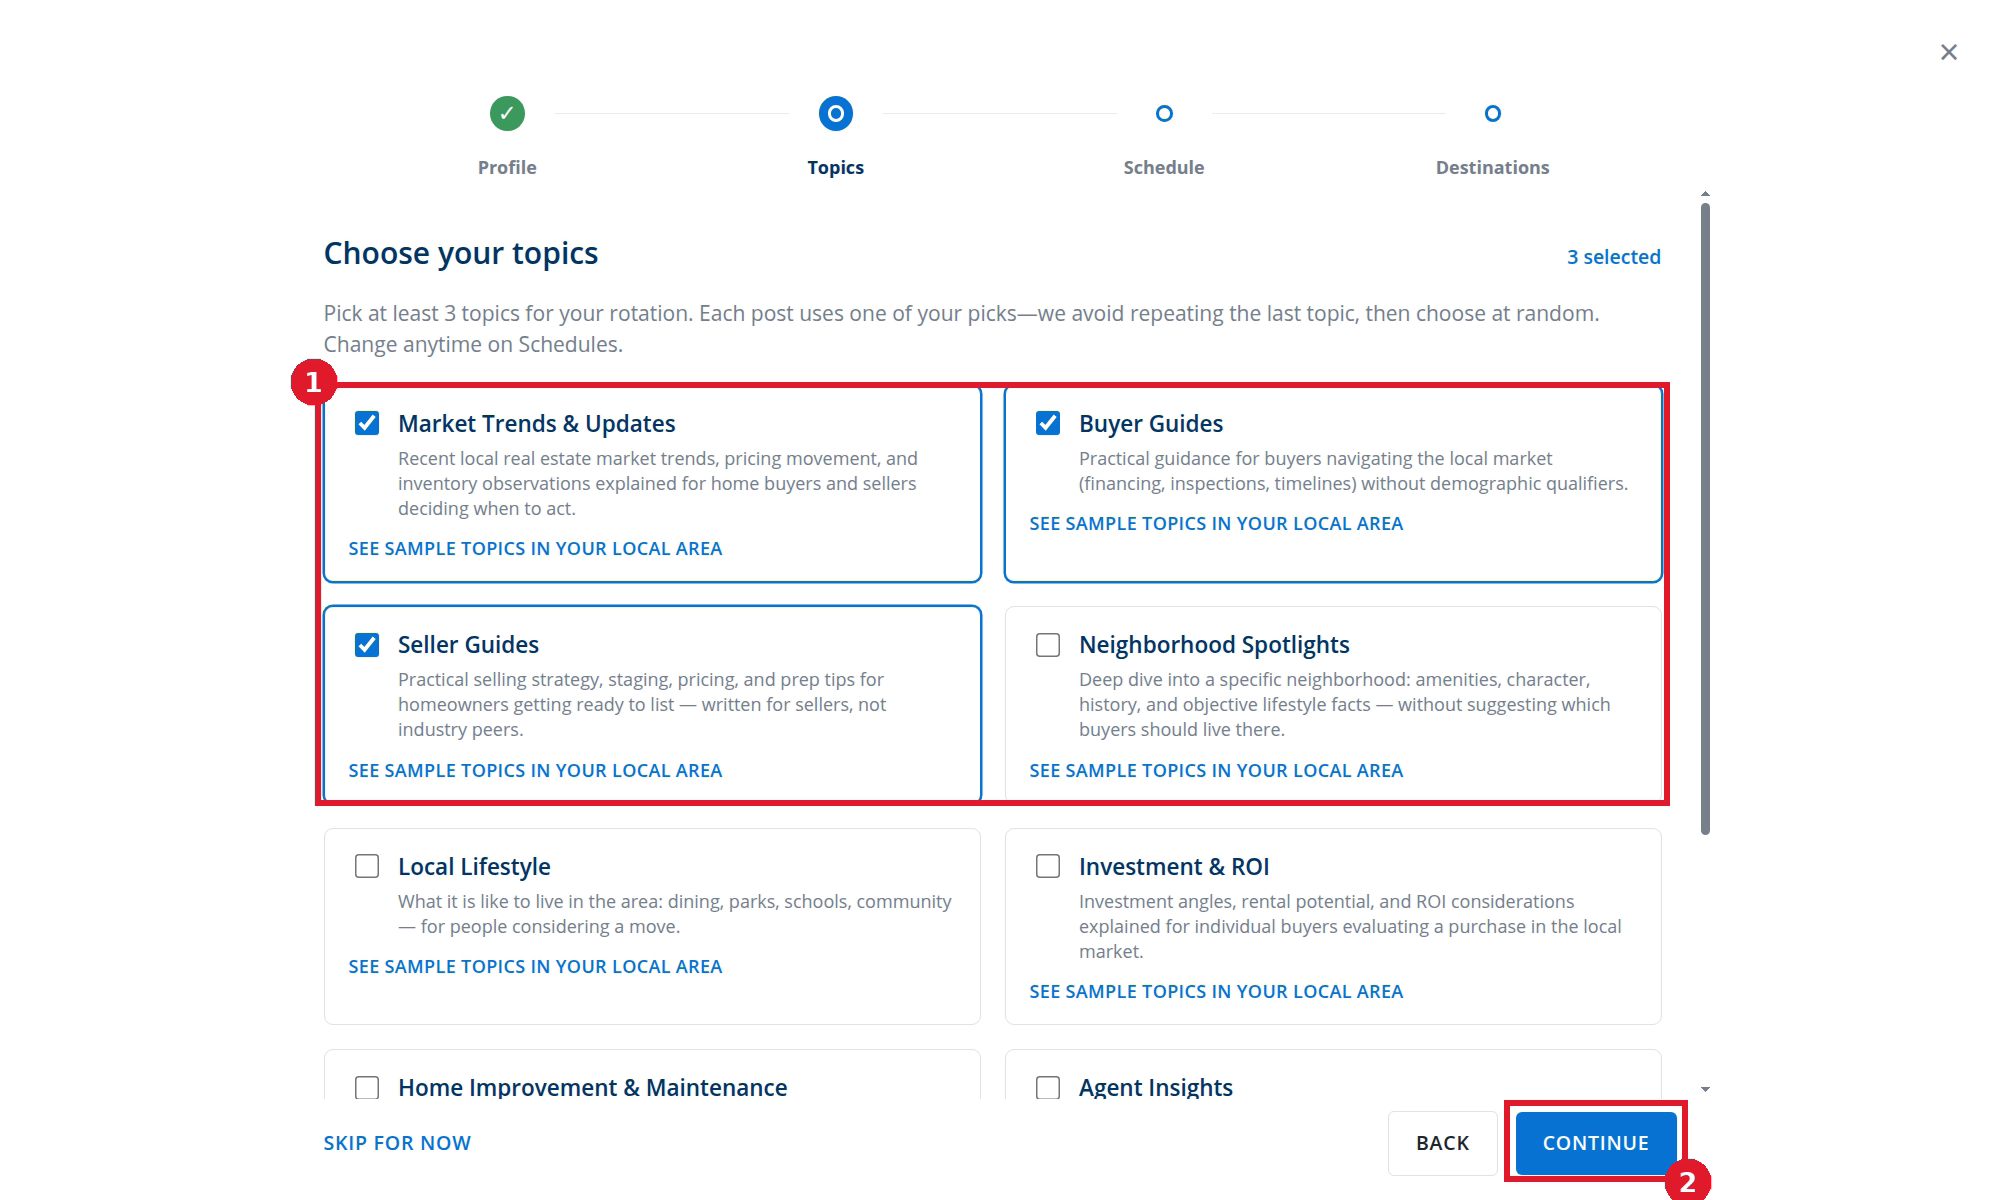
- Select at least three topic cards. Selected cards turn blue with a checked box; the rest stay white.
- Select CONTINUE.
See Choosing Content Automation Topics.
3. Set the schedule
Your plan determines whether the cadence is monthly, weekly, or daily. Choose the available date or day, time, and time zone.
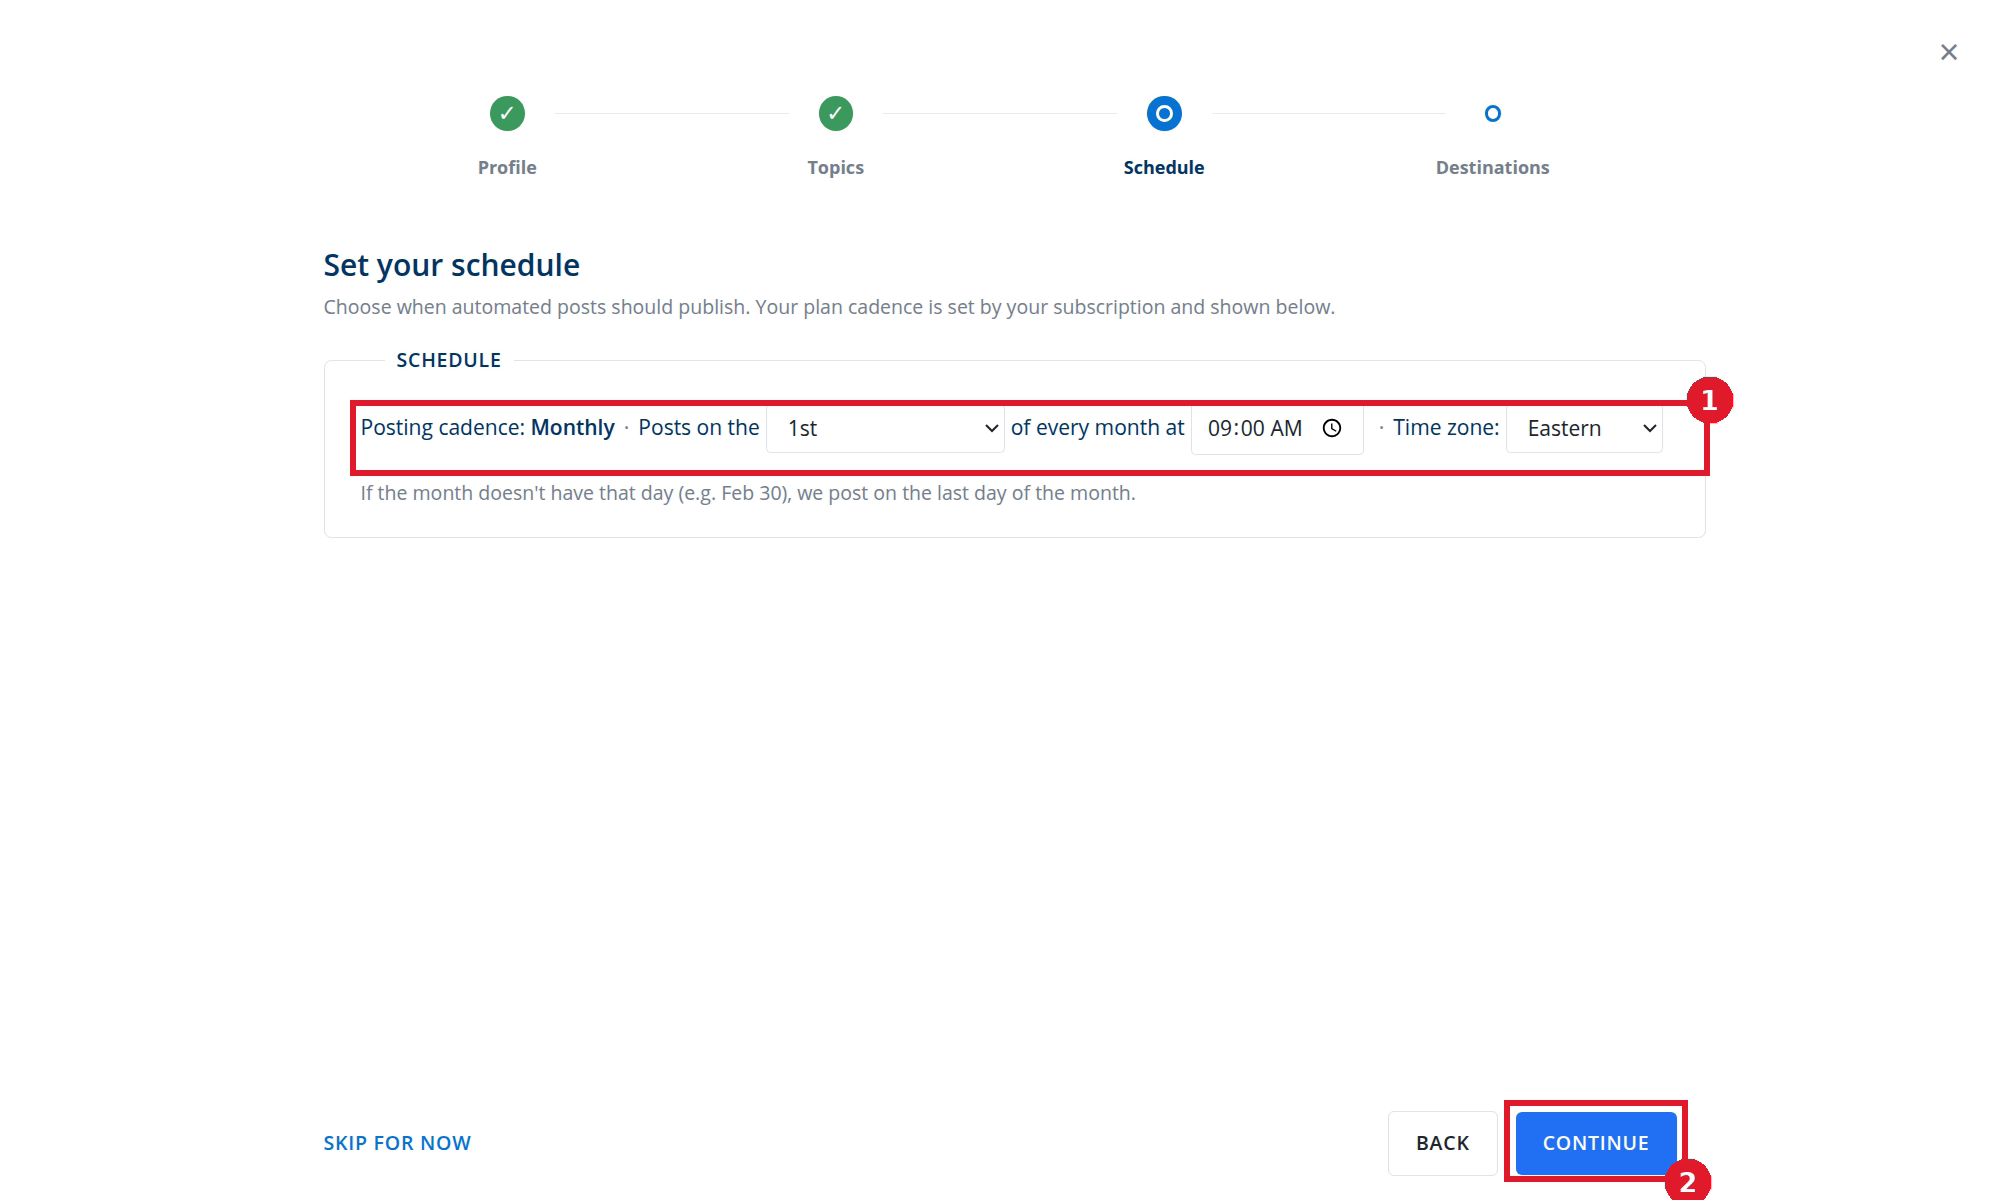
- Set the schedule controls available for your plan.
- Select CONTINUE.
The setup wizard uses Publish immediately. You can switch to Draft, then publish or Off later under Configuration.
See Setting Your Content Automation Schedule.
4. Choose the destination
Select the one Placester website whose blog should receive automated posts.
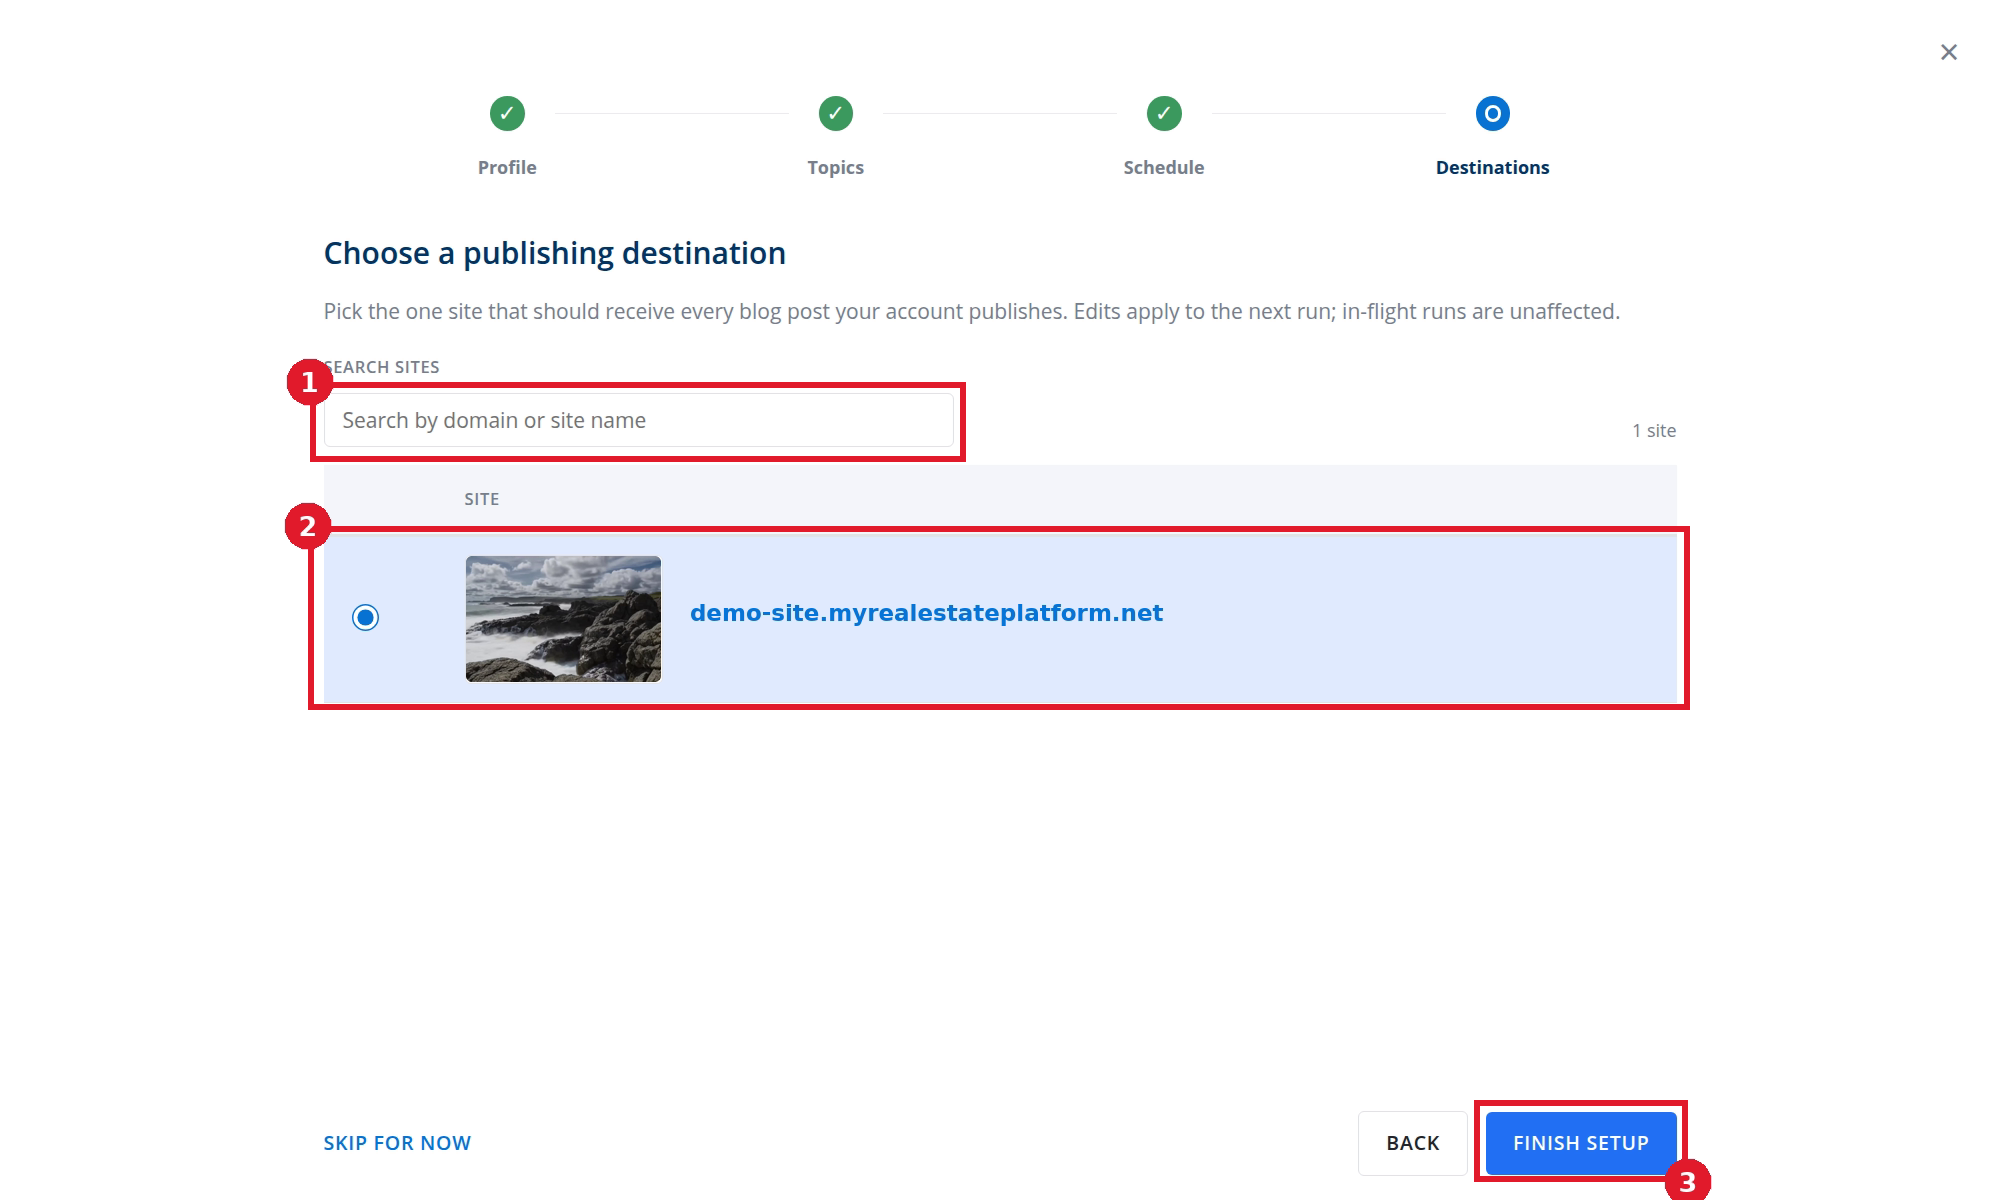
- Search by domain or site name when needed.
- Select one publishable site.
- Select FINISH SETUP.
See Choosing a Content Automation Destination.
Confirm setup on the dashboard
The success screen summarizes your cadence, topic count, and site count.
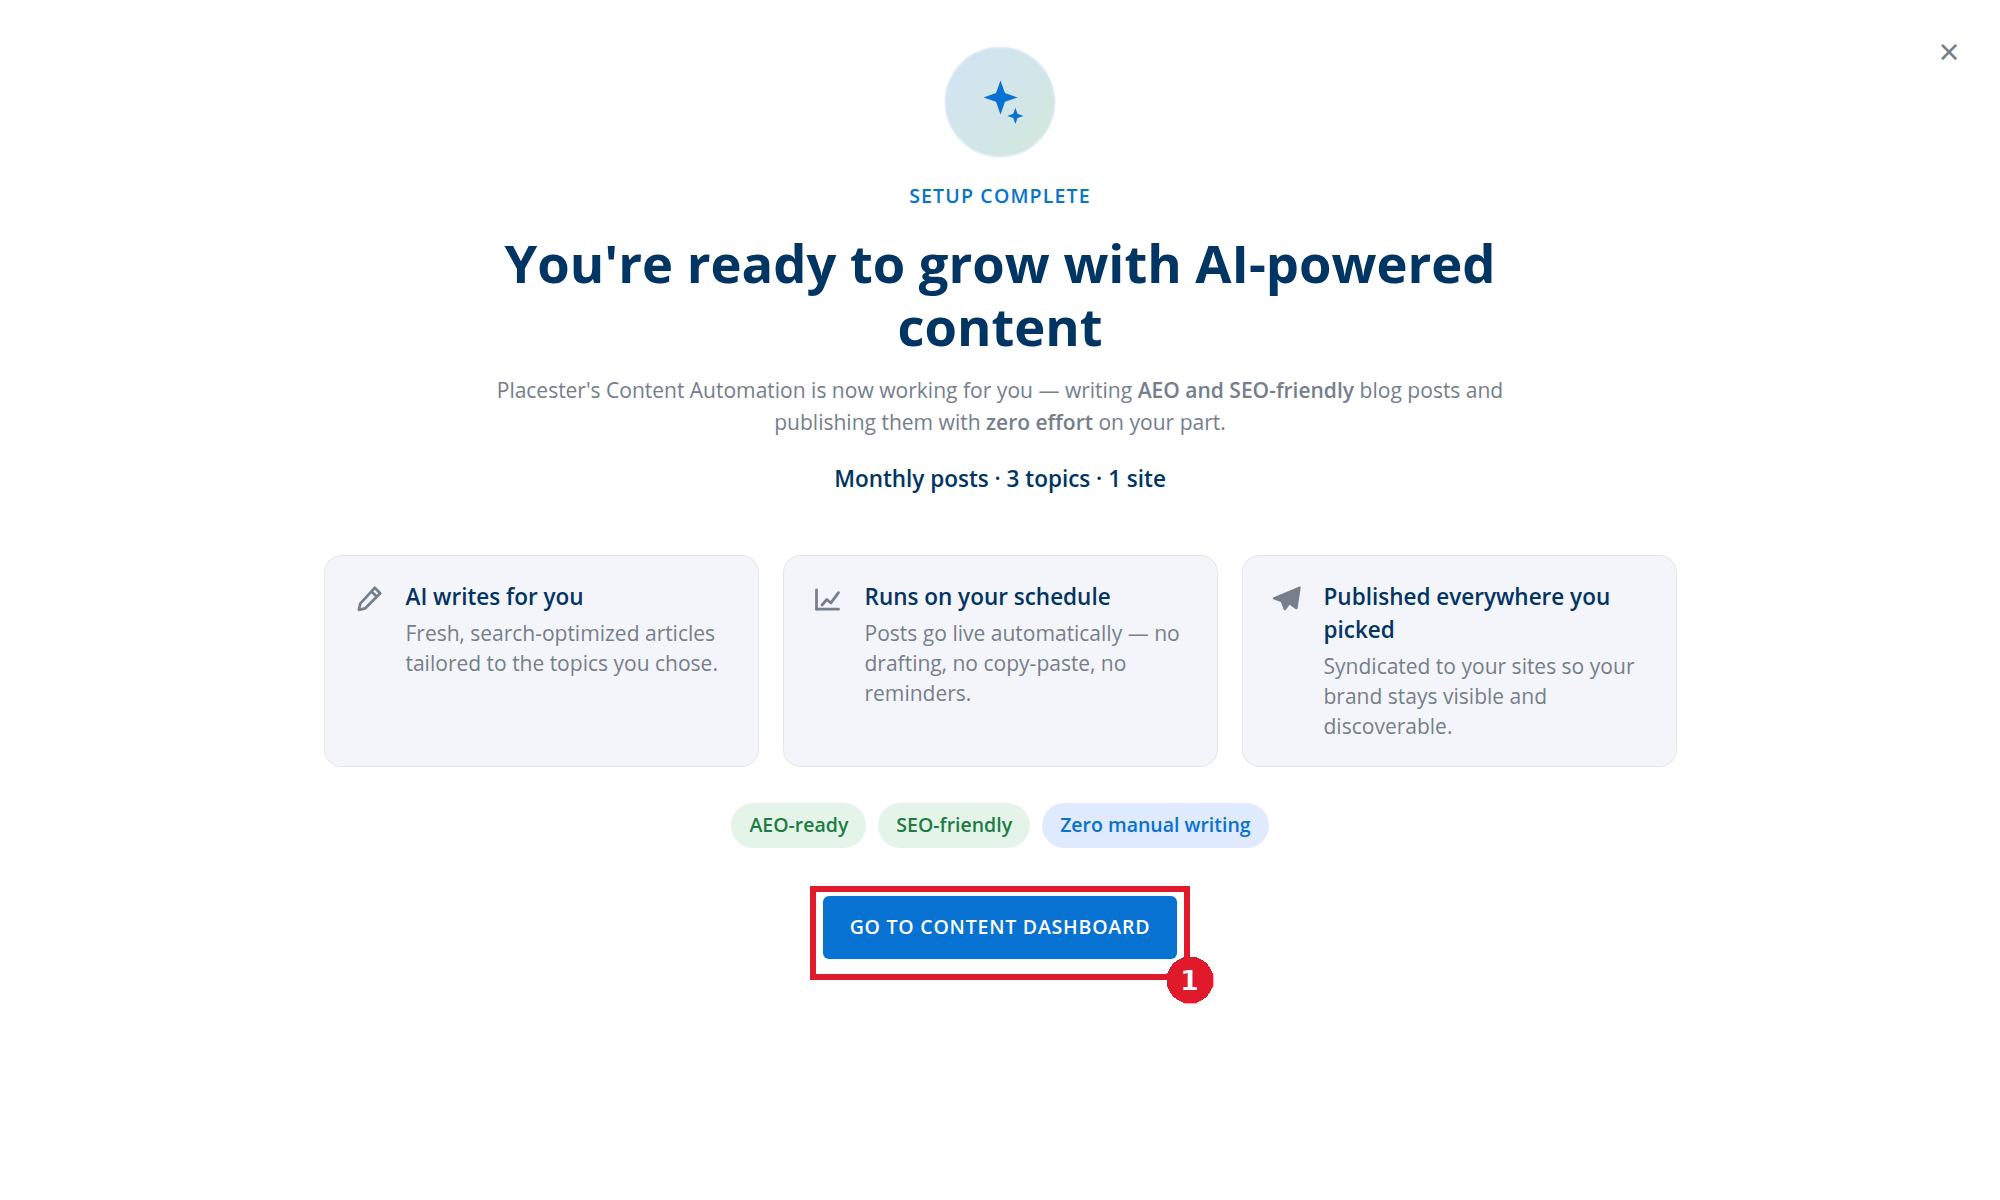
- Select GO TO CONTENT DASHBOARD.
The success screen currently uses plural language about publishing to "sites." Setup currently supports one site.
The dashboard initially shows the destination and next run. Last run stays empty until Content Automation completes its first run.
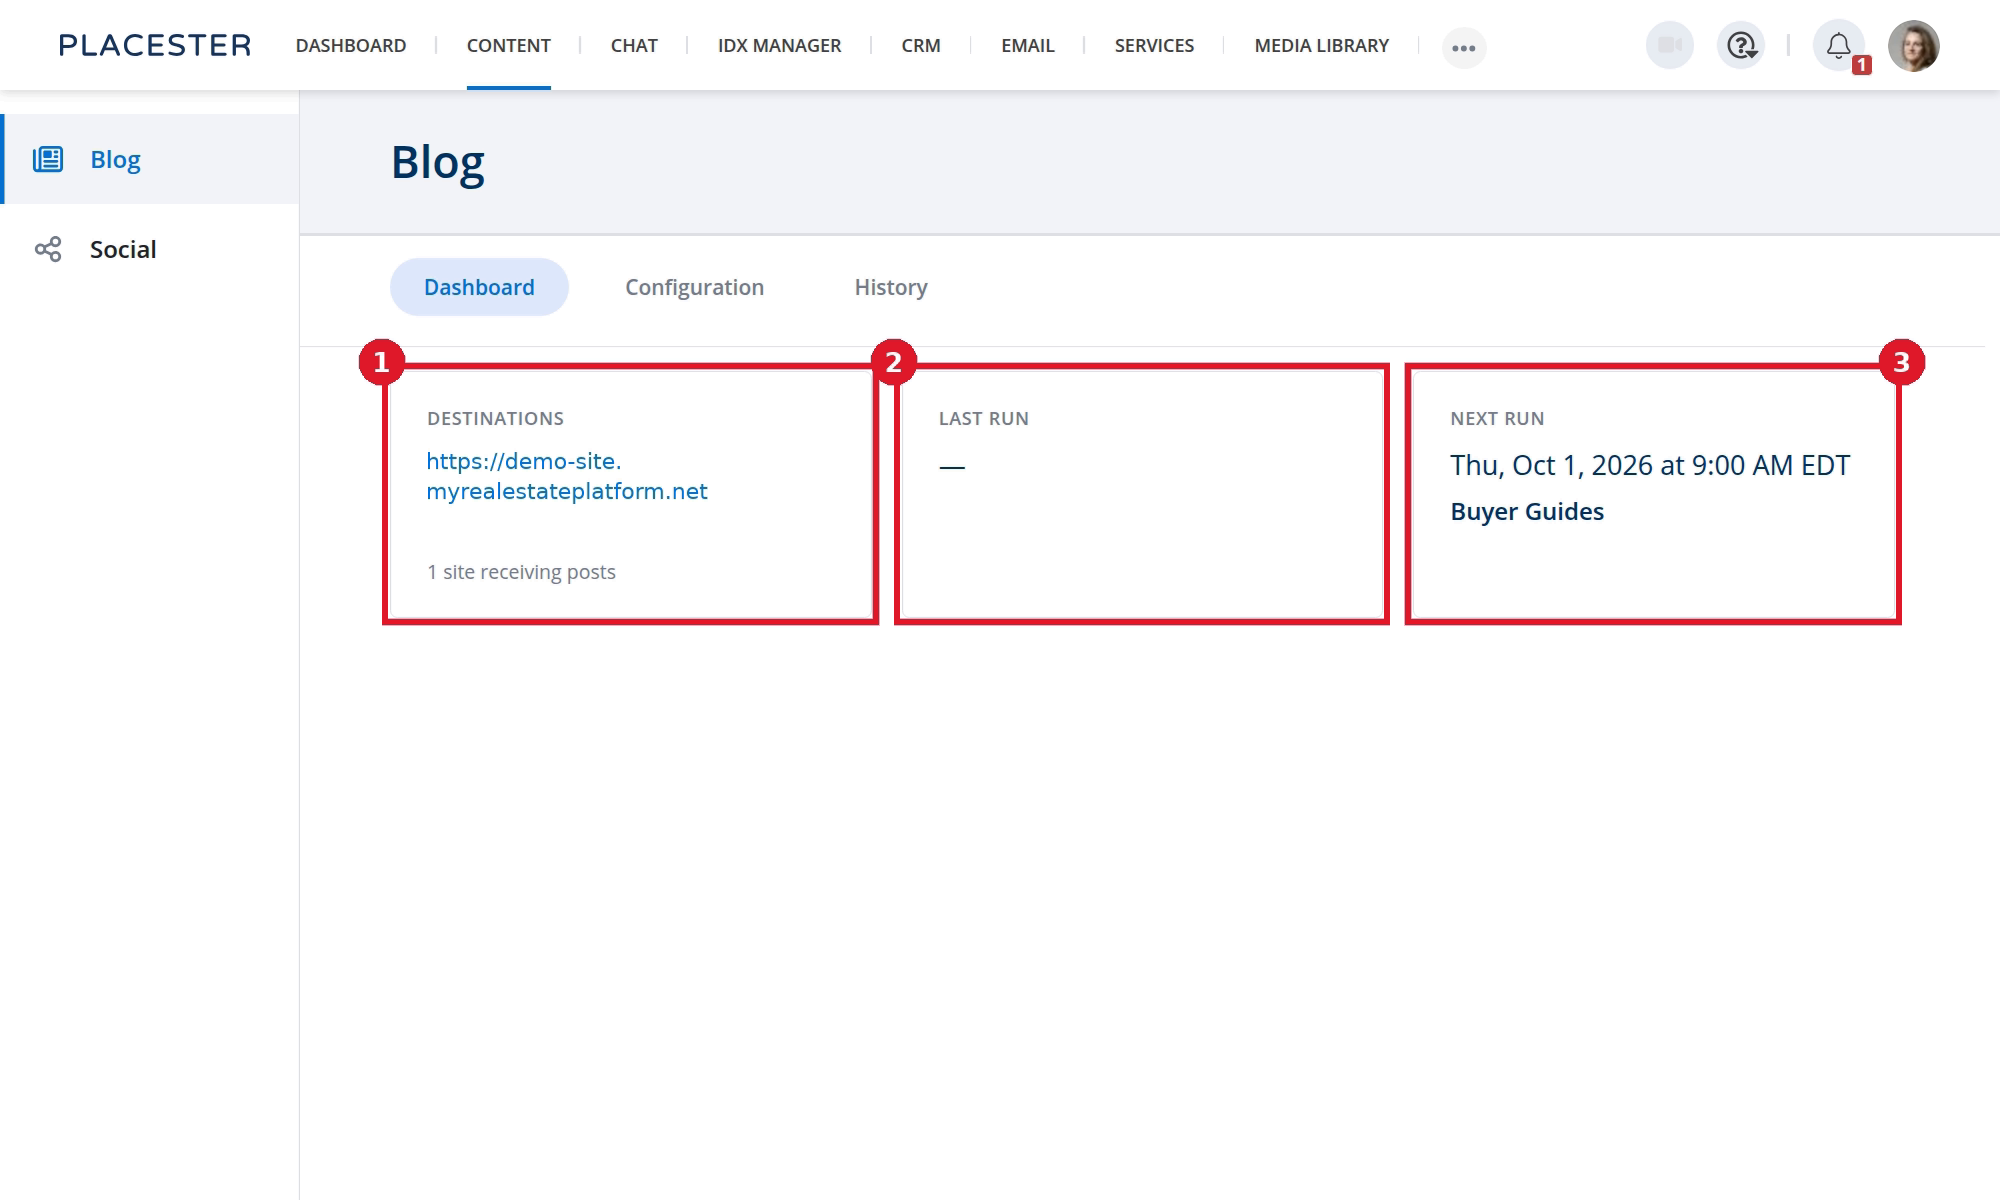
- Destinations shows the selected site.
- Last run displays a dash until the first run completes.
- Next run shows the first scheduled time and topic.
See Using the Content Automation Dashboard.
Change categories, publishing mode, schedule, or destination later under Configuration. If nothing publishes, follow Troubleshooting Content Automation.
Need more help?
If you have questions about Content Automation, contact Placester Support at support@placester.com.