Creating a Lead Capture Popup
A lead capture popup is a small window with a contact form. It opens over the pages of your website and asks visitors for their details. In Site Edit you create and change popups in the Edit Popup panel. Your changes go into a draft. Visitors see them after you publish.
Open your popups
- Select Dashboard in the top menu.
- On the site card, select EDIT SITE. Site Edit opens with your homepage.
- Select Add New in the top bar, then select the Lead Capture tab.
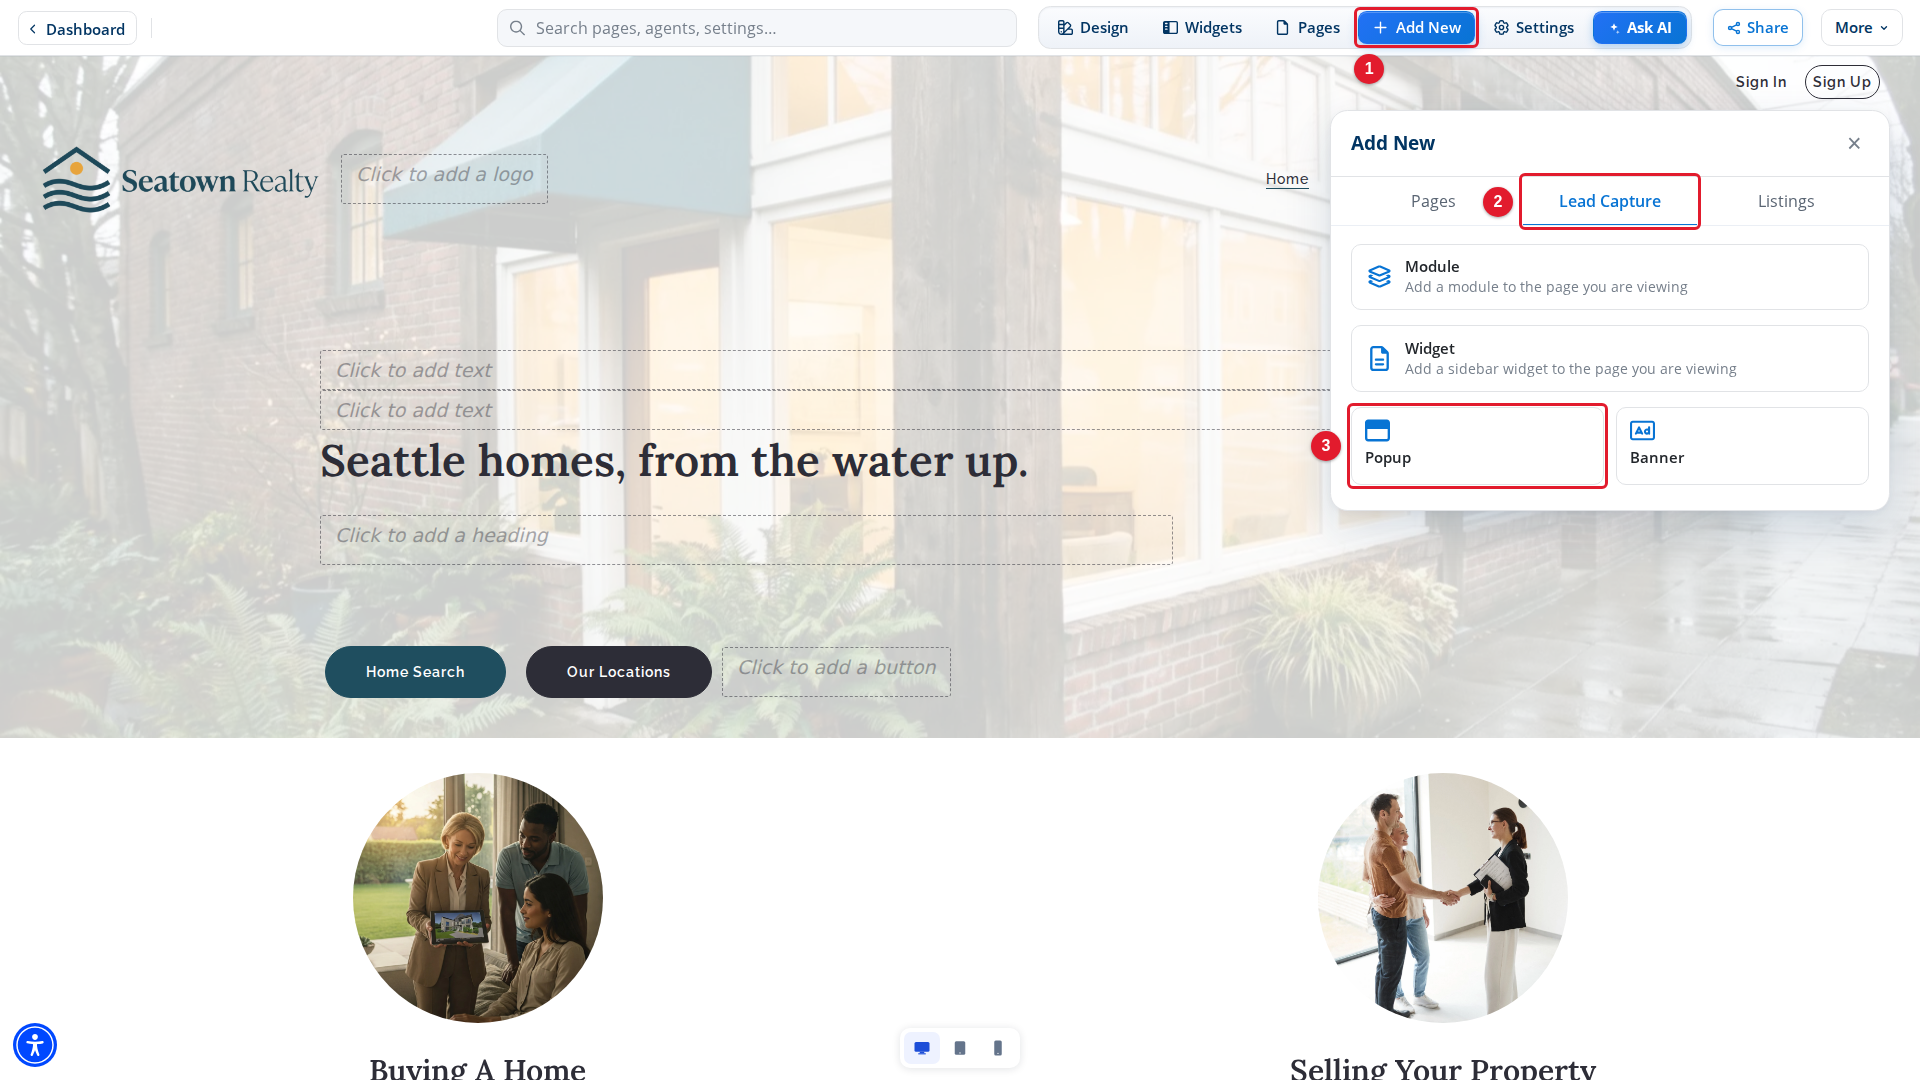
- Add New: Opens the Add New panel.
- Lead Capture: Shows the lead capture items you can add.
- Popup: Opens the list of your popups.
Select Popup. The Popups list opens.
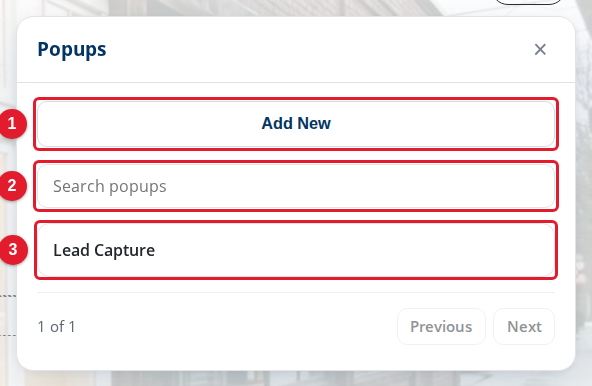
- Add New: Creates a new, empty popup and opens it.
- Search popups: Finds a popup by its title.
- Lead Capture: An existing popup. Select it to edit it.
To edit a popup, select its title. To make a new popup, select Add New. Site Edit adds a popup named New Popup to your draft at once and opens it with empty fields. The preview can show Loading preview… for a short time.
Write the popup
The Edit Popup panel has three tabs: Content, Triggers and Display rules. The popup shows in the preview while the panel is open.
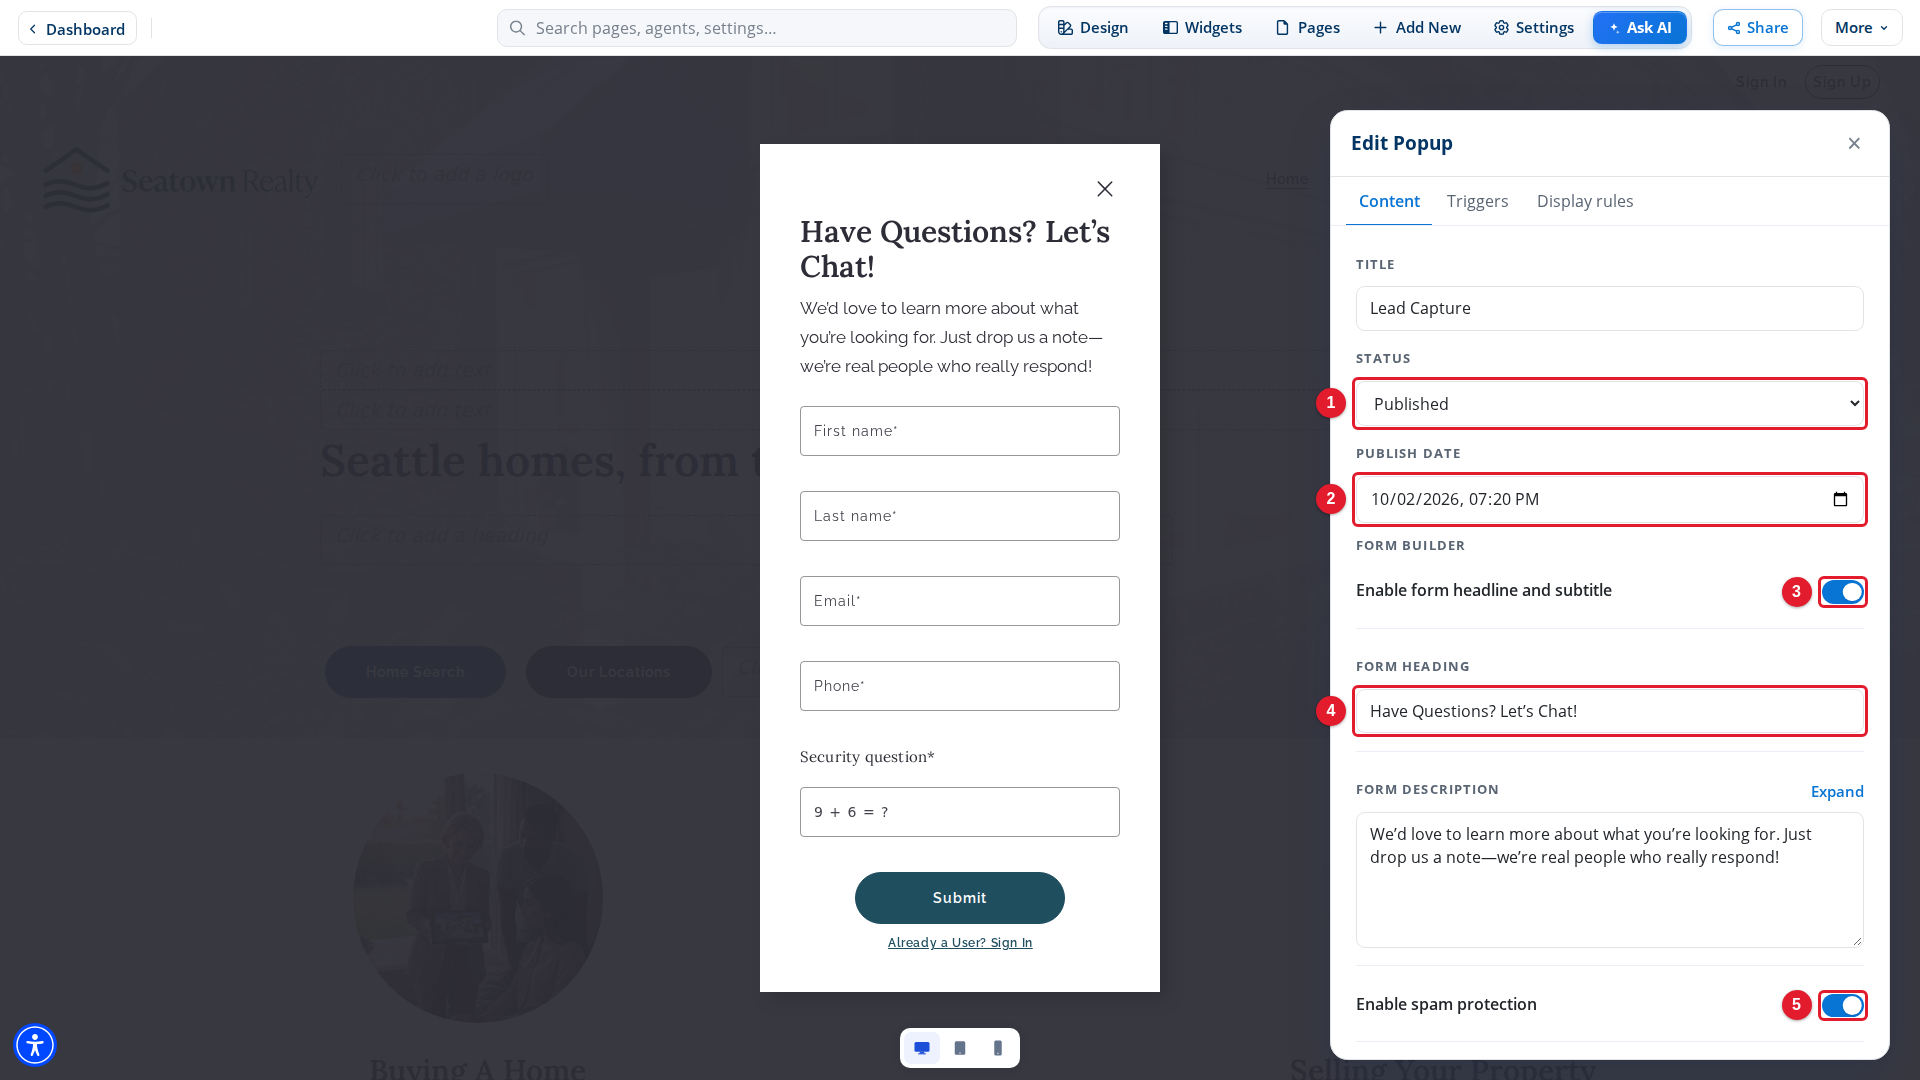
- Status: Choose Published, Draft, Private or Scheduled.
- Publish date: The date and time the popup starts.
- Enable form headline and subtitle: Shows a heading and a description above the form.
- Form heading: The heading visitors see.
- Enable spam protection: Adds a security question to the form.
Type a name for the popup in Title at the top of the tab. The popup has this name in your lists. When Enable form headline and subtitle is on, type the description under Form description. Select Expand to write it in a larger editor.
Build the form
The Form fields list shows the fields of the form in order. Select a field to show its settings.
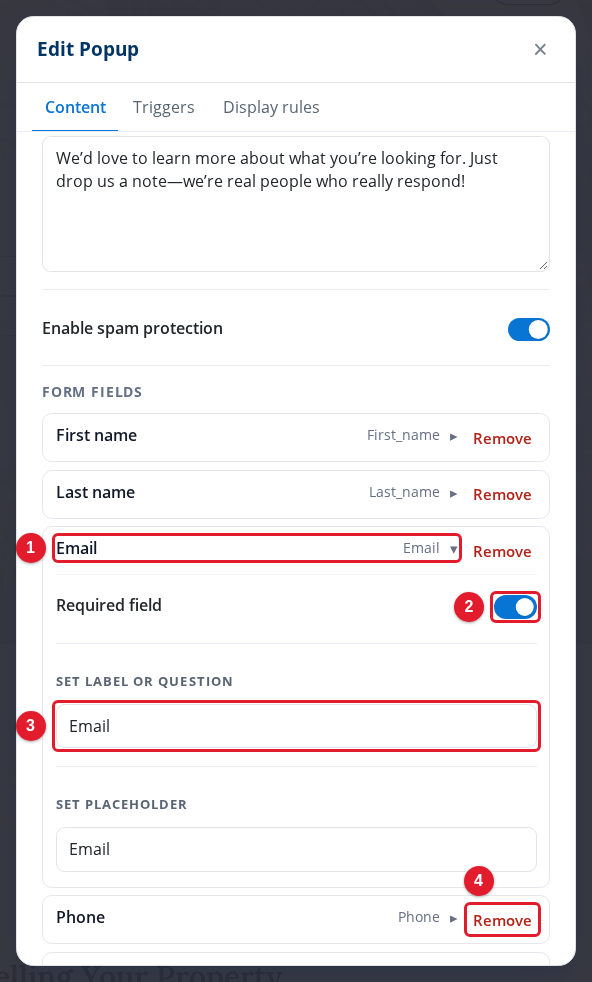
- Email: A field of the form. Select it to show its settings.
- Required field: Visitors must fill in this field before they can send the form.
- Set Label or Question: The words visitors see for this field.
- Remove: Takes the field out of the form.
Each field also has Set Placeholder, the hint text that shows in the empty field.
To add a field, choose its type in the list under the fields, then select ADD. The types are Checkboxes, Date, Email, First Name, Last Name, Max Price, Message, Min Price, Multiple Choice, Numeric, Phone, Price, Ranking, Select, Text, Text Section and Textarea.
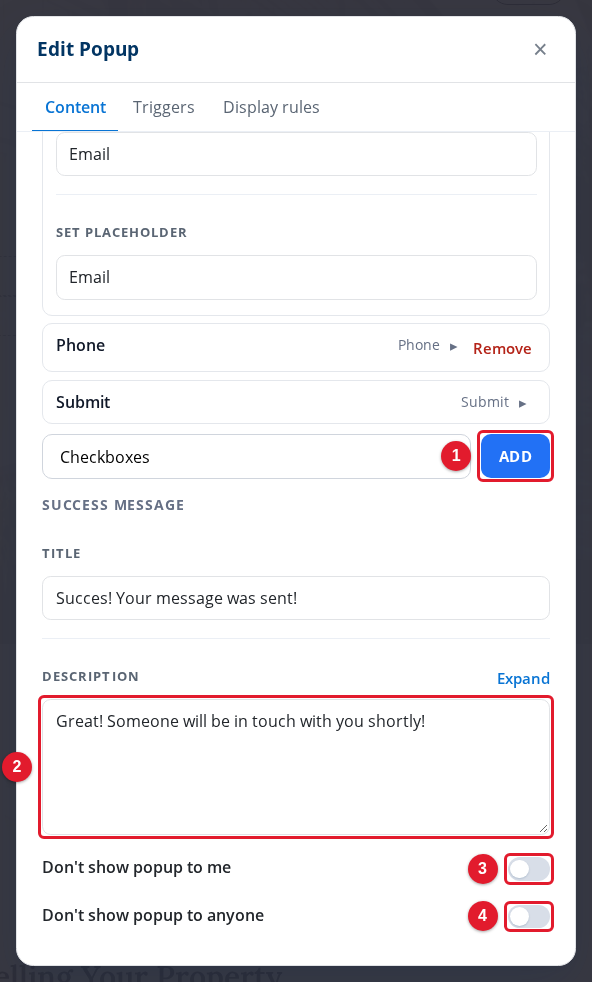
- ADD: Adds a field of the type chosen in the list next to it.
- Description: The message visitors see after they send the form.
- Don't show popup to me: Hides the popup from you only.
- Don't show popup to anyone: Hides the popup from all visitors.
Under Success message, type a Title and a Description for the message that shows after a visitor sends the form.
Choose when it appears
Select the Triggers tab.
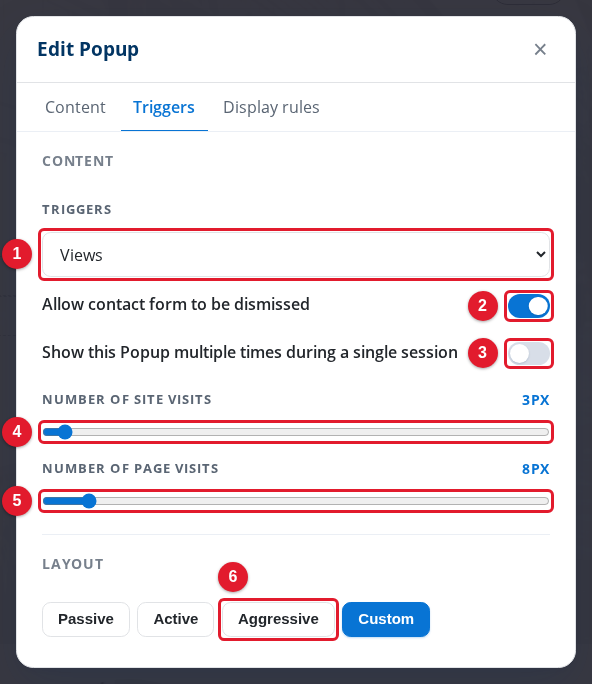
- Triggers: What makes the popup appear: Scroll, Views or Exit intent.
- Allow contact form to be dismissed: Lets visitors close the popup.
- Show this Popup multiple times during a single session: Lets the popup appear again in the same visit.
- Number of site visits: For Views: how many visits to your site before the popup appears.
- Number of page visits: For Views: how many pages a visitor opens before the popup appears.
- Aggressive: One of the Layout presets for how often the popup appears: Passive, Active, Aggressive or Custom.
The settings under Triggers change with your choice:
- Scroll: The popup appears when the visitor scrolls down the page. Set how far with the Scroll % slider.
- Views: The popup appears after the number of site visits and page visits that you set with the two sliders.
- Exit intent: The popup appears when the visitor is about to leave the page. It has no extra settings.
Choose where it appears
Select the Display rules tab.
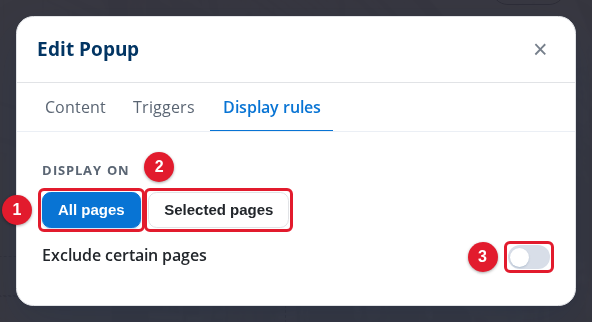
- All pages: Shows the popup on every page of your site.
- Selected pages: Shows the popup only on the pages you choose.
- Exclude certain pages: With All pages, keeps the popup off the pages you choose.
When you select Selected pages, a Selected pages search box appears. Type in it to find the pages. The Show popup on listings switch also shows the popup on your listing pages.
When you turn on Exclude certain pages, an Excluded pages search box appears. The Don't show popup on listings switch keeps the popup off your listing pages.
Find your popups later
Your popups are also in the Pages panel. Select Pages in the top bar, then select the Lead Capture Forms filter.
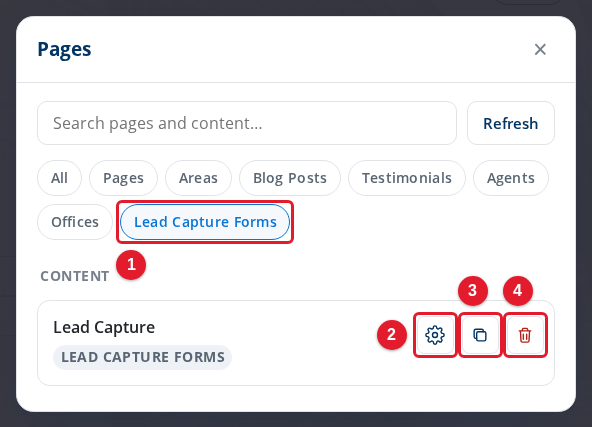
- Lead Capture Forms: Shows only your lead capture forms.
- Edit: Opens the popup in the Edit Popup panel.
- Duplicate: Makes a copy of the popup.
- Delete: Deletes the popup.
Publish your popup
Each change goes into your draft. The draft bar at the bottom of Site Edit shows your unpublished changes with Discard and Publish. Close the Edit Popup panel, then select Publish to show the popup to visitors. Select Discard to undo all of the draft. A new popup that you have not published goes away when you discard.
For more about drafts, see Publishing and Discarding Drafts.