Creating a Home Valuation Page
A home valuation page helps you find sellers. Its form asks home owners for their name, their email and the address of their home. You then contact them with an estimate of the value of their home.
Create the page
- Select Dashboard in the top menu.
- On the site card, select EDIT SITE. Site Edit opens with your homepage.
- Select Add New in the top bar. The Add New panel opens on the Pages tab.
- Scroll down to the Home Valuation card.
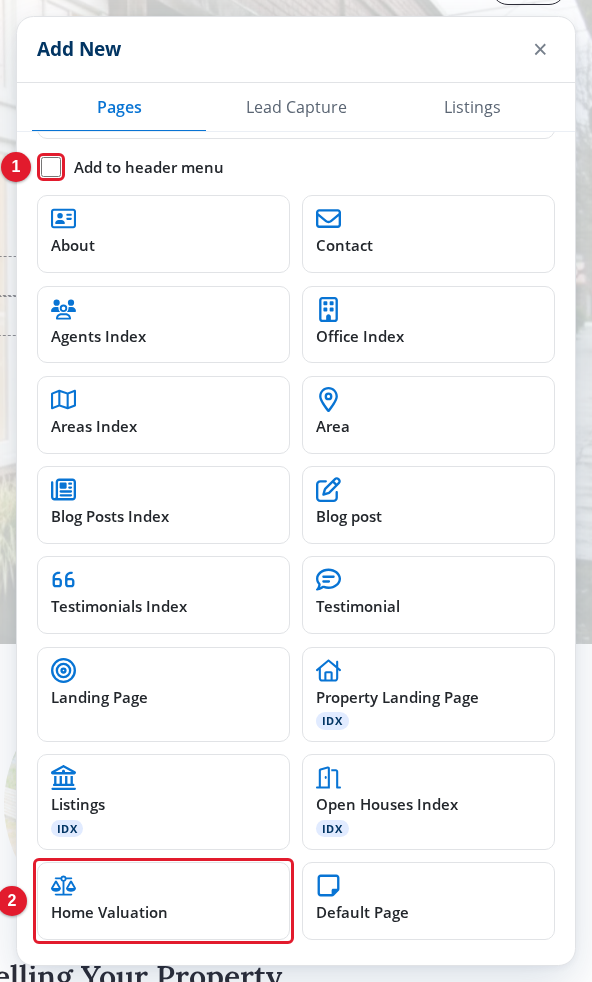
- Add to header menu: Puts a link to the new page in the menu at the top of your site.
- Home Valuation: Creates a new home valuation page in your draft.
Select Home Valuation. Site Edit creates the page with a picture, a title and a form, and shows it.
To work on a home valuation page that you already have, select Pages in the top bar, and then select the page in the list.
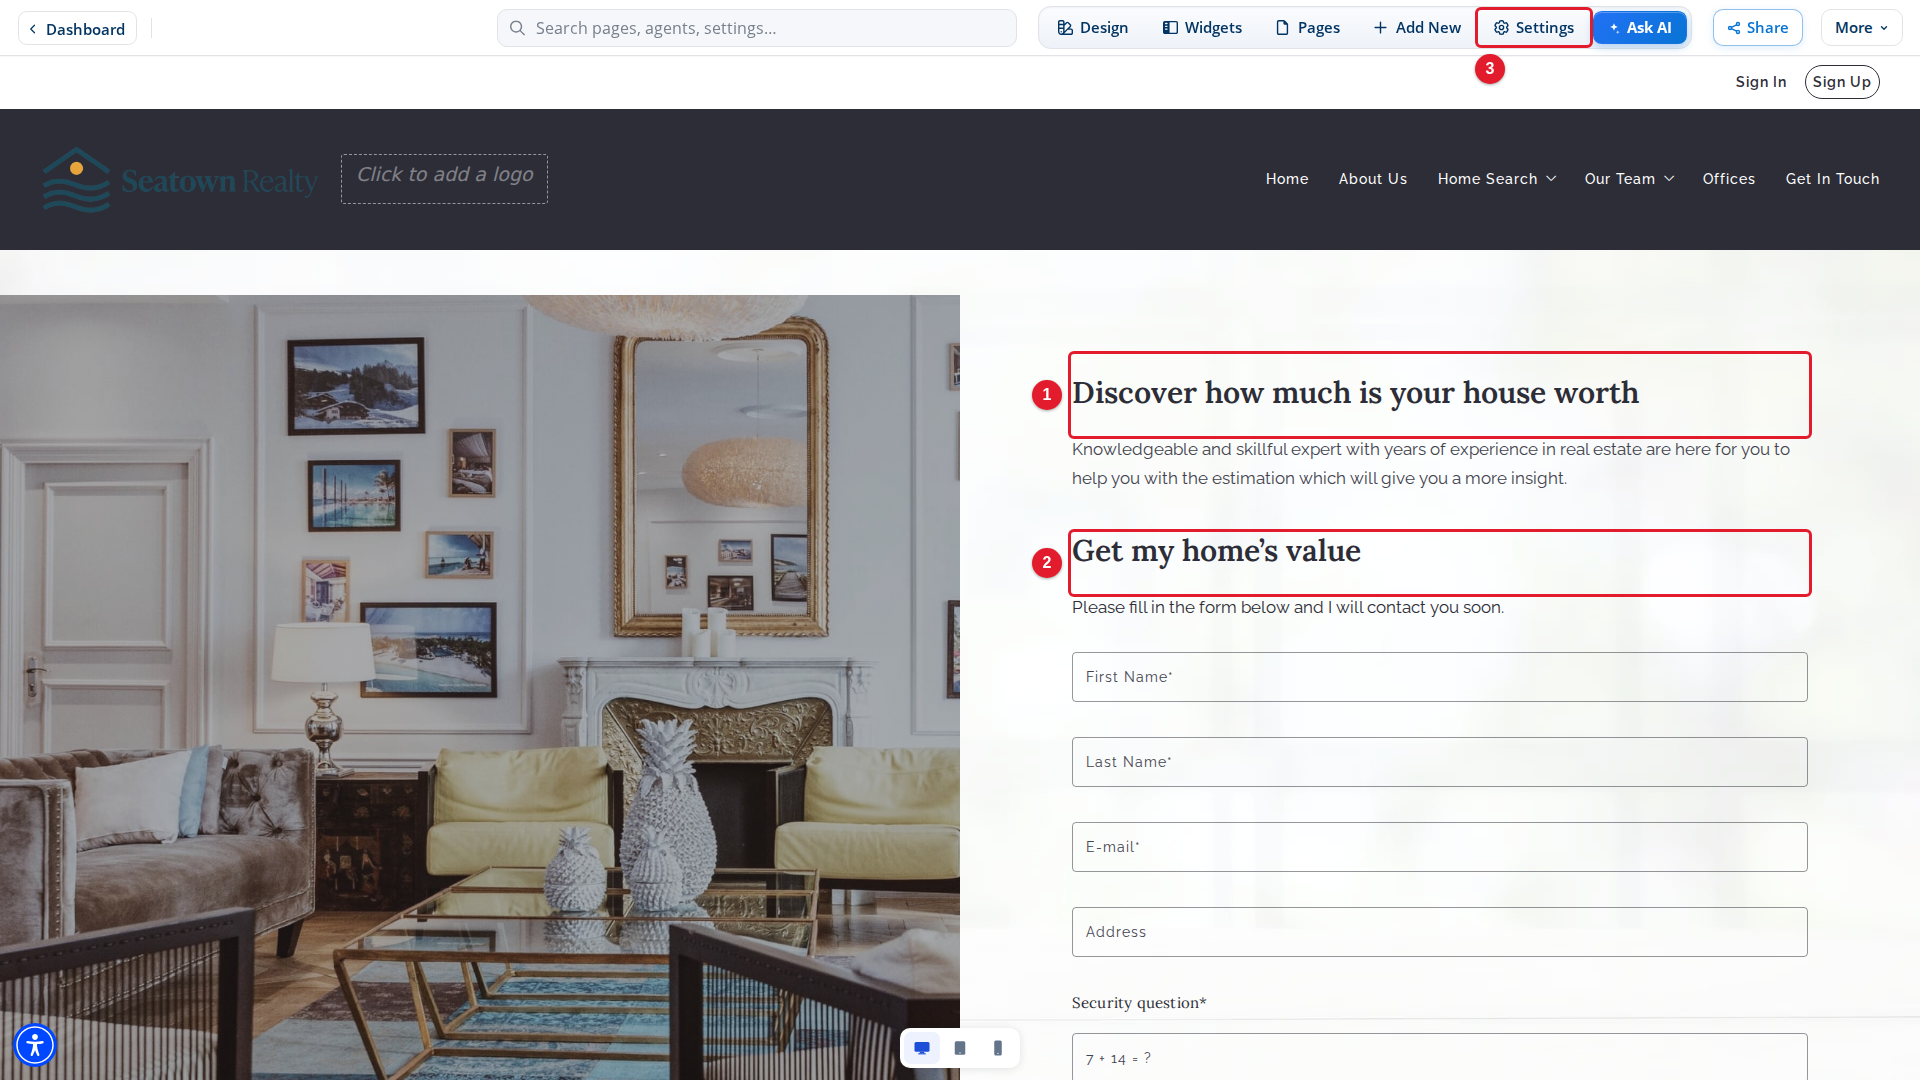
- Title: The page title. Select it to type a new one.
- Form heading: The heading of the form.
- Settings: Opens the settings of this page, where you change the form.
Change the form
- Select Settings in the top bar. The Settings panel opens on This Page.
- Select the Form Builder tab.
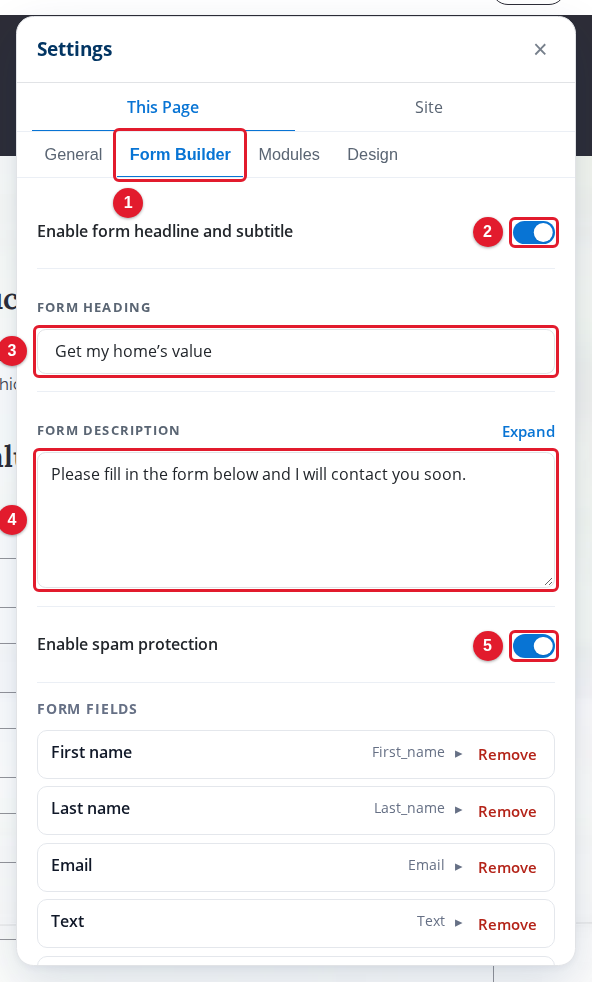
- Form Builder: The settings of the form on this page.
- Enable form headline and subtitle: Shows or hides the heading and description above the form.
- Form heading: The heading above the form.
- Form description: The text under the form heading.
- Enable spam protection: Adds a security question that a visitor must answer before sending.
Under Form fields, the panel lists the fields of the form in order. To change a field, select it. Its settings open under it.
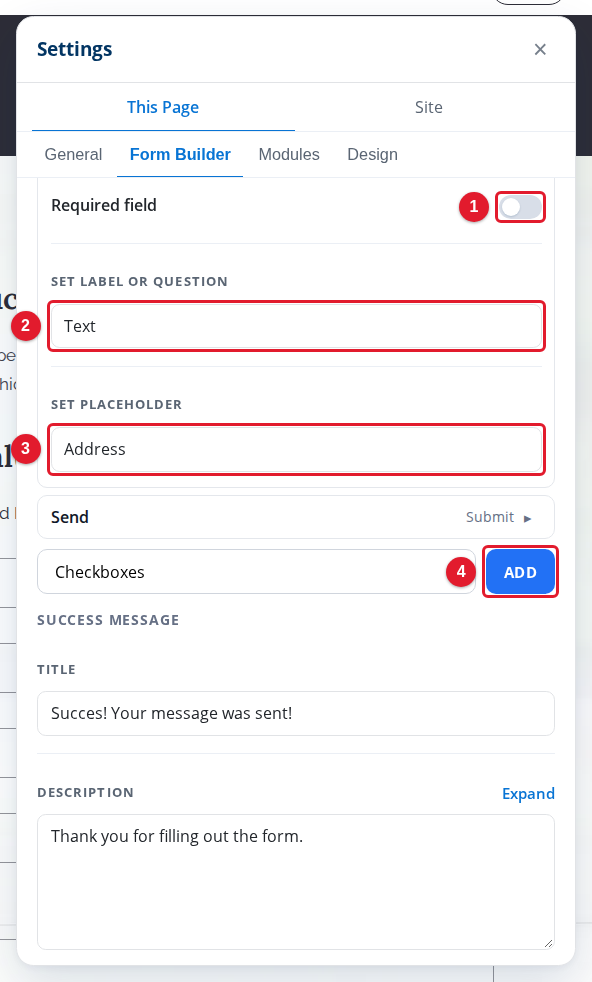
- Required field: Makes visitors fill in this field before they can send the form.
- Set Label or Question: The name of the field.
- Set Placeholder: The hint text inside the empty field.
- Add: Adds a field of the type chosen in the box to its left.
To remove a field, select Remove next to it. To add a field, choose a field type in the box next to ADD, such as Phone or Message, and then select ADD.
Keep the address field. The address is what you need to make the estimate.
Change the thank-you message
Visitors see a success message after they send the form. Scroll to the end of the Form Builder tab to change it.
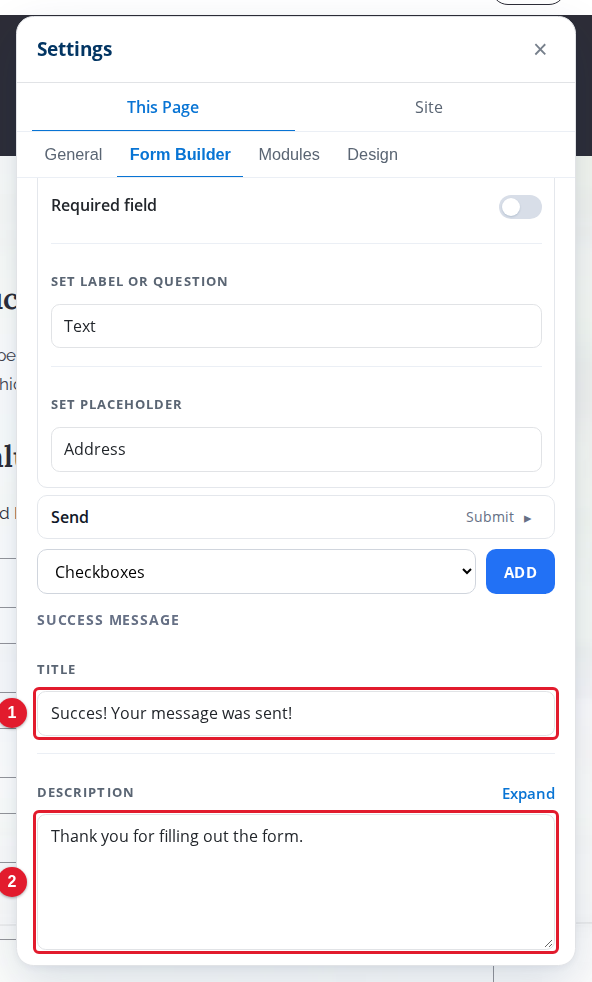
- Title: The heading visitors see after they send the form.
- Description: The text under that heading.
Read the title of the success message, and correct it if necessary. Tell visitors when you will contact them, for example "We will send your home value within one business day."
Show the page without header and footer
You can show the page without the rest of your site. Visitors who come from an ad or a social post then see only the form, with no menu that takes them away.
- In the Settings panel, select the General tab.
- Scroll down to the switches.
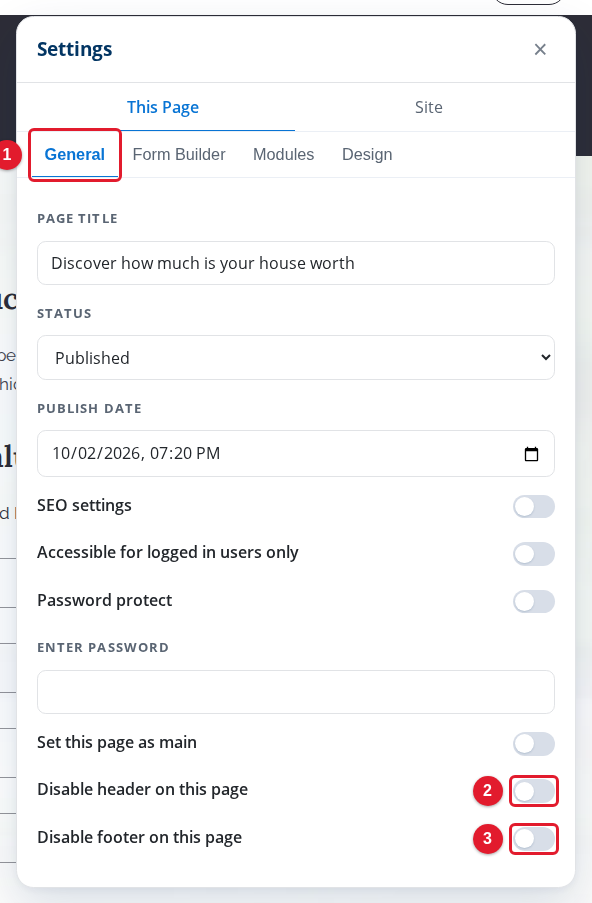
- General: The general settings of this page.
- Disable header on this page: Hides the top of your site, with its menu, on this page.
- Disable footer on this page: Hides the bottom of your site on this page.
Turn on one switch or both. Turn on only Disable header on this page to hide the menu and keep your office details in the footer.
Publish the page
Your changes go into your draft. The draft bar at the bottom of Site Edit shows Discard and Publish. Select Publish to put the page on your live site.
A page that is not in your menu is still on your site. The Pages list shows the address of each page under its name. Use that address in your ads and posts. For more about drafts, see Publishing and Discarding Drafts.