Reusing Modules with Saved Presets
A saved preset is a module that is already on your website, with its content and its look. In Site Edit you can add a saved preset to a page from the Saved presets list. You do not have to build the module again.
A saved preset is shared. A change to it, or a new name, shows on every page that uses it.
Add a saved preset to a page
- Select Dashboard in the top menu.
- On the site card, select EDIT SITE. Site Edit opens with your homepage.
- Open the page where you want the module.
- Find the + button at the place where you want the module. A + button shows between the parts of the page.
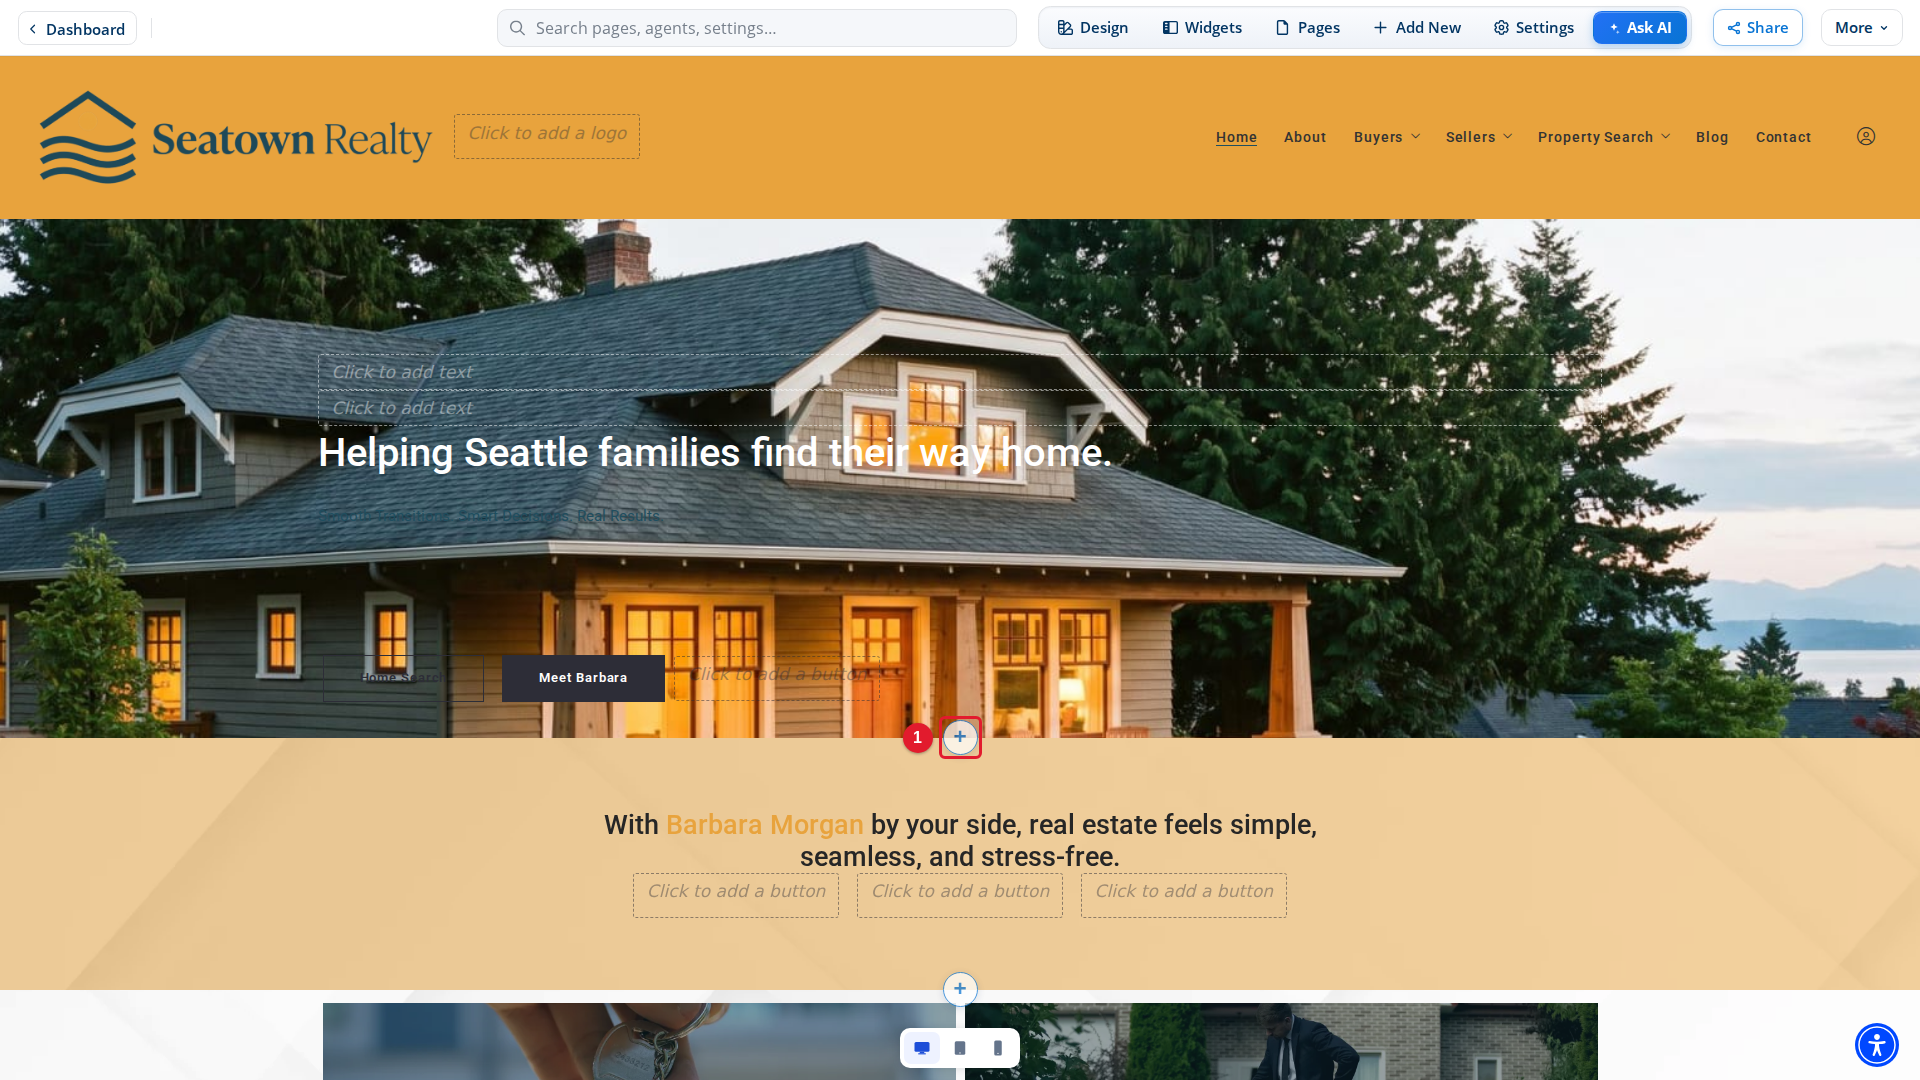
- +: Opens the Add module panel to add a module at this place on the page.
Select +. The Add module panel opens on the New tab. Select the Saved presets tab.
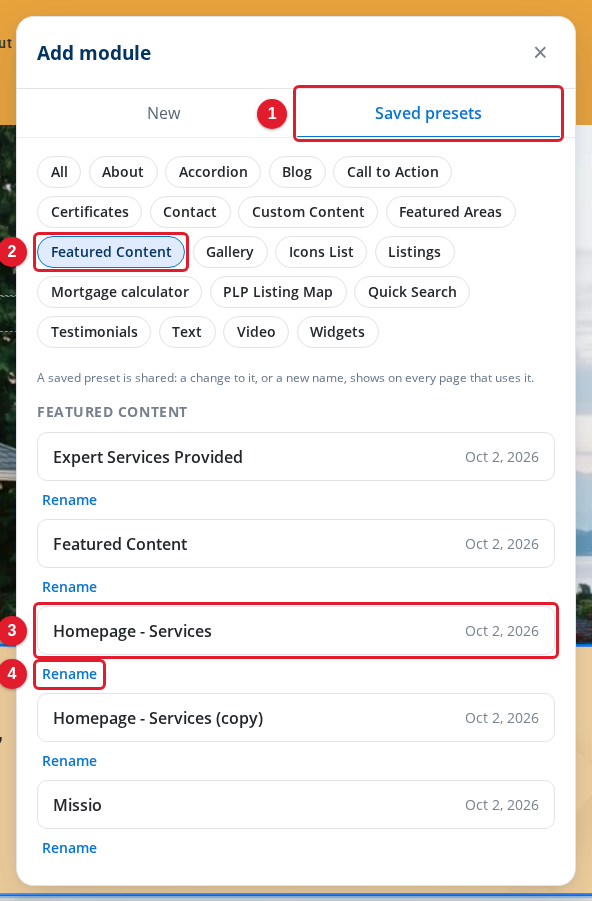
- Saved presets: Shows the modules you can reuse.
- Featured Content: Shows only the presets of one module type. All shows every preset.
- Homepage - Services: A saved preset, with its name and date. Select it to add it to the page.
- Rename: Changes the name of this preset.
The presets are in groups by module type. Select a type at the top of the list to see only the presets of that type. Select All to see all of them again.
Select a preset. Site Edit adds it to the page at the place of the + and closes the panel. The new module goes into your draft. Visitors see it after you publish.
You cannot add a preset to a page that already shows it. Choose a preset that is not on the page yet.
Rename a saved preset
Give your presets clear names, so you can find them in the list.
- In the Saved presets list, select Rename under the preset. A box with the name of the preset replaces it in the list.
- Type the new name.
- Select Save.
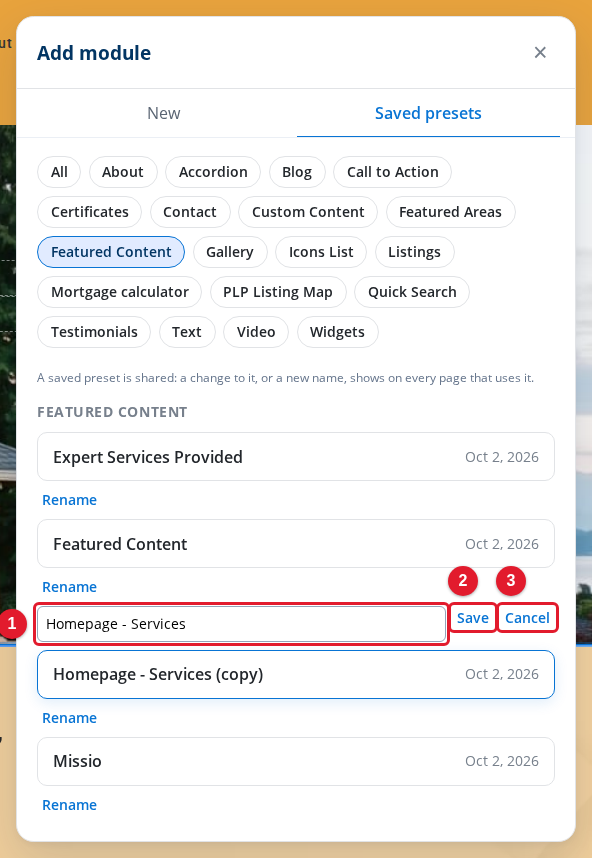
- Preset name: The name of the preset. Type the new name.
- Save: Saves the new name to your draft.
- Cancel: Keeps the old name.
You can also change the name in the panel of the module. Point at the module on the page and select its Customize button. On the Content tab, type the new name in Preset name.
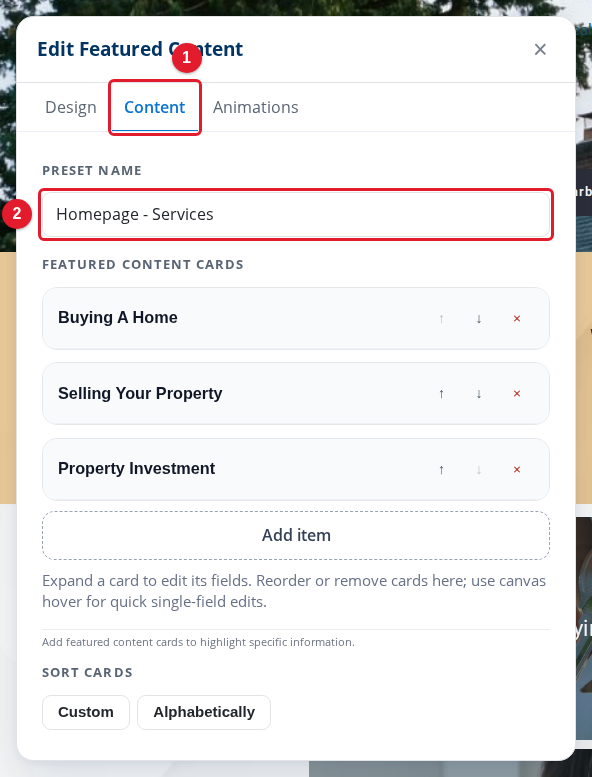
- Content: Shows the content of the module.
- Preset name: The name of this module in the Saved presets list.
The new name goes into your draft. Select Publish to keep it. For more about drafts, see Publishing and Discarding Drafts.
What you cannot do yet
- Save a module as a new preset: Site Edit has no control for this. The list shows the modules that are already on your site.
- Delete a preset: The Saved presets list has no control to remove a preset.
- Make a separate copy: Site Edit has no control to copy a preset. A saved preset is shared, so a change on one page shows on every page that uses it.
For more about modules, see Working with Modules.