Setting Up Placester Live Chat
Placester Live Chat puts a chat button on your website, so visitors can send you a message. You set up the chat on your site in the Live Chat settings of Site Edit. Your changes go into a draft. Visitors see them after you publish.
For what Live Chat is and how you answer chats, see Placester Live Chat Feature.
Open the site settings
- Select Dashboard in the top menu.
- On the site card, select EDIT SITE. Site Edit opens with your homepage.
- Select Settings in the top bar, then select the Site tab.
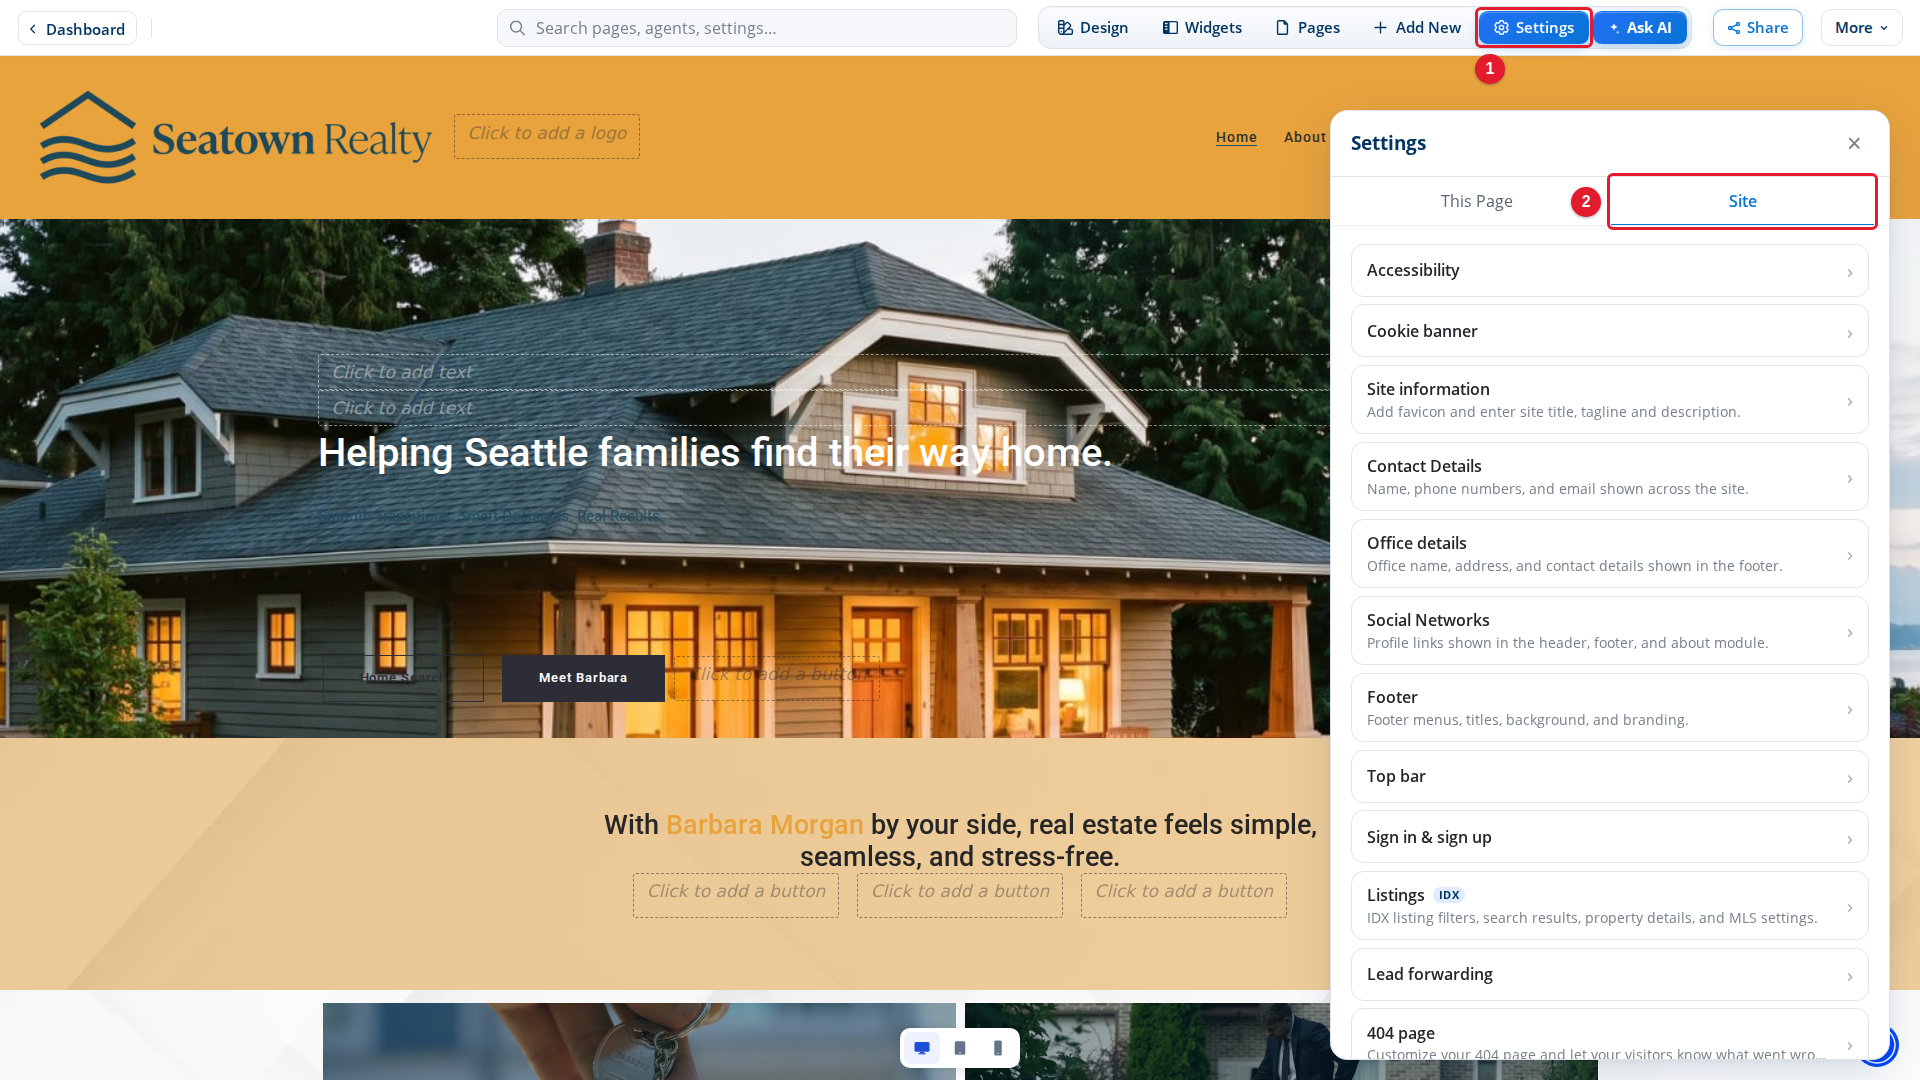
- Settings: Opens the Settings panel.
- Site: Shows the settings that apply to the whole site.
Scroll down to the end of the list and select Live Chat. It has four tabs: Content, Availability, Display and Design.
Turn on Live Chat
The Content tab opens first.
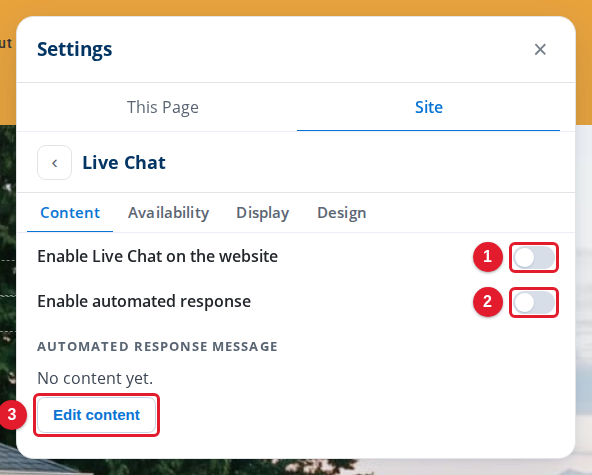
- Enable Live Chat on the website: Shows the chat on your site.
- Enable automated response: Sends a message to a visitor who starts a chat.
- Edit content: Opens an editor for the automated response message.
Set your hours
Select the Availability tab.
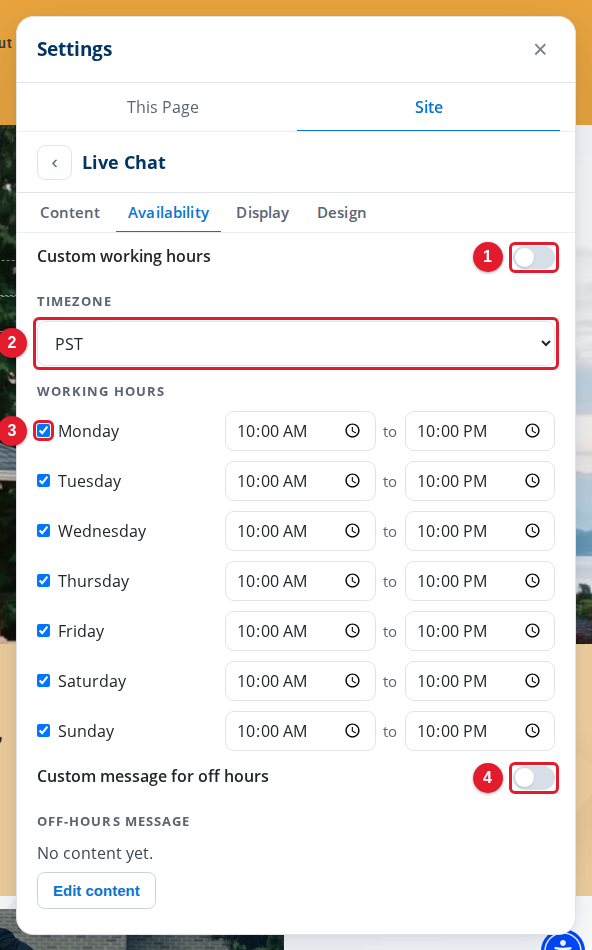
- Custom working hours: Uses the hours below instead of all day, every day.
- Timezone: The time zone of your hours.
- Monday: Clear it to close chat on that day.
- Custom message for off hours: Shows your own message when chat is closed.
Each day has a start time and an end time. When Custom message for off hours is on, select Edit content under Off-hours message to write the message.
Choose where chat shows
Select the Display tab.
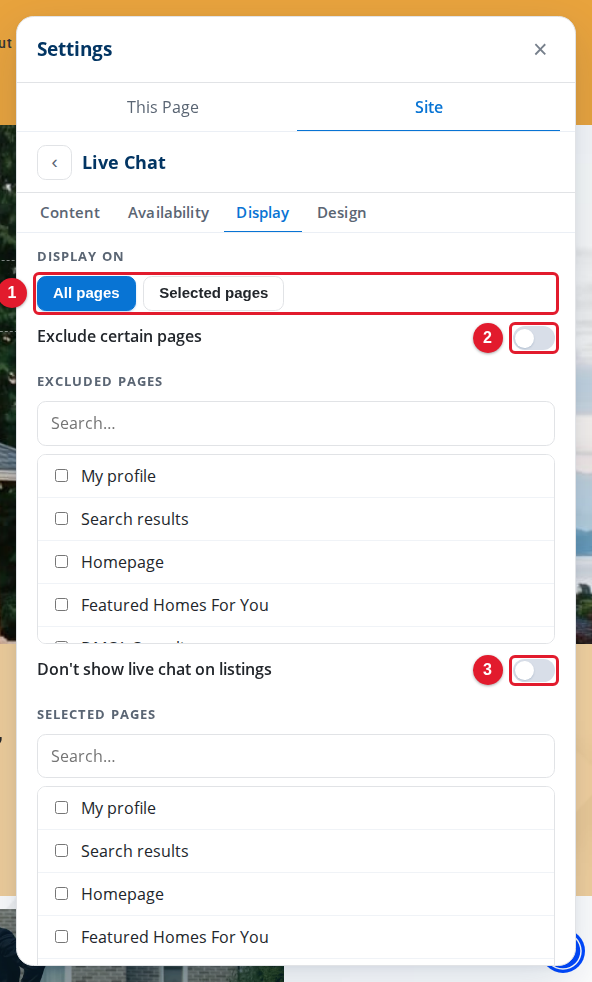
- Display on: All pages, or only the pages you select.
- Exclude certain pages: Lets you pick pages where chat does not show.
- Don't show live chat on listings: Hides chat on listing pages.
The tab shows two page lists, Excluded pages and Selected pages. Use the list that goes with your choice:
- With All pages, turn on Exclude certain pages. Then select, in Excluded pages, the pages where chat must not show.
- With Selected pages, select, in Selected pages, the pages where chat shows. Turn on Show live chat on listings to show it on listing pages too.
Type in the Search… box above a list to find a page.
Change the chat design
Select the Design tab.
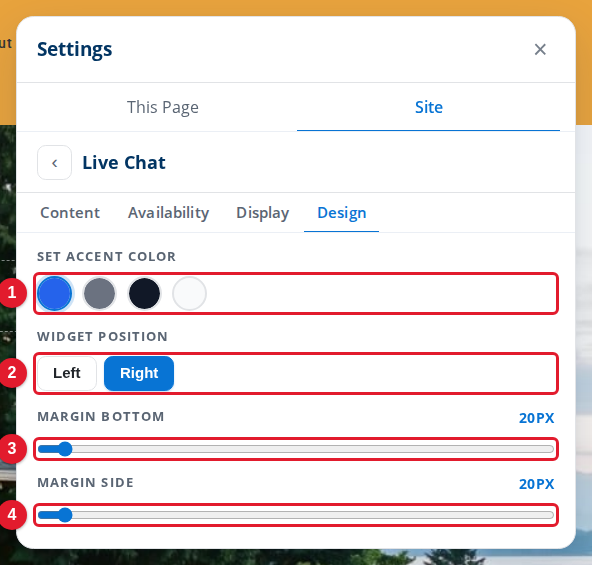
- Set accent color: The color of the chat button and window.
- Widget position: The bottom left or bottom right of the screen.
- Margin bottom: The space between the chat button and the bottom of the screen.
- Margin side: The space between the chat button and the side of the screen.
Publish your changes
Each change goes into your draft. The draft bar at the bottom of Site Edit shows the number of changed site settings, with Discard and Publish. Select Publish to show the chat to visitors, or Discard to undo all of the draft.
For more about drafts, see Publishing and Discarding Drafts.