Scheduling a Blog Post
You can write a blog post now and let it go live at a later date and time. You do this with the Status and the Publish date of the post.
Two things make a post go live:
- Publish on the draft bar sends all of your Site Edit changes to your site.
- The Status of the post tells your site when visitors can see the post.
When you schedule a post, you set its status in Site Edit, and then you publish the draft. The post then waits, and goes live at its publish date.
Open the post
- In Site Edit, select Pages in the top bar.
- Select Blog Posts to show only your posts.
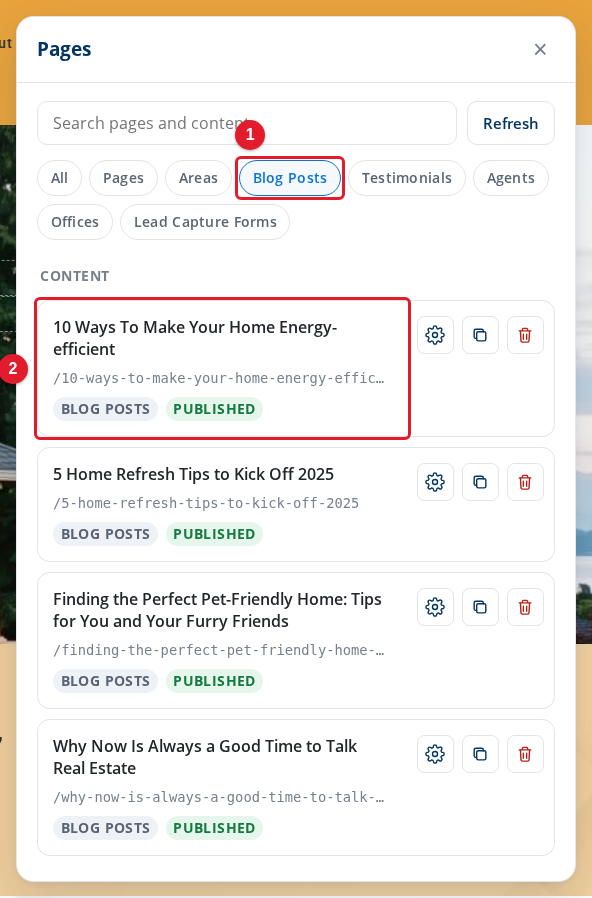
- Blog Posts: Shows only your blog posts.
- Post: Opens the post in the preview.
Select the post. It opens in the preview.
Set a future date
Select Settings in the top bar. The Settings panel opens on This Blog Post, on the General tab.
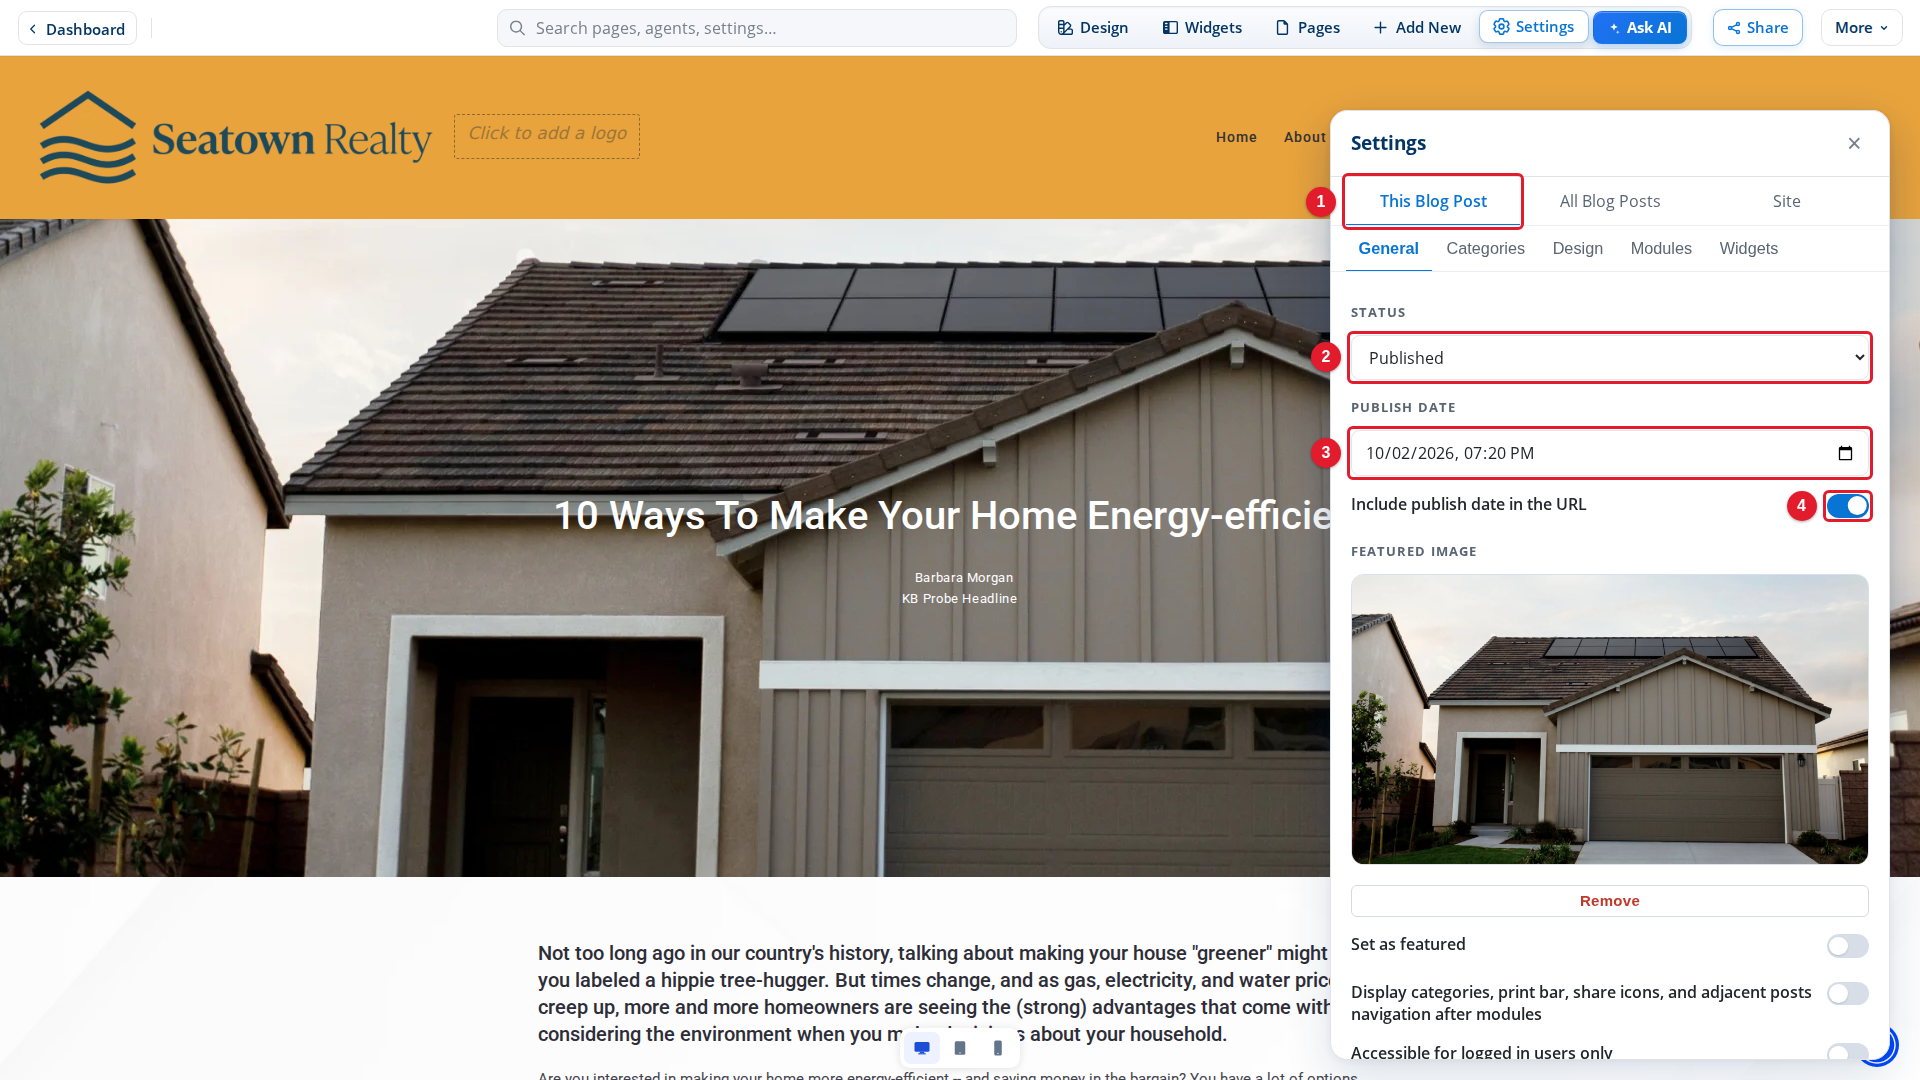
- This Blog Post: Settings of only this post.
- Status: Choose Scheduled to publish the post at a later time.
- Publish date: The date and time the post goes live.
- Include publish date in the URL: Puts the date in the web address of the post. It does not schedule anything.
To schedule the post:
- In Status, select Scheduled.
- In Publish date, set the date and the time when the post must go live. Use a date in the future.
- Close the Settings panel.
- On the draft bar, select Publish.
The post now waits. At the publish date, it goes live on your site.
Important: The schedule starts only after you select Publish on the draft bar. Until then, the new status and date are only in your draft.
If you select Scheduled with a date that has already passed, the post does not wait. It goes live when you publish the draft.
Change or stop a schedule
Open the post again, then select Settings.
- To move the date, change Publish date, then publish the draft.
- To publish the post now, set Status to Published, then publish the draft.
- To hide the post until you are ready, set Status to Draft, then publish the draft.
Other status choices
- Published: Visitors can see the post.
- Draft: Visitors cannot see the post.
- Private: Visitors cannot see the post.
- Scheduled: The post goes live at its publish date.
For more about the draft bar, see Publishing and Discarding Drafts. To write a new post, see Creating a Blog Post.