Showing Your Agents on Your Website
Legacy Customizer steps: Create and Manage Agent Groups in your Agent Index page Legacy Customizer steps: Creating an Agents Page [Codeless]
Your website can show the agents of your brokerage. You keep the agent records (photos, names and contact details) in Agent Manager. In Site Edit you choose where and how the agents show: on an agents index page, on each agent's own page, in the Featured Agents module and in the Agent and Agents widgets. Your Site Edit changes go into a draft. Visitors see them after you publish.
Manage your agent records
- Select Dashboard in the top menu.
- On the site card, select EDIT SITE. Site Edit opens with your homepage.
- Select More at the top right.
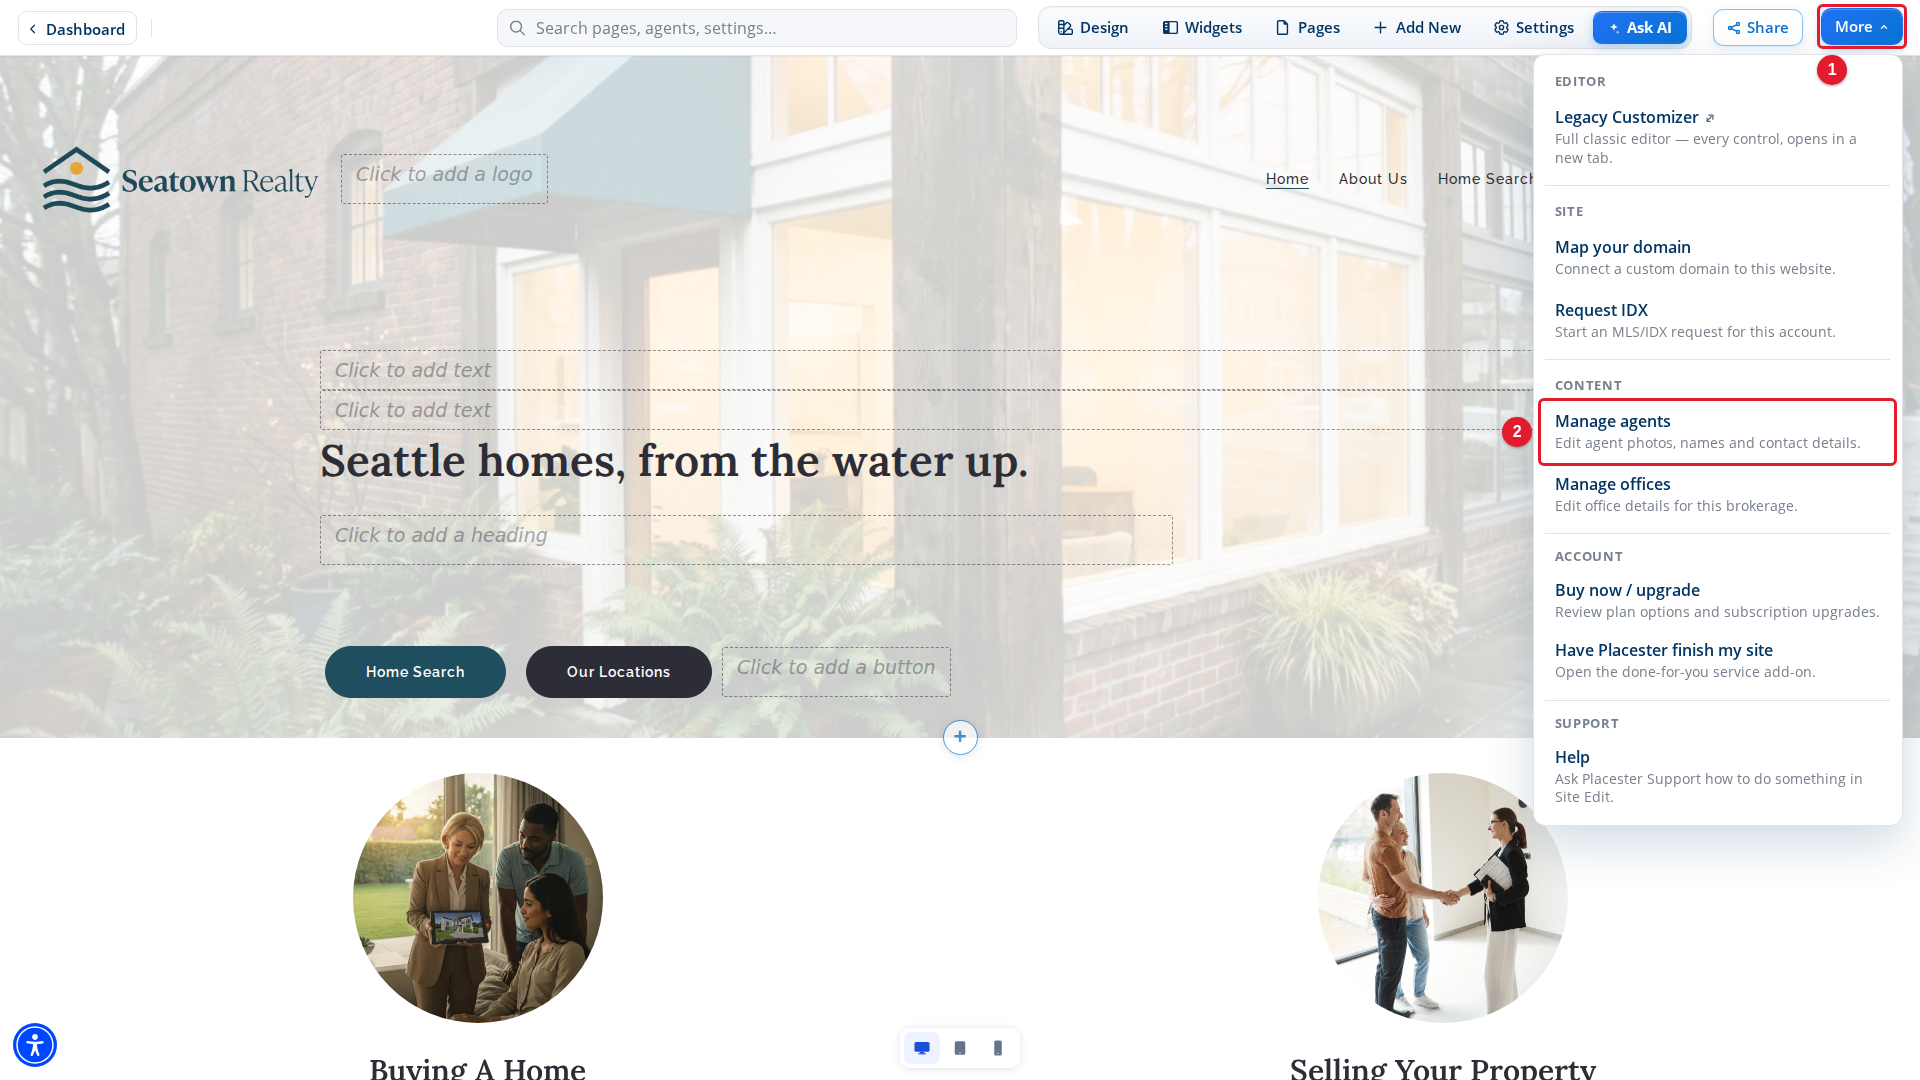
- More: Opens the More menu.
- Manage agents: Opens Agent Manager, where you add agents and edit their photos, names and contact details.
Add and edit your agents in Agent Manager. See Adding/ Creating New Agent using Agent Manager.
Create an agents index page
An agents index page lists your agents. If your site does not have one, create it from Add New.
- Select Add New in the top bar. The Add New panel opens on the Pages tab.
- To put the new page in your menu, select Add to header menu.
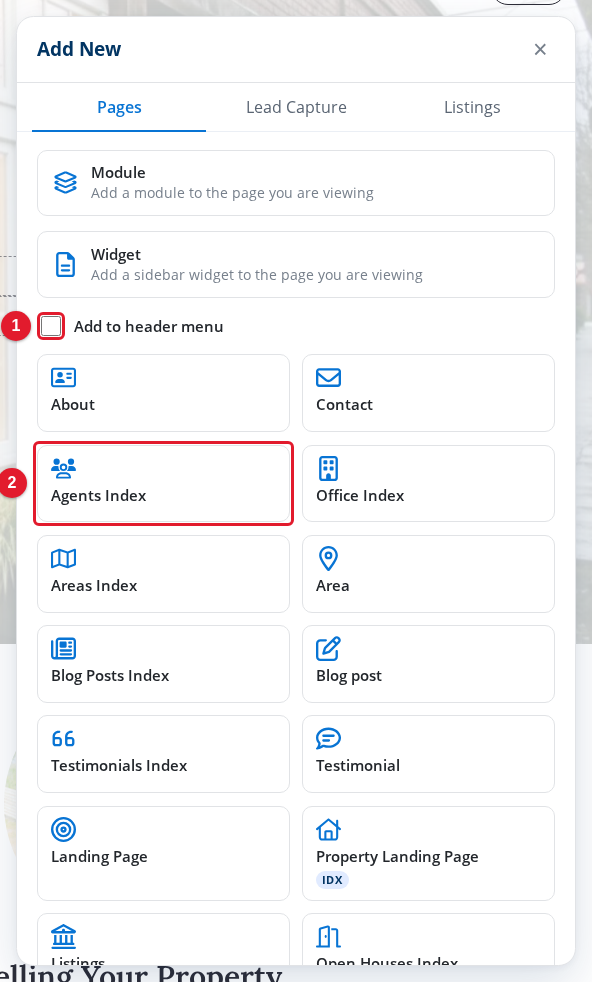
- Add to header menu: Also puts the new page in the menu at the top of your site.
- Agents Index: Creates a page that lists your agents.
Select Agents Index to create the page. For more about new pages, see Creating a New Page.
Set up the agents index page
- Select Pages in the top bar.
- Find your agents index page. Its label is AGENTS INDEX PAGE.
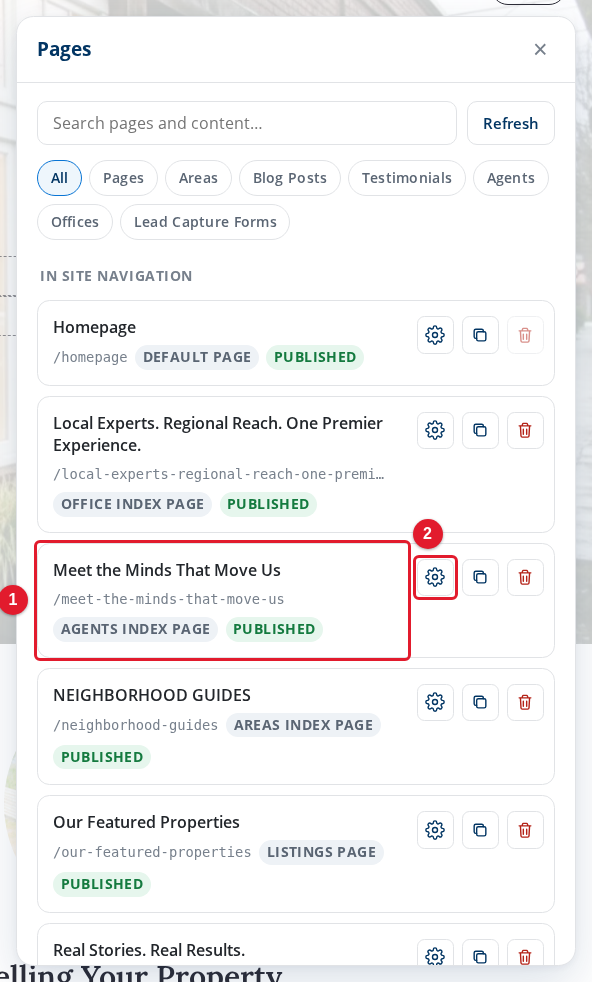
- AGENTS INDEX PAGE: Your agents index page. Select it to show it in the preview.
- Page settings: Opens the settings of the page.
Select Page settings (the gear) next to the page. The settings open on the General tab. Scroll down to the agent controls.
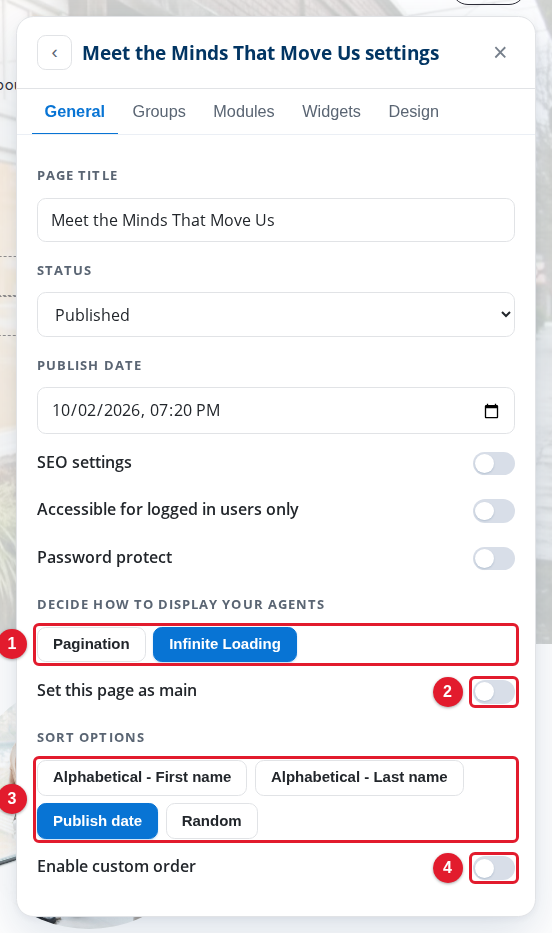
- Decide how to display your Agents: Pagination shows the agents in pages. Infinite Loading shows more agents as the visitor scrolls.
- Set this page as main: Makes this page the main agents page of your site.
- Sort options: The order of the agents on the page.
- Enable custom order: Lets you put the agents in your own order.
The Sort options are Alphabetical - First name, Alphabetical - Last name, Publish date and Random. To use your own order, turn on Enable custom order.
Edit an agent page and its groups
Each agent has a page on your site. Only an agent page with the status Published shows on your site. When no agent page is published, the agents index page and the Featured Agents module show "Sorry, nothing to show here."
- Select Pages in the top bar.
- Select Agents in the filter row.
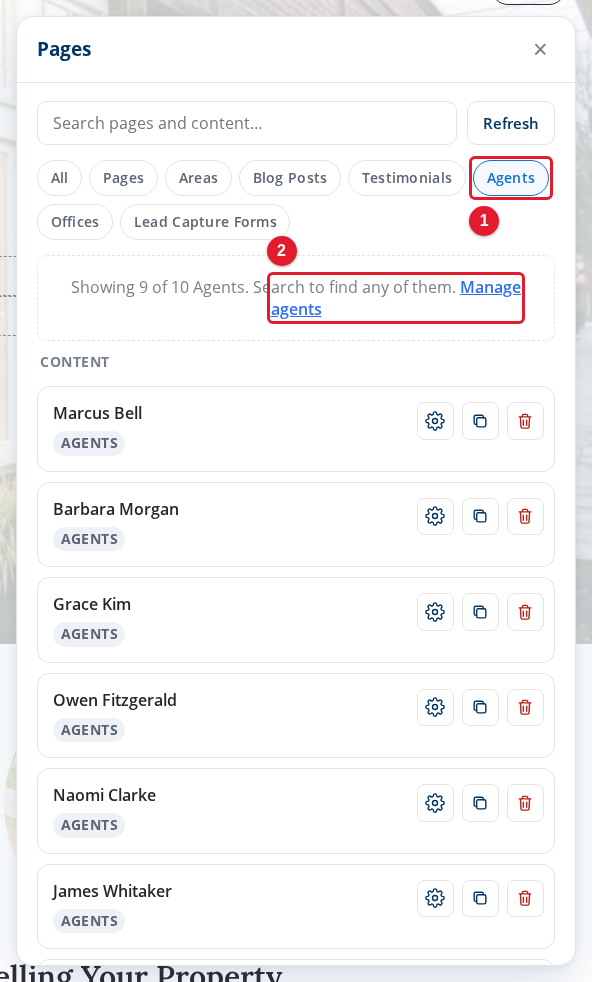
- Agents: Shows only the agent pages.
- Manage agents: Opens Agent Manager.
The panel shows some of your agent pages. To find an agent, type the name in Search pages and content…. Select an agent page. The Edit Agent panel opens on the General tab. Its tabs are General, Groups, Info, Design, Listings, Modules and Widgets. The General tab shows the first name and last name of the agent. You cannot change the name here: the panel shows "Managed in Agent Manager." To change the name, use Manage agents. The General tab also has Title, Status and Publish date of the page. The Info tab has the job title, license ID, phone numbers, email, website and social networks of the agent.
To put the agent in a group, open the Groups tab.
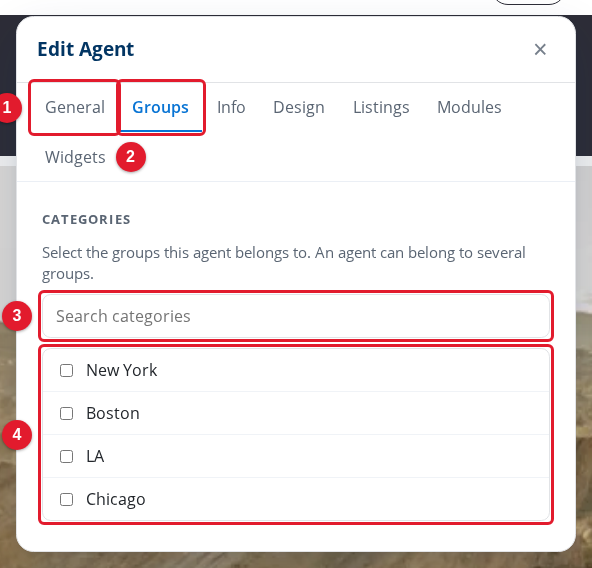
- General: The name of the agent, and the status and publish date of the agent page.
- Groups: The groups the agent belongs to.
- Search categories: Finds a group by name.
- Groups list: Select a box to put the agent in that group.
An agent can be in more than one group.
Show agents on any page
The Featured Agents module shows your agents in a section of a page.
- Open the page in the preview.
- Select Add New, then select Module. The Add module panel opens.
- Select Featured Agents. The panel shows its six layouts.
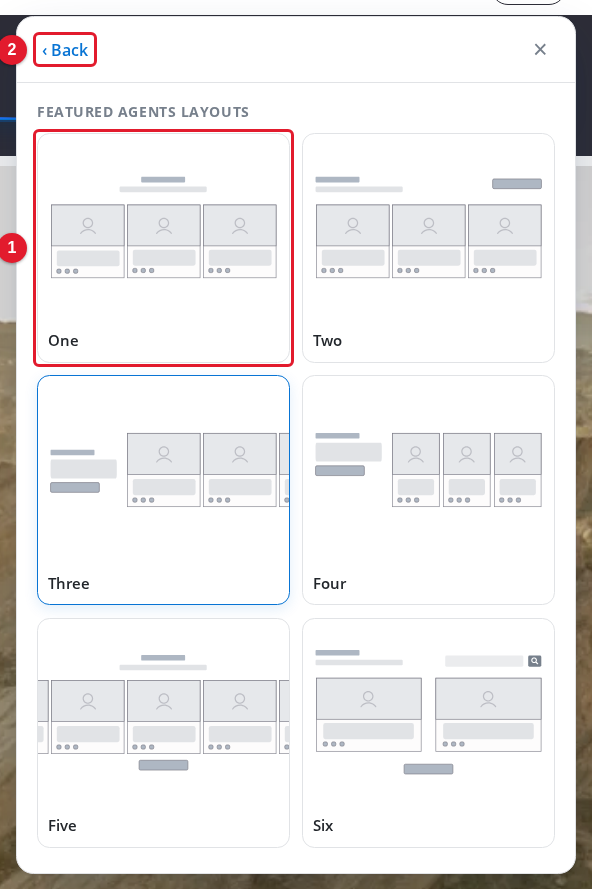
- One: A layout of the module. Select a layout to add the module to the page.
- Back: Goes back to the list of module types.
Select a layout. Site Edit adds the module to the page. For more about modules, see Working with Modules.
Show agents in a sidebar
- Select Widgets in the top bar.
- Select the Add widget tab.
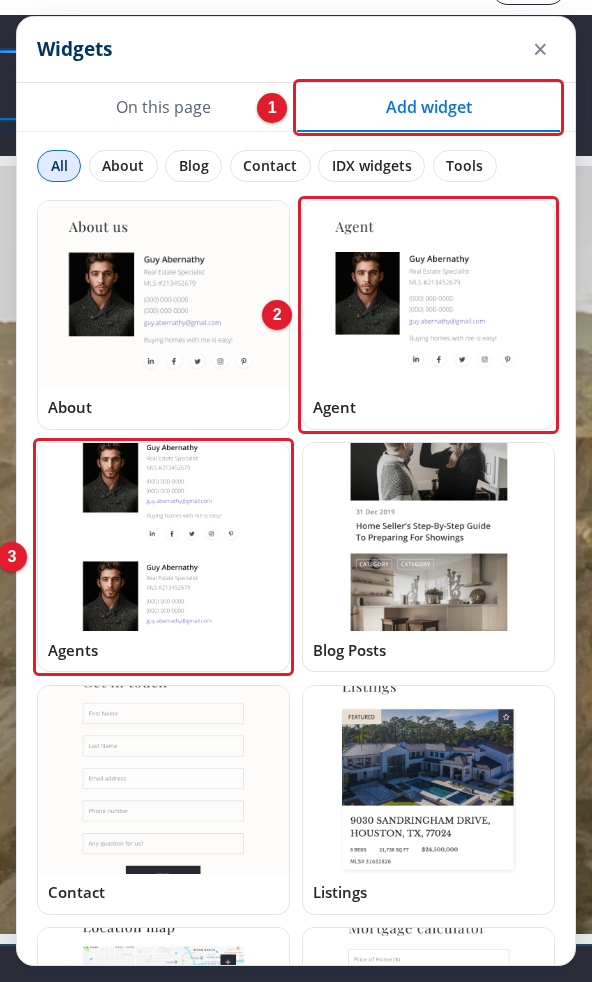
- Add widget: The catalog of widgets you can add to the sidebar of the page.
- Agent: Shows one agent in the sidebar.
- Agents: Shows a list of agents in the sidebar.
Select Agent or Agents. For more about widgets and the sidebar position, see Working with Widgets.
Publish your changes
Each change goes into your draft. The draft bar at the bottom of Site Edit shows Unpublished changes with Discard and Publish. Close the open panel, then select Publish to show your changes to visitors, or Discard to undo all of the draft.
For more about drafts, see Publishing and Discarding Drafts.