Customizing Property Detail Pages
Legacy Customizer steps: Custom Property Page Banner Legacy Customizer steps: Managing Property Details Page
A property detail page shows one listing: its photos, price and details. Every listing on your site uses the same design. In Site Edit you change it in Settings > Site > Listings. Your changes go into a draft. Visitors see them after you publish.
Open the property page settings
- Select Dashboard in the top menu.
- On the site card, select EDIT SITE.
- In the Site Edit top bar, select Settings.
- Select the Site tab, then select Listings.
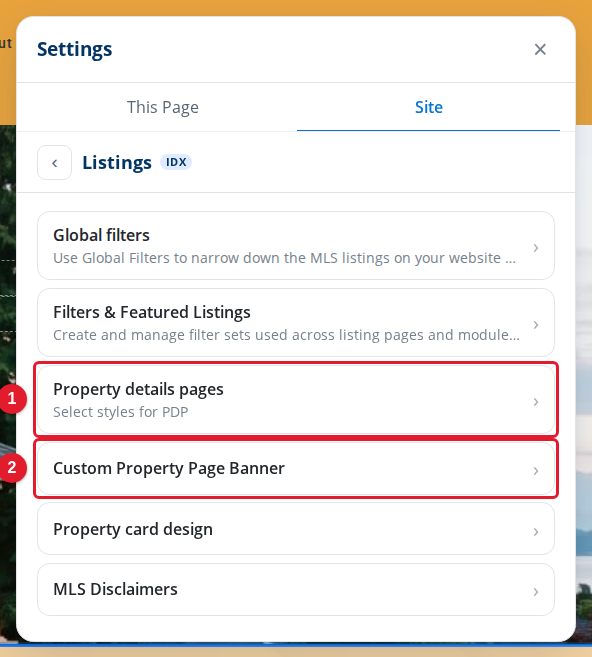
- Property details pages: Opens the design and the tabs of your property detail pages.
- Custom Property Page Banner: Opens the banner that can show on property detail pages.
Change the design
Select Property details pages. The settings open on the Design tab.
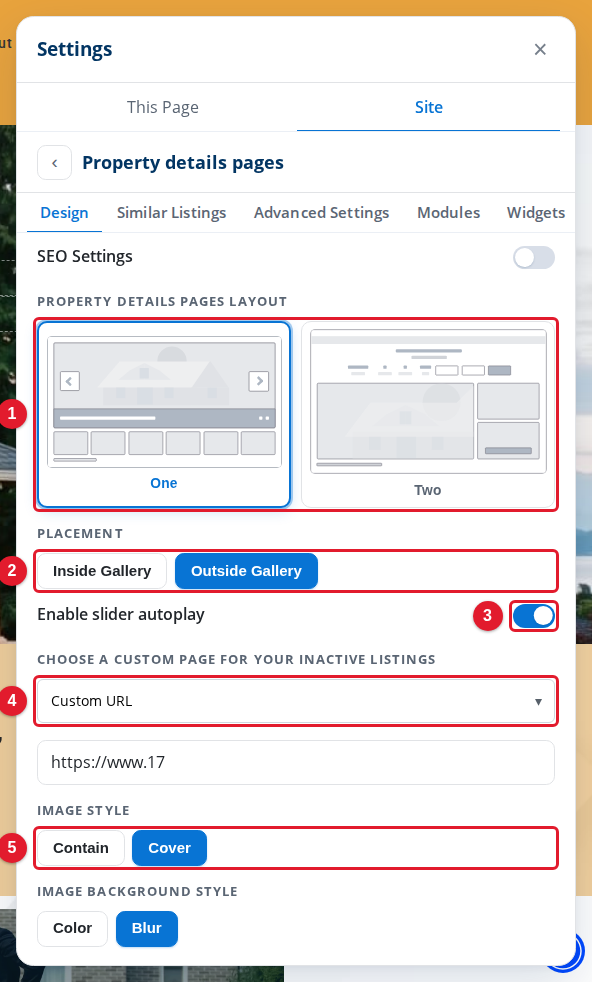
- Property details pages layout: The layout of every property detail page.
- Placement: Puts the listing details inside or outside the photo gallery.
- Enable slider autoplay: Moves through the listing photos without a click.
- Choose a custom page for your inactive listings: The page visitors see when a listing is no longer active.
- Image style: Shows each photo whole (Contain) or fills the frame (Cover).
Under the image style, the tab also has Image background style, button colors and styles, Enable background image and Enable overlay on images. Scroll down in the panel to see them.
To send visitors to your own page when a listing is no longer active, use Choose a custom page for your inactive listings. With Custom URL, type the full address of the page in the box under it.
Show similar listings
Select the Similar Listings tab.
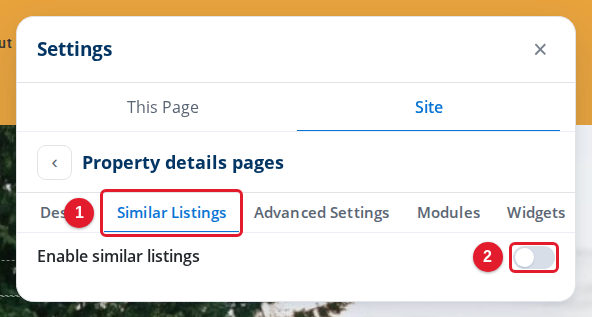
- Similar Listings: The tab for listings like the one on the page.
- Enable similar listings: Shows similar listings on each property detail page.
Show listing attribution
Select the Advanced Settings tab.
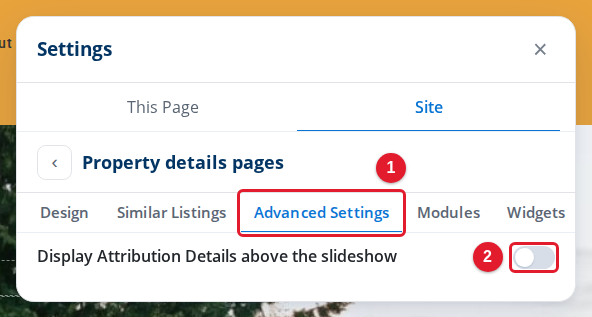
- Advanced Settings: The tab for the attribution setting.
- Display Attribution Details above the slideshow: Shows the listing attribution above the photos.
Choose the sidebar
Select the Widgets tab.
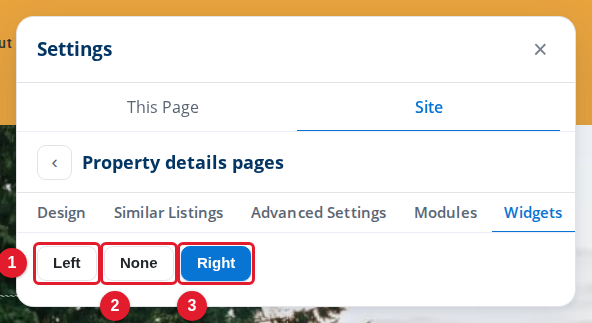
- Left: Puts the sidebar on the left of the page.
- None: Shows no sidebar.
- Right: Puts the sidebar on the right of the page.
For more about widgets, see Working with Widgets.
Add a banner to property pages
A banner shows a message on your property detail pages, for example an offer or a note about your services.
- Go back to the Listings settings.
- Select Custom Property Page Banner.
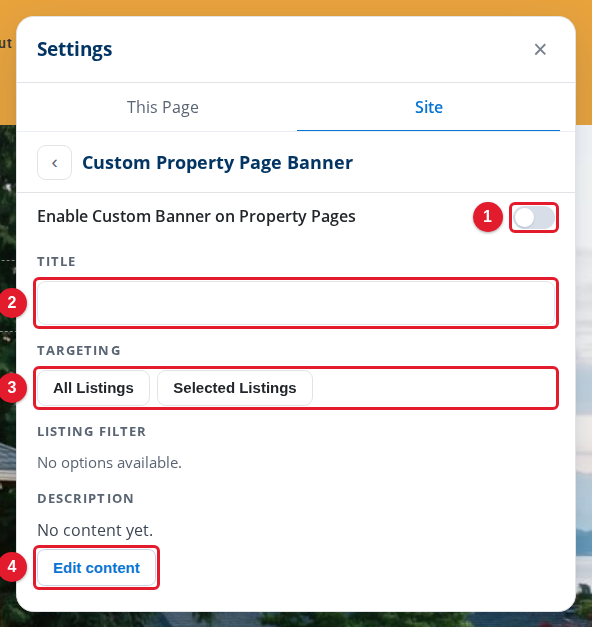
- Enable Custom Banner on Property Pages: Turns the banner on or off.
- Title: The heading of the banner.
- Targeting: Shows the banner on all listings, or only on listings of one filter.
- Edit content: Opens an editor for the text of the banner.
Turn on the banner, type its title, and select Edit content to write its text. Under Targeting, choose All Listings or Selected Listings.
Publish your changes
Each change goes into your draft. Close the Settings panel, then select Publish in the draft bar to show the changes to visitors, or Discard to undo all of the draft. See Publishing and Discarding Drafts.