Adding Tracking Codes and Custom Code
Legacy Customizer steps: Adding a Facebook Pixel to your Placester Site (Codeless) Legacy Customizer steps: Adding Google Tag Manager (Codeless) Legacy Customizer steps: Customizer: Adding a Chat Widget to Your Site [Codeless] Legacy Customizer steps: Customizer: Adding your Google Analytics Tracking ID, AdWords Conversion Label and ID [Codeless] Legacy Customizer steps: How to add JS Code to your Placester Website ( Codeless )
Tracking codes tell services such as Google Analytics and Facebook when people visit your website. You add them in the Site tracking settings. To add other code, such as a chat widget from another company, you use the Custom JS settings. Your changes go into a draft. They go on your live site after you publish.
Open the site settings
- Select Dashboard in the top menu.
- On the site card, select EDIT SITE. Site Edit opens with your homepage.
- Select Settings in the top bar, then select the Site tab.
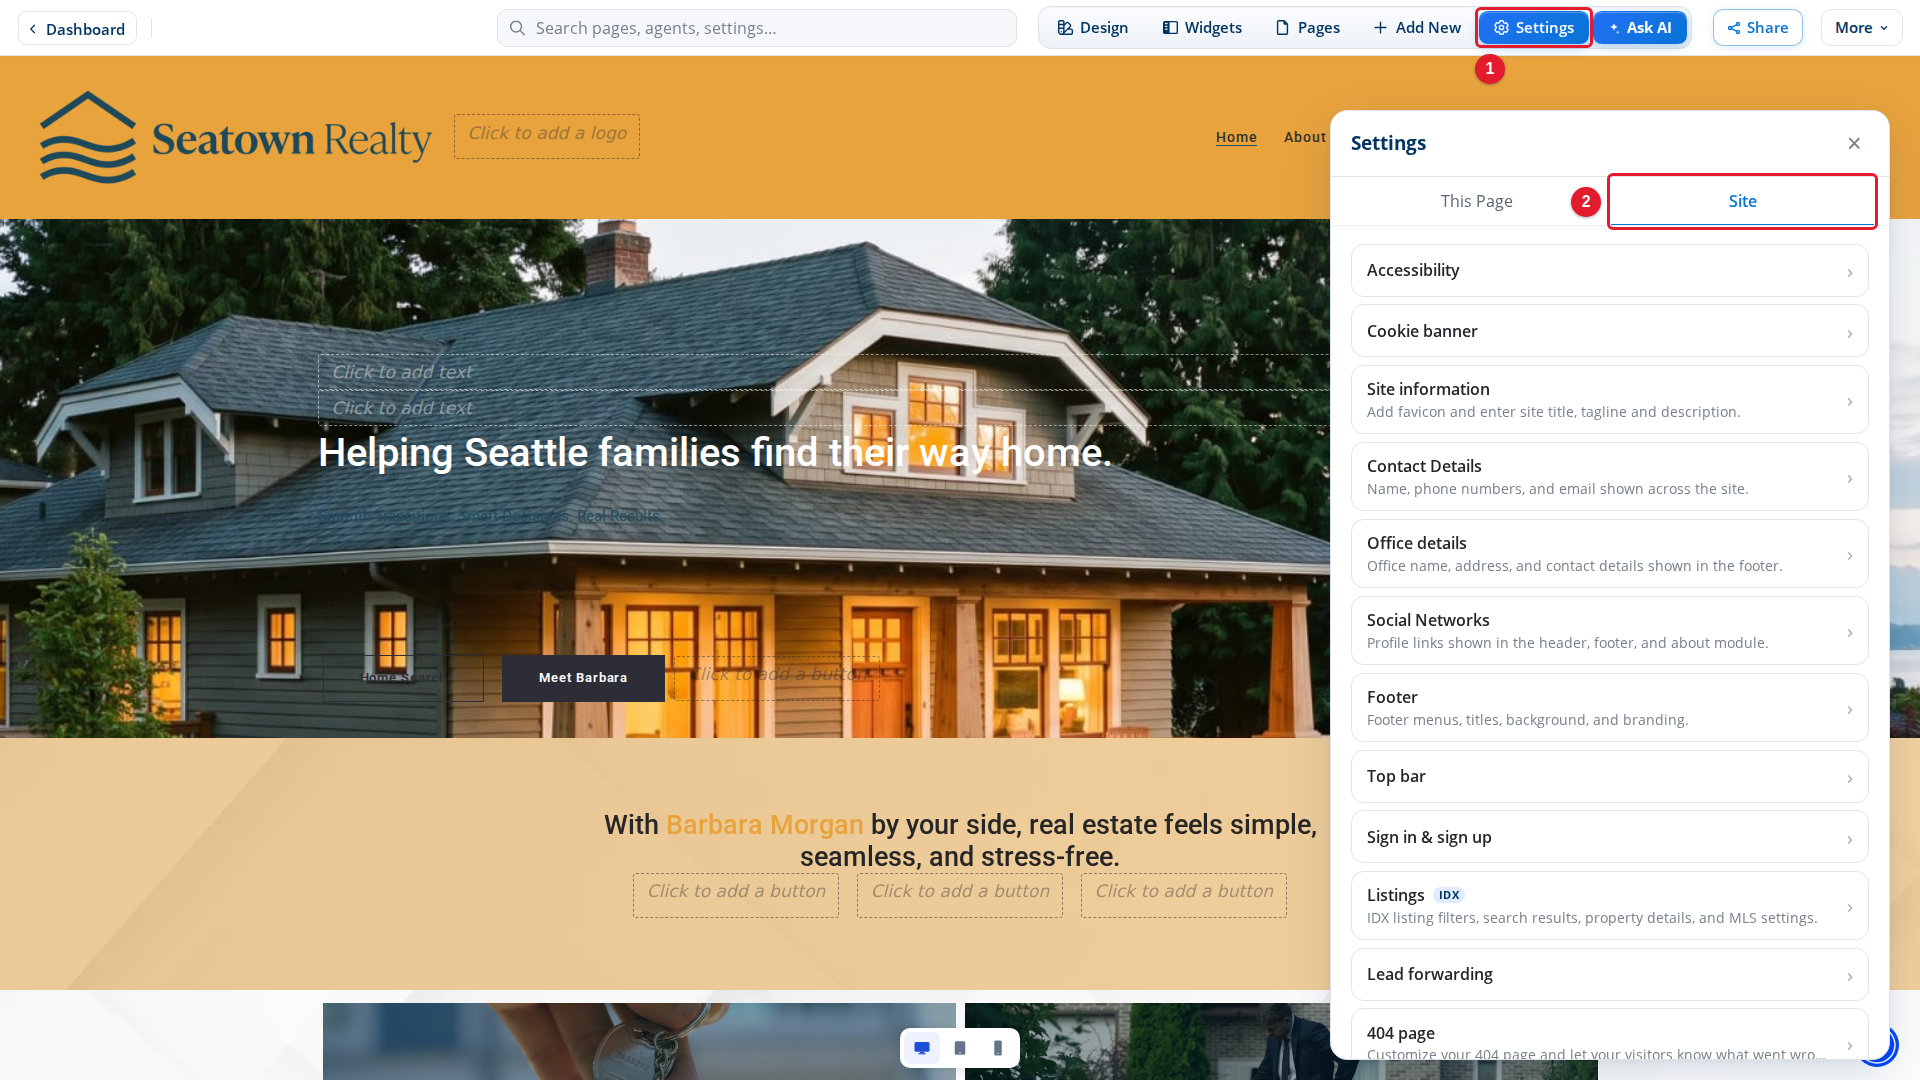
- Settings: Opens the Settings panel.
- Site: Shows the settings that apply to the whole site.
Scroll down the list to find Custom JS and Site tracking. If you want to add custom code, do that first, before you open Site tracking.
Add custom code
Use custom code to add a service that gives you a JavaScript snippet, such as a chat widget. Code that does not work correctly can break your site, so add only code from a source you trust.
- Select Custom JS.
- Turn on Are you sure you want to enable custom JS?. The code boxes appear.
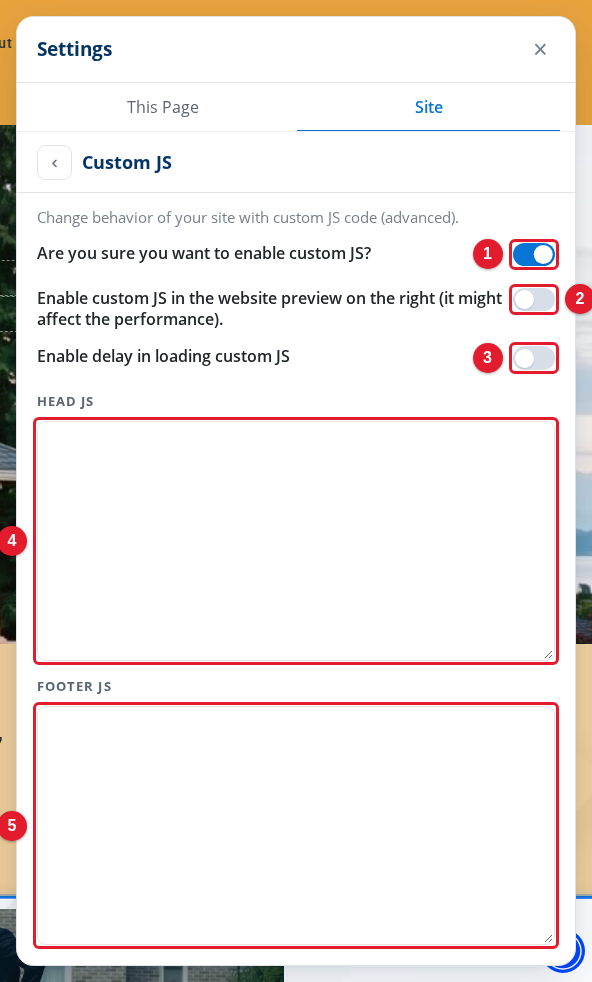
- Are you sure you want to enable custom JS?: Turns on custom code for your site and shows the code boxes.
- Enable custom JS in the website preview: Runs your code in the Site Edit preview too.
- Enable delay in loading custom JS: Loads your code after the page, so the page shows sooner.
- Head JS: Code that loads in the head of every page.
- Footer JS: Code that loads at the end of every page.
Paste the code that the service gives you into one of the boxes. If the service does not say where the code goes, use Footer JS.
Site Edit does not run your code in the preview unless you turn on Enable custom JS in the website preview. To see a chat widget or other code work, publish and then open your live site.
Add your Facebook codes
Select ‹ next to the panel title to go back to the list, then select Site tracking. It opens on the Social Media tab.
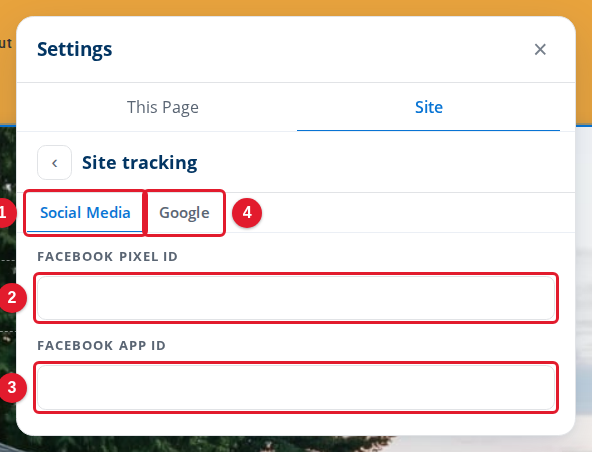
- Social Media: Shows the Facebook codes.
- Facebook Pixel ID: The ID of your Facebook (Meta) Pixel.
- Facebook App ID: The ID of your Facebook app.
- Google: Shows the Google codes.
Copy each ID from your Facebook (Meta) account and paste it into its box. Type only the ID, not the full code snippet.
Add your Google codes
Select the Google tab.
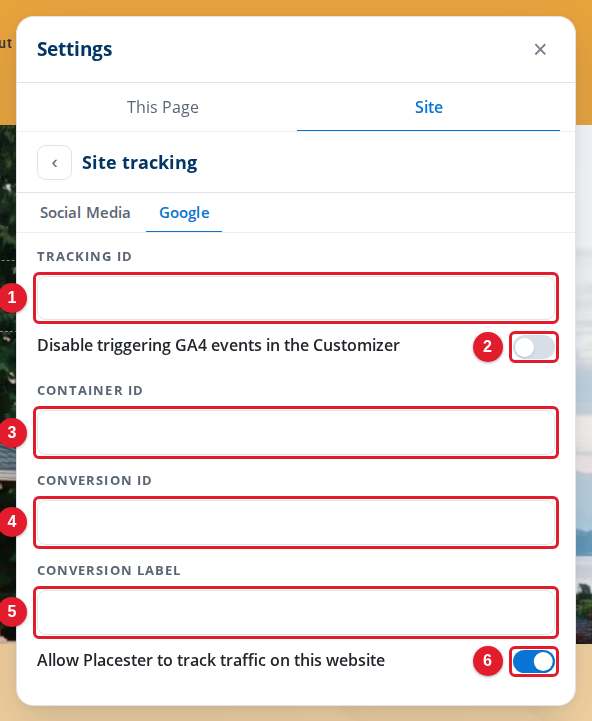
- Tracking ID: Your Google Analytics measurement ID.
- Disable triggering GA4 events: Stops Site Edit from sending Analytics events while you edit.
- Container ID: Your Google Tag Manager container ID.
- Conversion ID: Your Google Ads conversion ID.
- Conversion Label: Your Google Ads conversion label.
- Allow Placester to track traffic on this website: Lets Placester count visits to your site.
Fill in only the boxes for the services you use. Leave the other boxes empty.
Publish your changes
Each change goes into your draft. The draft bar at the bottom of Site Edit shows the number of changed site settings, with Discard and Publish. Select Publish to put the codes on your live site, or Discard to undo all of the draft.
For more about drafts, see Publishing and Discarding Drafts.